Apple Based Devices - Installing Certificate of Authority on Filtered Clients
MacOSX Single User Desktops and Laptops
To deploy a Macintosh Desktop/Laptop and IOS Device Profile
This document pertains to installing certs on Apple based networks and devices. Most Apple devices have a simple method of ‘trusting’ a certificate.
Using your web browser, obtain the certificate from your network support team. Depending on the size of the SSL deployment, it is recommended that a centralized location be used for the distribution of the cert and installation instructions.
Click on the Download link for the certificate.
On the older versions of IOS, the process is quite simple. Just follow the prompts.
Click Install, Install, and Done.
On the newer versions of IOS, the steps are slightly different:
Download the certificate, click Allow and then click Close.
Go to Settings > General > Profiles
Click on the newly added profile. The profile should have a recognizable name, typically including the word 'Netsweeper' (but not necessarily so).
You should see the page with some red text 'Not Verified'. At the top there should be a link Install.
Tap the Install link.
Enter the device passcode.
Tap the install link a second time.
Tap the Install button.
You should now see the Profile Installed page with the profile now showing 'Verified'.
Using your web browser obtain the certificate from your network support team. Depending on the size of the SSL deployment, it is recommended that a centralized location be used for the distribution of the cert and installation instructions.
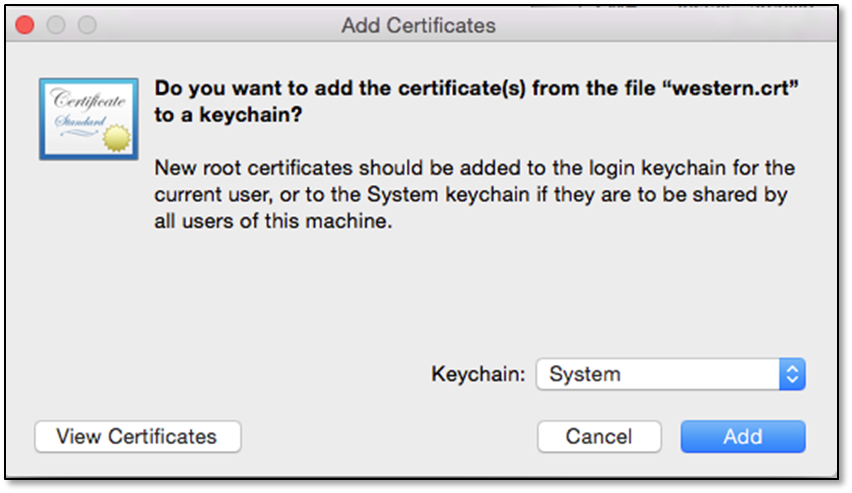
Double-click the downloaded file to install into the Keychain. Change the Keychain to System (for all users), click Add
You may be asked to authenticate to unlock the key chain, use a login and password of a machine administrator.
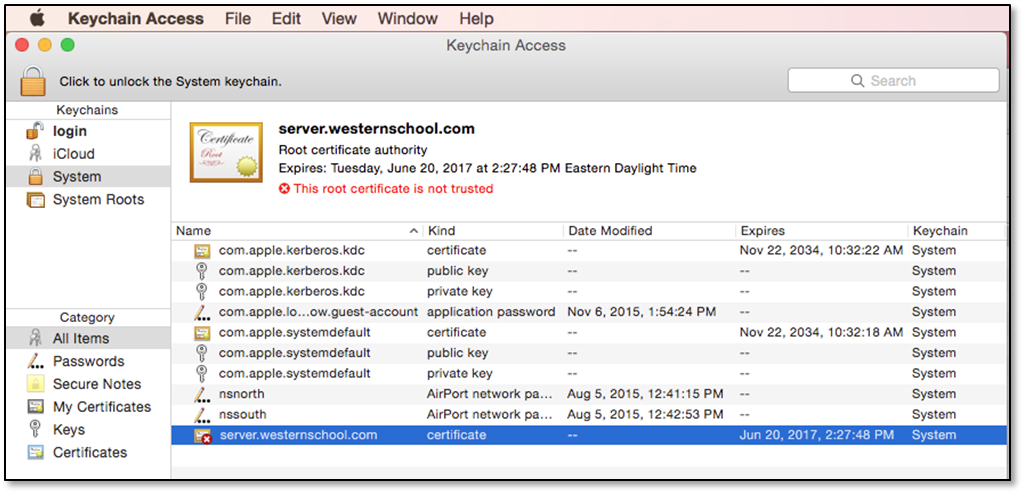
Select the System Keychain, double-click your certificate
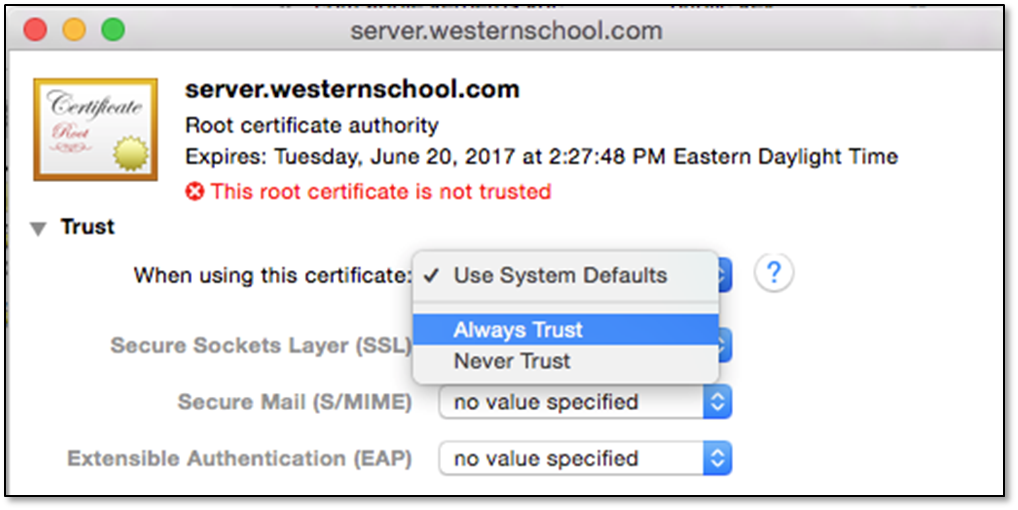
Click [Always Trust]. You may be asked to authenticate to unlock the key chain, use a login and password of a machine administrator.
If you have Apple devices, you might want to consider a bulk deployment. To perform a bulk deployment ‘the Apple way’, you will need an Apple server. This guide will focus on the current 10.7 Lion Server family (the processes are essentially the same for later releases of Mac OS X.). You can find the online documentation from Apple at
https://help.apple.com/advancedserveradmin/mac/10.7/#
We will be using the Profile Manager, as part of the Server App.
https://help.apple.com/advancedserveradmin/mac/10.7/#apd0E2214C6-50F0-48C9-A482-74CEA1D77A9F
Apple states:
You can distribute configuration profiles by email, on your own webpage, or by using Profile Manager’s built-in user portal. When users open the email attachment or download the profile using Safari on their device, they’re prompted to begin installation. You can also use Profile Manager as a mobile device management (MDM) server, which allows you to send new and updated profiles to users after they enroll their device.
You as the Apple Server administrator must decide which method you will use to deploy the Certificate. You can use a new profile, or an existing profile.
This example will create a new Device profile. This new profile will contain only your certificate (however you could choose to also include your network and proxy configurations if you wish).
1. Log on to your MacOSX server.
2. Using a browser obtain the certificate from your network support team. Depending on the size of the SSL deployment, it is recommended that a centralized location be used for the distribution of the cert and installation instructions. Download your certificate to your desktop.
3. Start the Server app.
4. Click the Profile Manager in the left pane
5. Click the Start Profile Manager link in the right pane
6. Your browser will start up (you may be asked to log in, if so log in with your administrator user name and password)
7. In
the web-based Profile Manager, click Device Groups in the left pane.
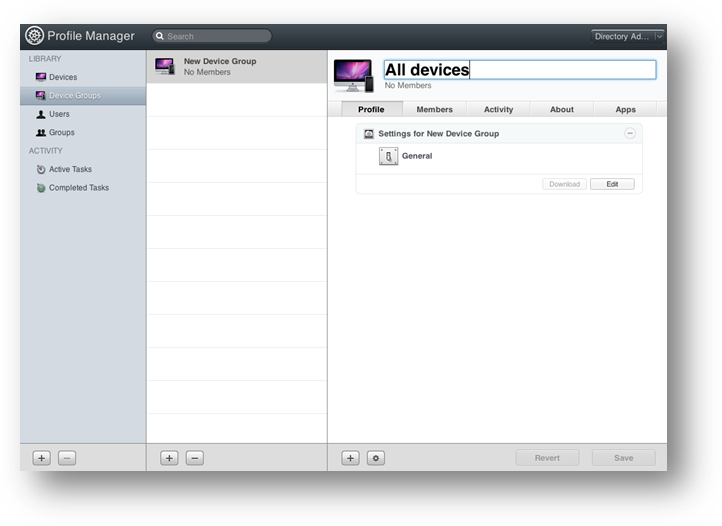
8. Click the [+] button to add a new device group.
9. We have named this new device group “All devices”
10. Click
the [Edit] button. You should be looking at the General Settings...
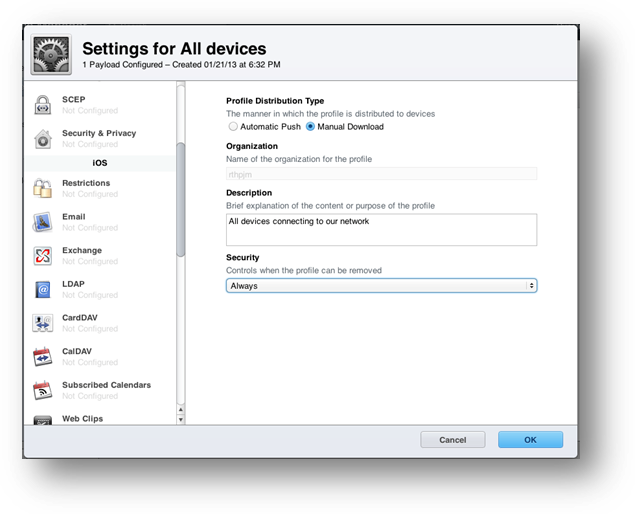
11. Set the profile distribution type to Manual Download
12. (If you have your users/devices registered with your MacOSX server, you could choose a Push profile instead)
13. Enter a description of your choice.
14. In
the left pane scroll to find and click on Certificates
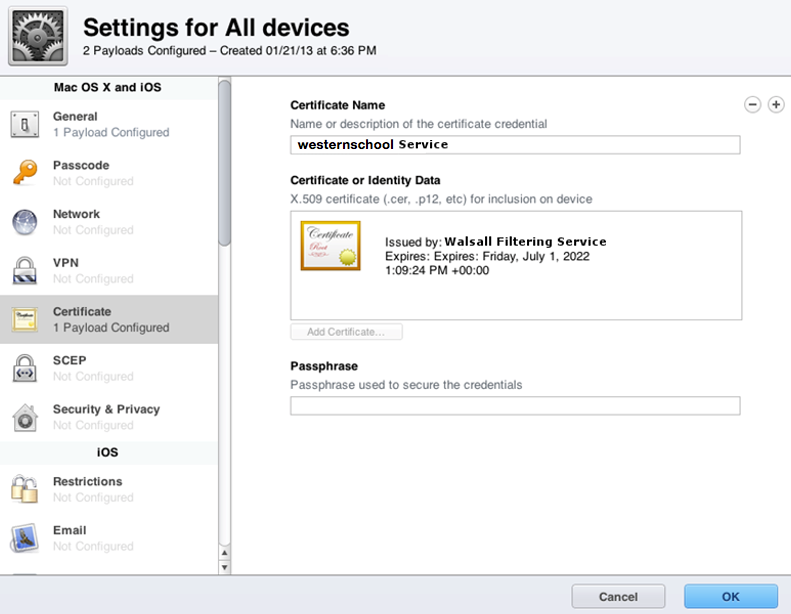
15. We named the certificate Westernschool Service.
16. Drag
and drop the certificate from your desktop into the Certificate or Identity
Data field (or click the [Add certificate] button and follow the prompts).
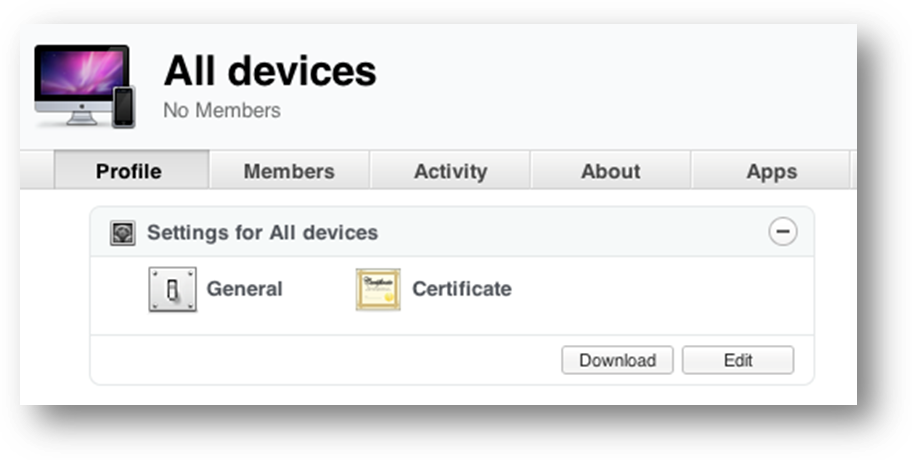
17. Click OK
18. Click
the [Download] button to download the profile configuration file(s)
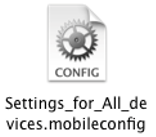
19. Then place this mobileconfig file on a convenient web server (for the school). We suggests you use a location on your public web site, this way your users and guests can then download the configuration from here.
When a user downloads the mobileconfig file from your web server the Profile will load.
Note: we used a self-signed server certificate in this example, causing the Unverified Profile warnings....
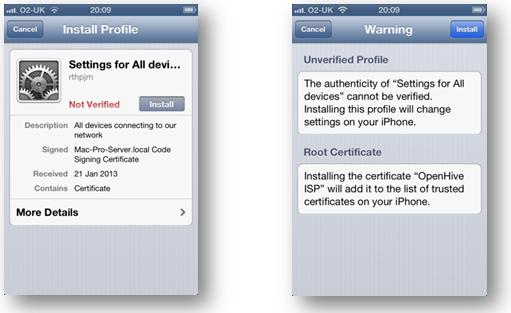
You can verify the profile and certificate are installed on an IOS device by going to Settings > General > Profile > More Details
From the web server right-click the mobileconfig file and choose to download the linked file. Once downloaded, double-click the mobileconfig file to install
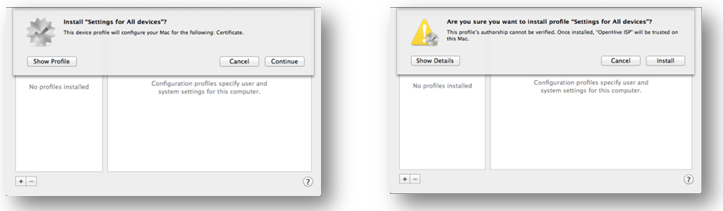
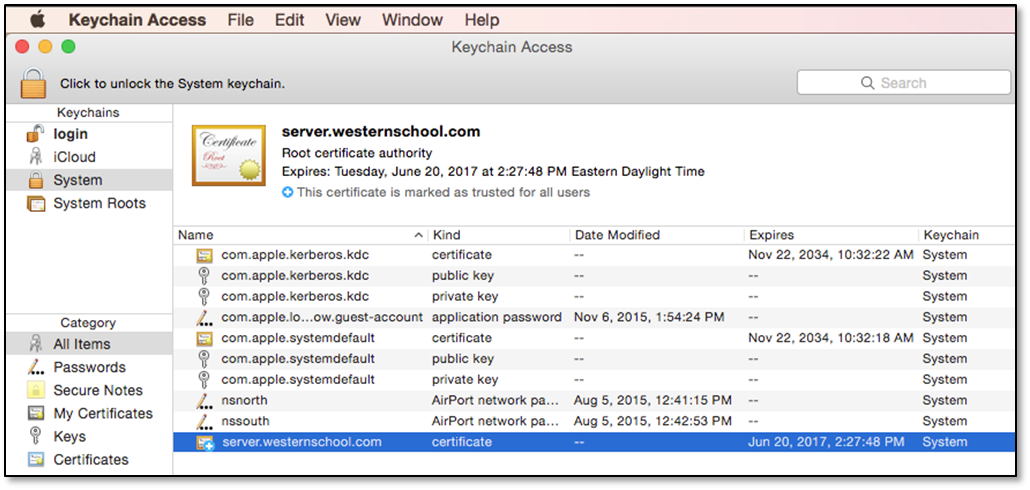
You can verify that your Certificate has been installed using the Keychain Access application (found in Applications > Utilities).