 Viewing and Editing Deny Pages
- To view or edit any available Deny Page, navigate to Tools > Deny Pages > Content.
- To edit an existing Deny Page, select its Name from the list, or use the respective Edit button. Alternatively, the View button allows you to view a Deny Page's output.
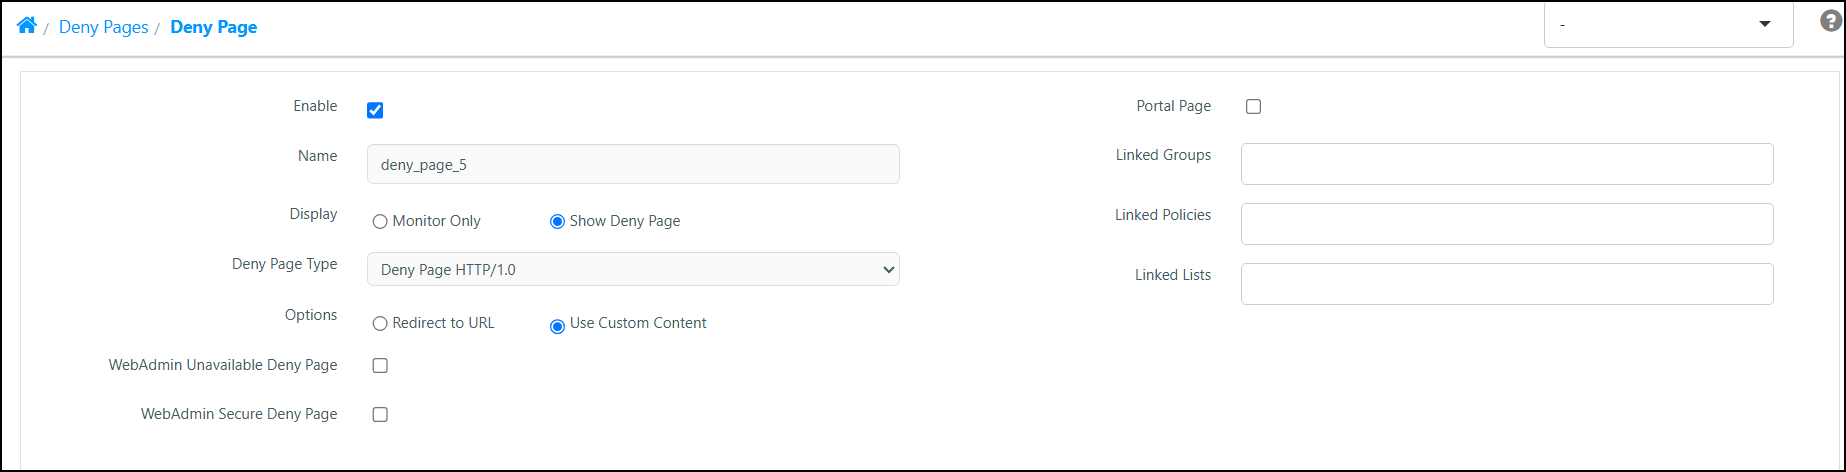
Editing a Deny Page
-
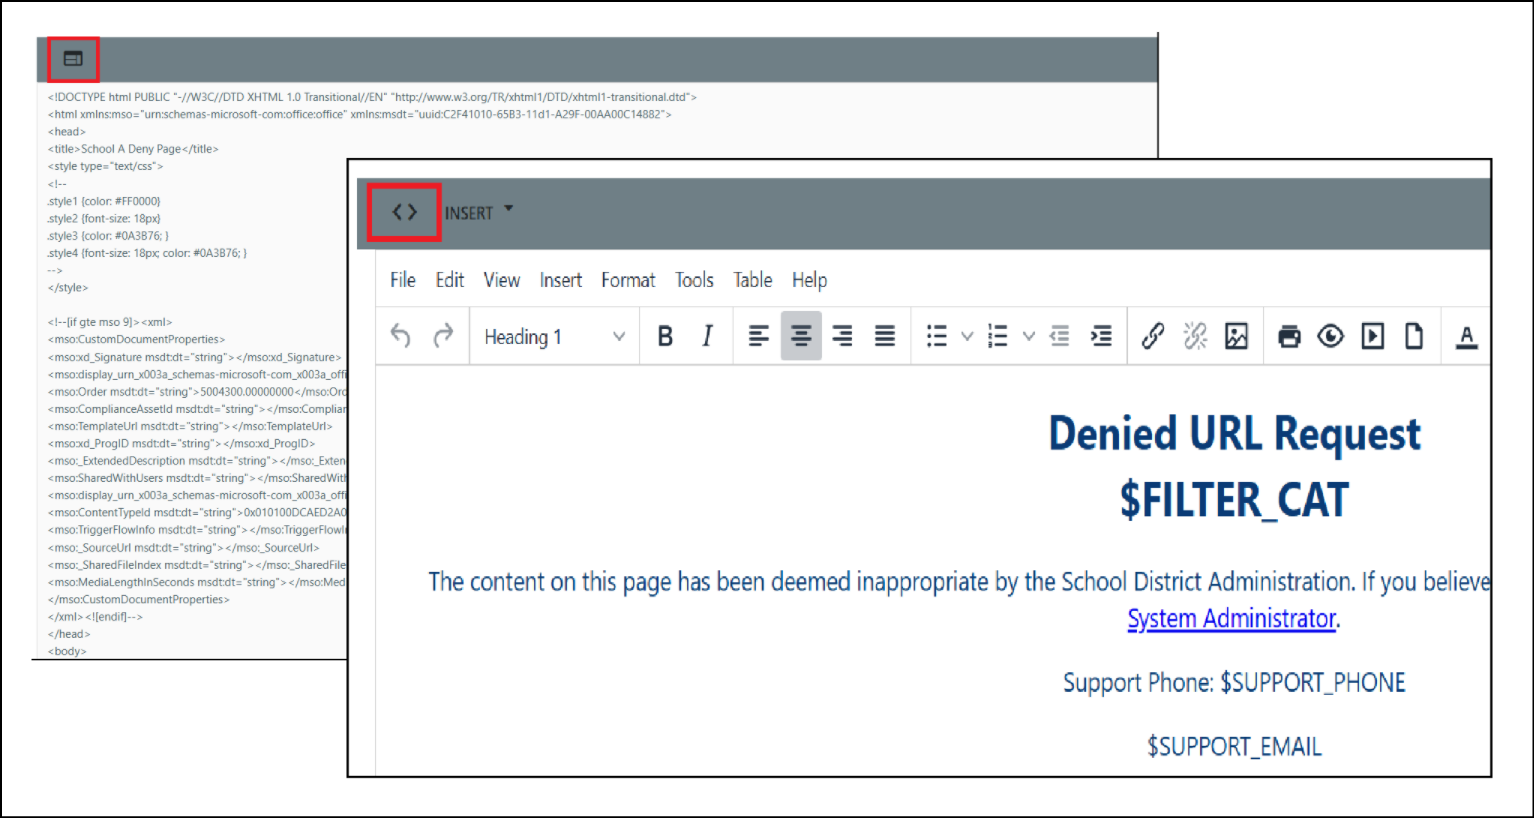
The 'Modify Deny Page' window allows you to edit any existing Deny Page. The Toggle View button switches between Plain Text and the Rich Text Editor.
-
In Plain Text mode, you can edit the HTML code manually, or paste code from another source. This can be ideal for troubleshooting the code.
-
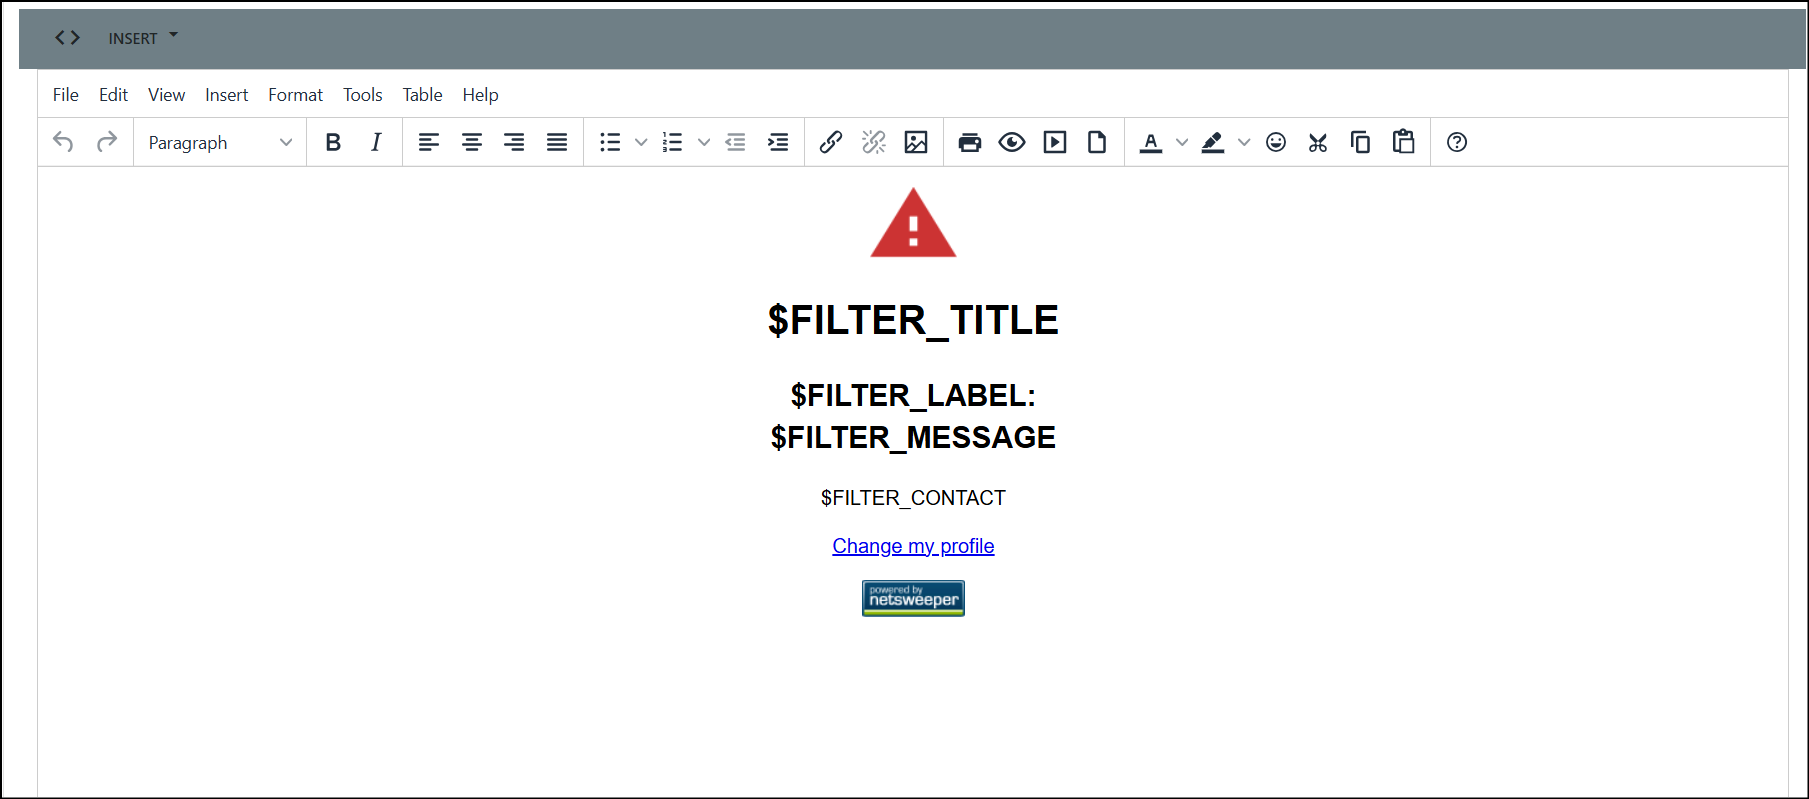
The 'Rich Text Editor' includes different buttons and formatting tools, as well menu options for Rich Text editing.
-
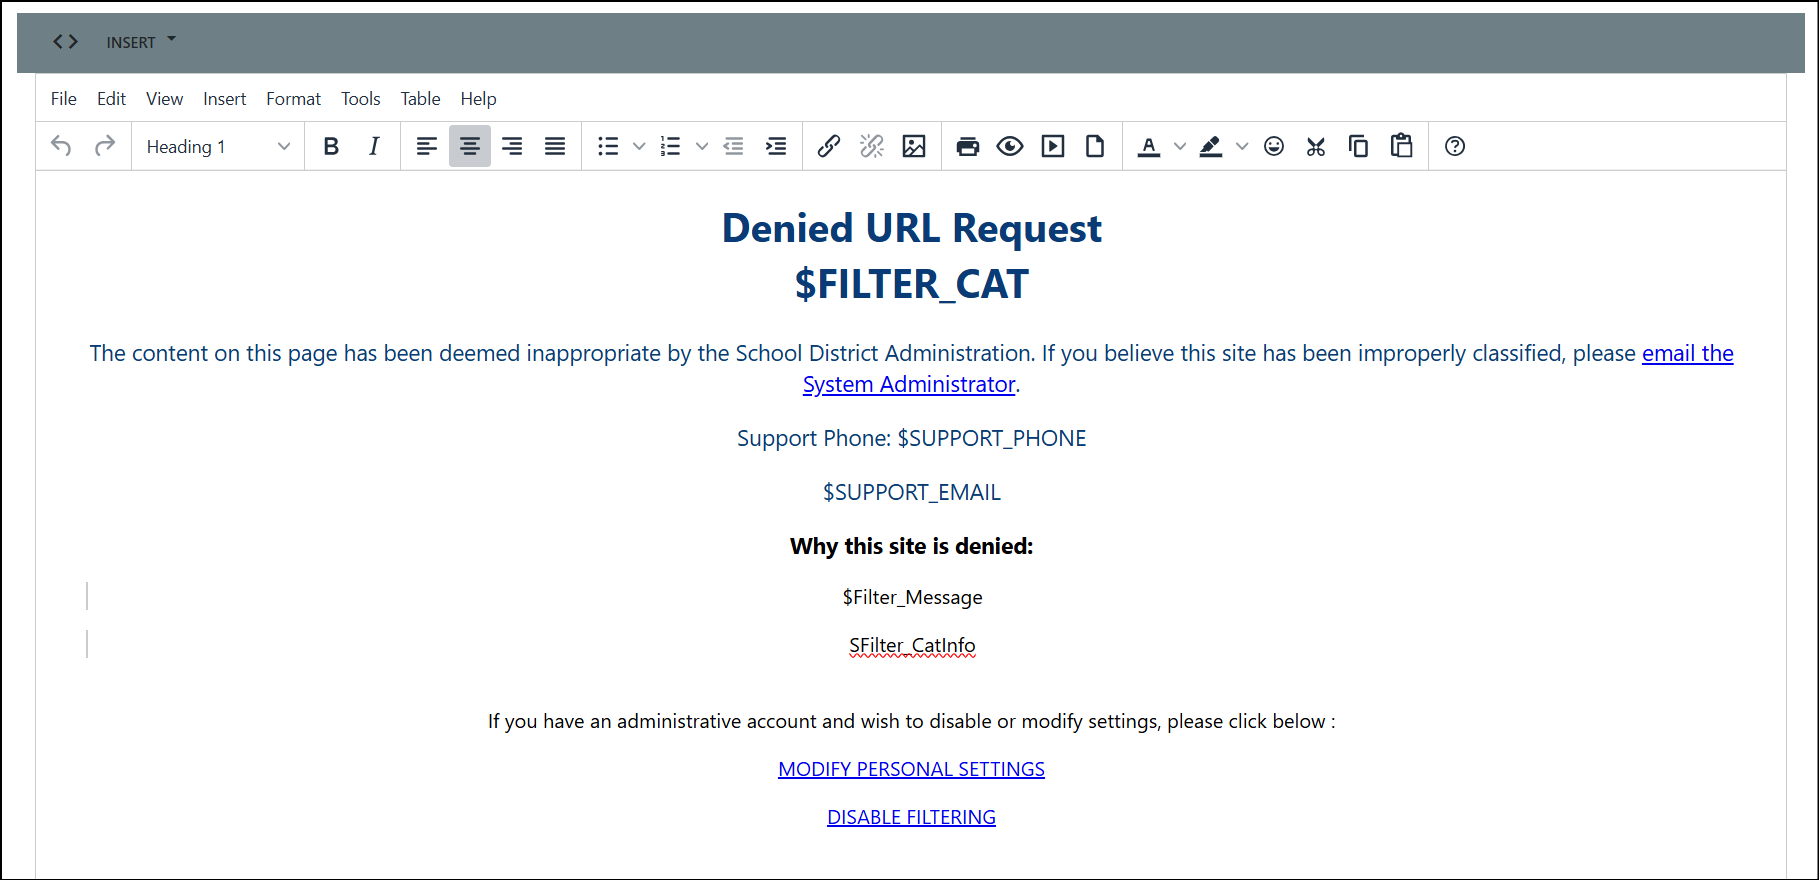
Customize your Deny Page as desired and select the Submit button to apply your changes.
Deny Page Options
Descriptions for the available Deny Page Options.
|
Option |
Description |
|---|---|
|
Enable |
To enable the page, select the checkbox. |
|
Name |
Type in the name of the Deny Page. |
|
Display Deny Page |
Select either Monitor Only or Show Deny Page. If you select Monitor Only, the user will not see the Deny page, but Netsweeper will log the visit to the blocked site. |
|
Deny Page Type
|
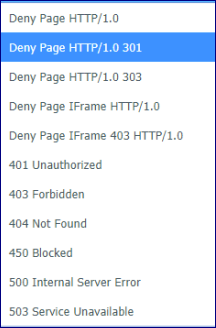
In the Deny Page Type field, select one of the options from the dropdown list. This determines the basic template and text for the Deny page. Several standard HTTP status codes are included in the options. If you choose one of the HTTP status codes, your browser will display that standard HTTP message instead of serving a deny page. Tip – If you want to hide filtering from your users, you can use the HTTP status codes instead of actual Deny pages. The status code you assign in lieu of the Deny page does not have to reflect the actual Web status. For example, you may just want the user to see a message saying that the website is unavailable – instead of telling the user that access to the page is blocked. As you create custom Deny pages, your new Deny pages will also list on this menu by the names that you assign to them. |
|
Options |
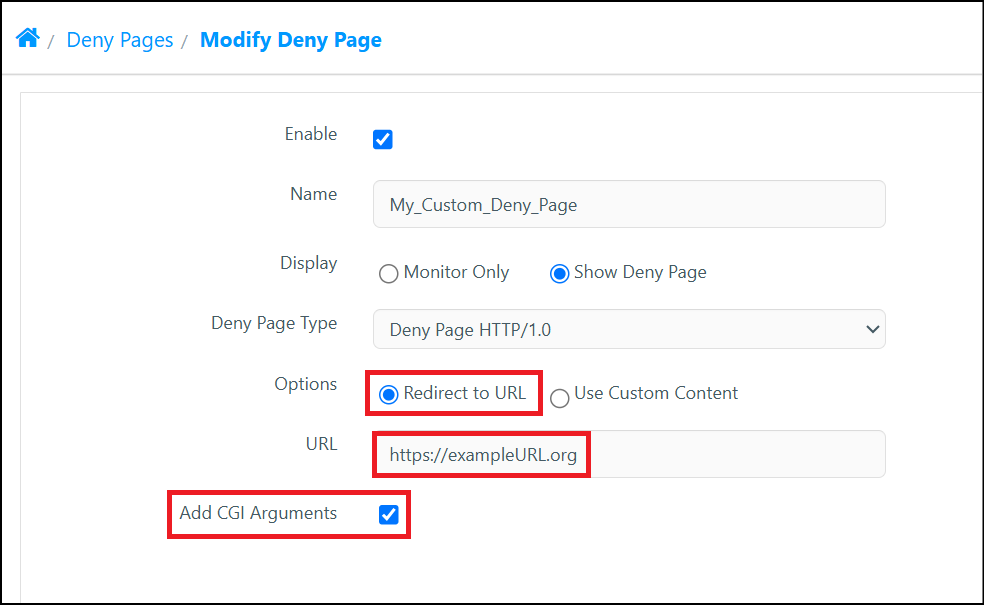
In the Deny Page Options, choose whether you want to redirect the user to another URL or use custom content you create for the deny page. (Instead of serving a deny page for blocked access to www.facebook.com, for example, you can redirect the requester to a URL on the safe and responsible use of social networking sites.) If you click Redirect to URL, the page will rewrite, adding a field where you can type in the address of the URL to which the user should be redirected. Type the URL in the field, and then click Submit. See also: ' Redirect to URL - Add Deny Page CGI Arguments'. If you select Use Custom Content, use the HTML editor or the Rich Text Editor tool at the bottom of the page to create the custom content, and then select the Submit button to save your changes.. |
|
WebAdmin Unavailable Deny Page |
This checkbox allows you to designate a custom Deny Page as a 'WebAdmin Unavailable' Deny Page. |
|
WebAdmin Secure Deny Page |
This checkbox allows you to designate a custom Deny Page as a 'WebAdmin Secure' Deny Page. |
|
Add CGI Arguments |
The ' Add Deny Page CGI Arguments' checkbox displays when you choose the 'Redirect to URL' option in the 'Modify Deny Page' window. This option allows you to specify whether to send CGI arguments when redirecting to a specific URL. Generally, you might use this option if you were re-directing users to a custom external (non-Netsweeper) deny page.
|
|
Portal Page |
Assign this Deny Page as a Portal Page. Selecting this will cause a 'Linked Auth Portals' field to populate. This option allows you to force users to authenticate in order to browse. |
|
Linked Groups |
Link this Deny Page to a specific Group, or Groups. Please note that the priority may need to be adjusted in the Deny Page 'Rules' tab in order for a Group-based Deny Pages to be served. |
|
Linked Policies |
Link this Deny Page to a specific Policy, or Policies. Please note that the priority may need to be adjusted in the Deny Page 'Rules' tab in order for a Policy-based Deny Pages to be served. |
|
Linked Lists |
Link this Deny Page to a specific List, or Lists. Please note that you may need to use the More Actions > Add List Rule buttons and then adjust the priority in the Deny Page 'Rules' tab in order for List-based Deny Pages to be served. |
 Adding Images to a Deny Page
-
To add images to any available Deny Page, navigate to Tools > Deny Pages > Content.
-
To edit an existing Deny Page, select its Name from the list, or use the respective Edit button.
-
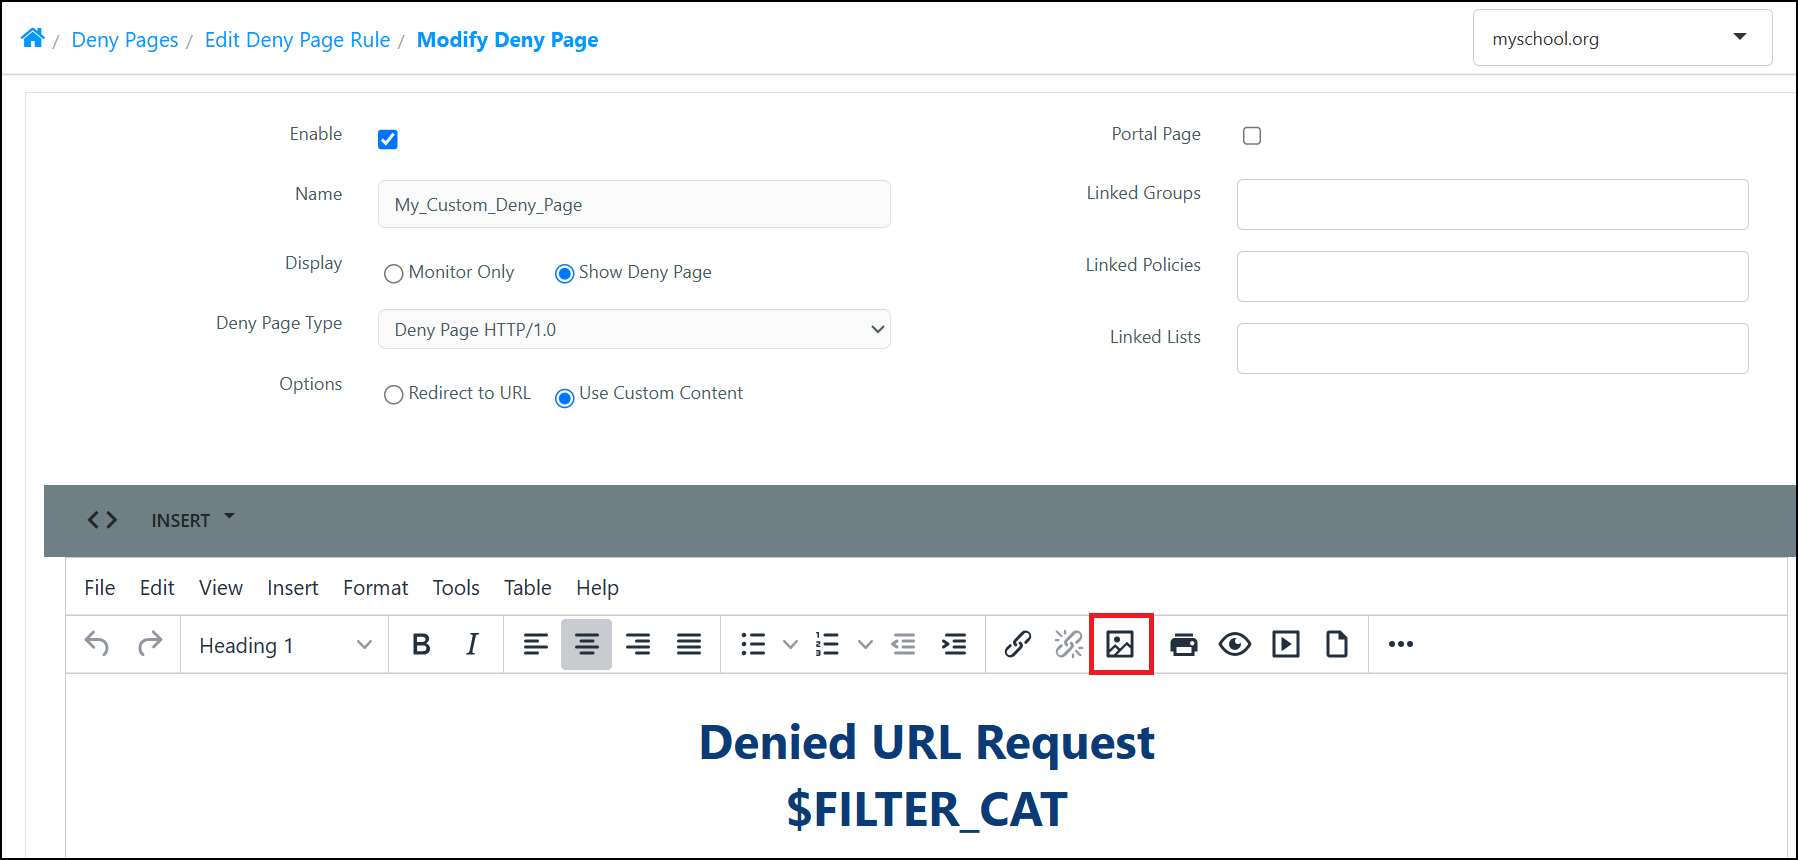
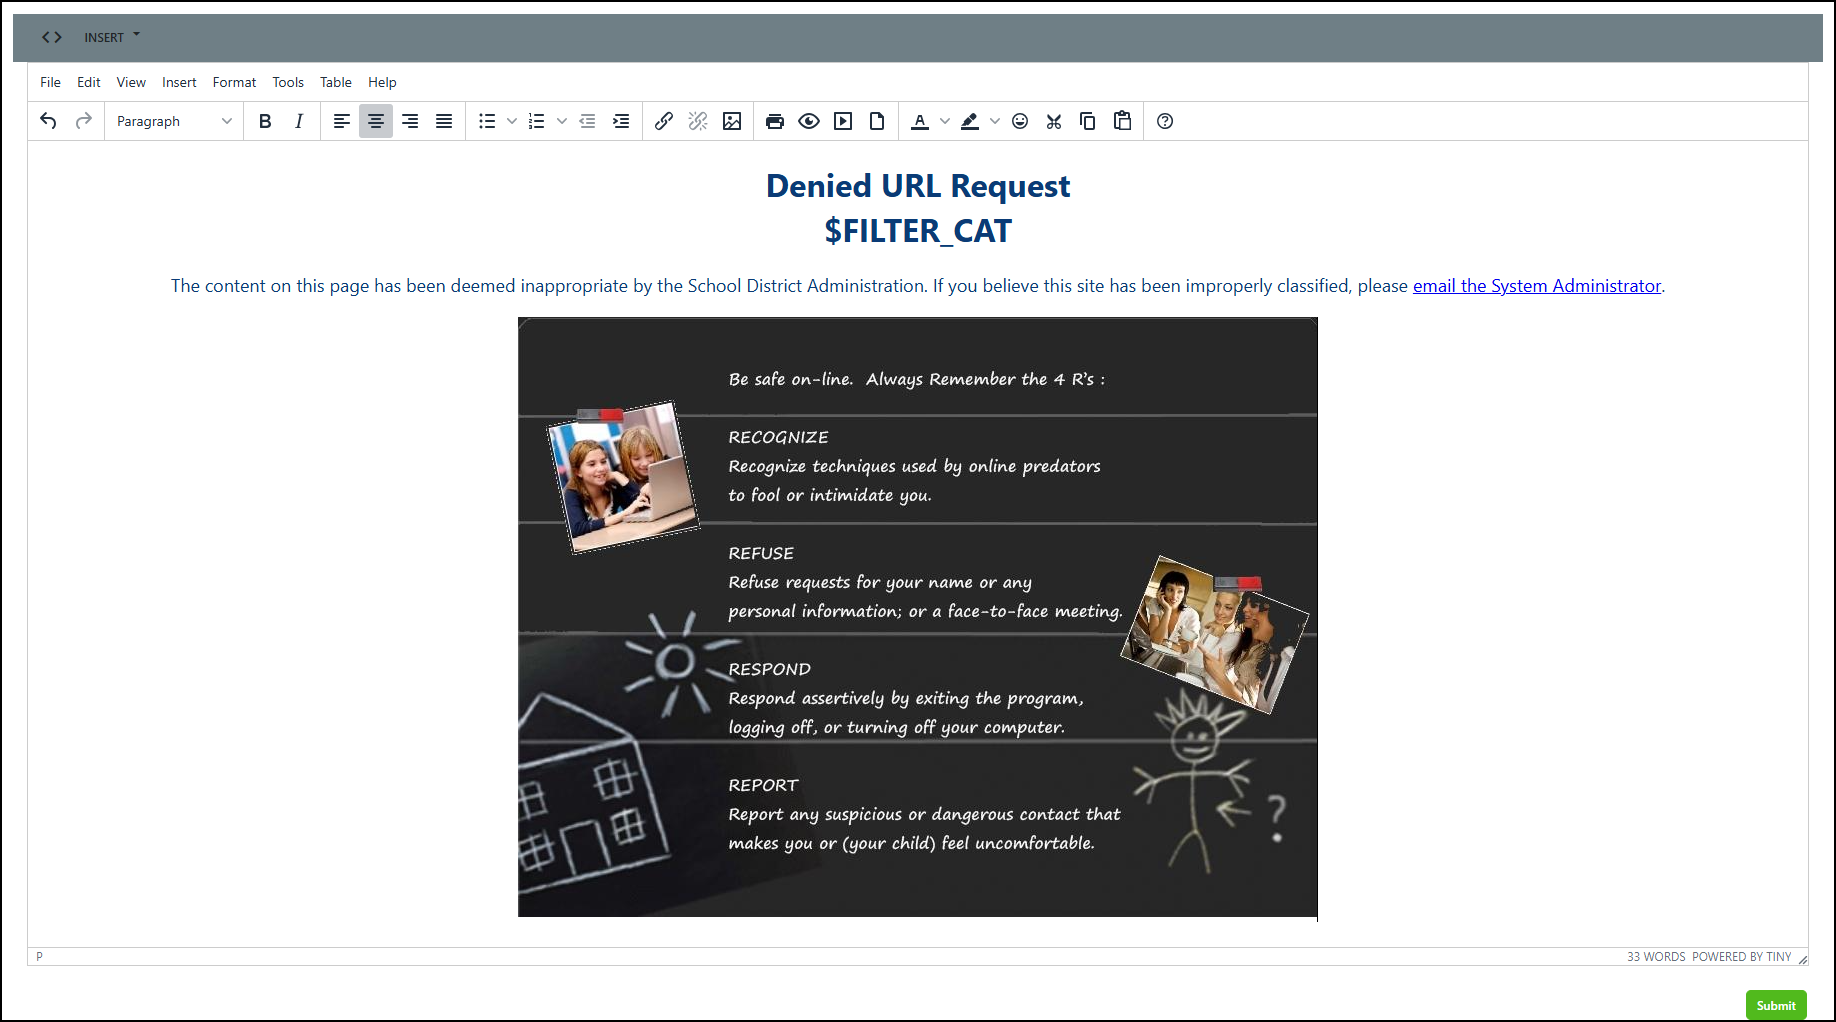
In the Rich Text Editor, select the Insert/Edit Image button from the Toolbar.
-
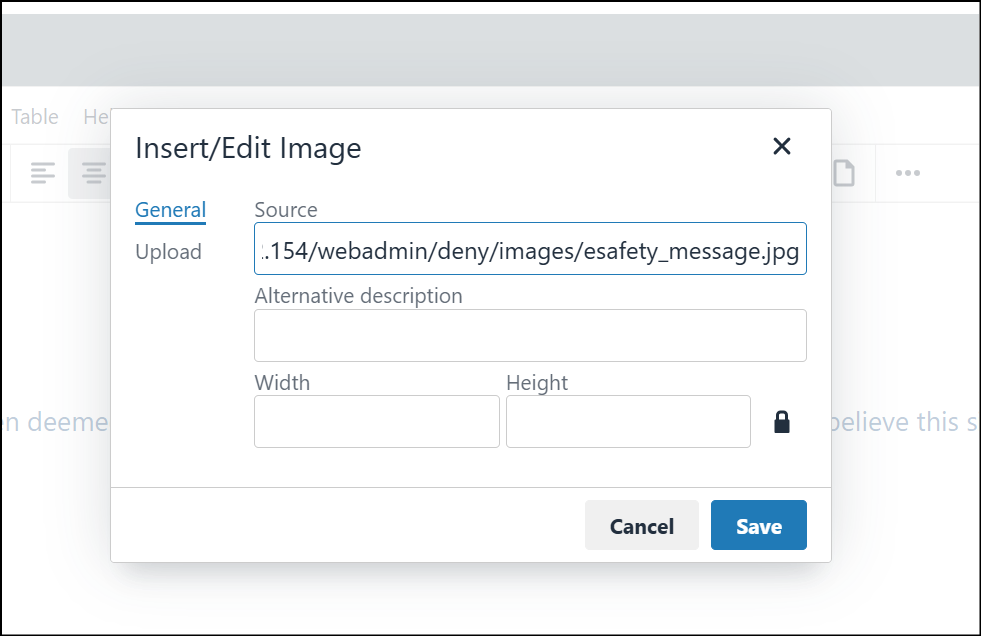
In the 'Insert/Edit Image' popup box, enter the path to the file in the Source field. This is typically in the format 'https://Your.WebAdmin/webadmin/deny/images/filename.extension'.
-
Select Save to finish inserting the image into your Deny Page.
-
Select the Submit button to apply your changes.
Uploading a Custom Image
-
In the Rich Text Editor, select the Insert/Edit Image button from the Toolbar.
-
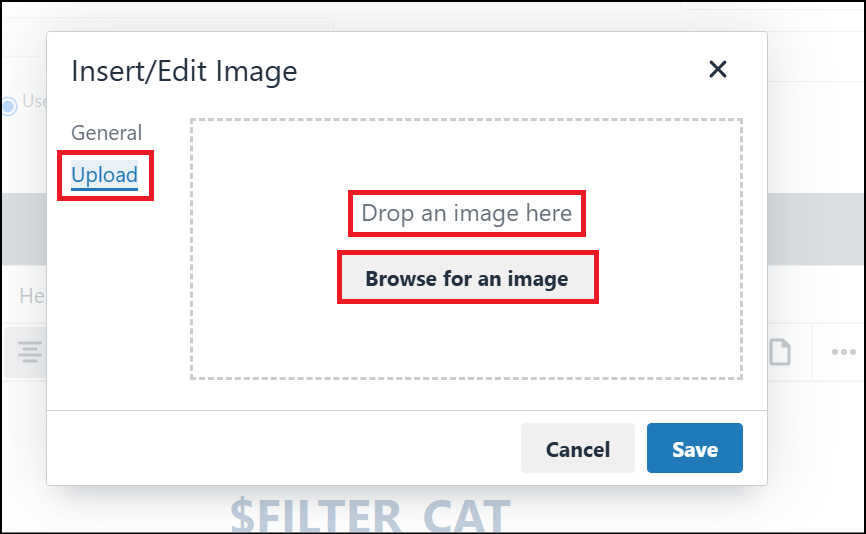
In the 'Insert/Edit Image' popup box, choose the Upload option and either drag and drop an image, or select the Browse for an Image button.
-
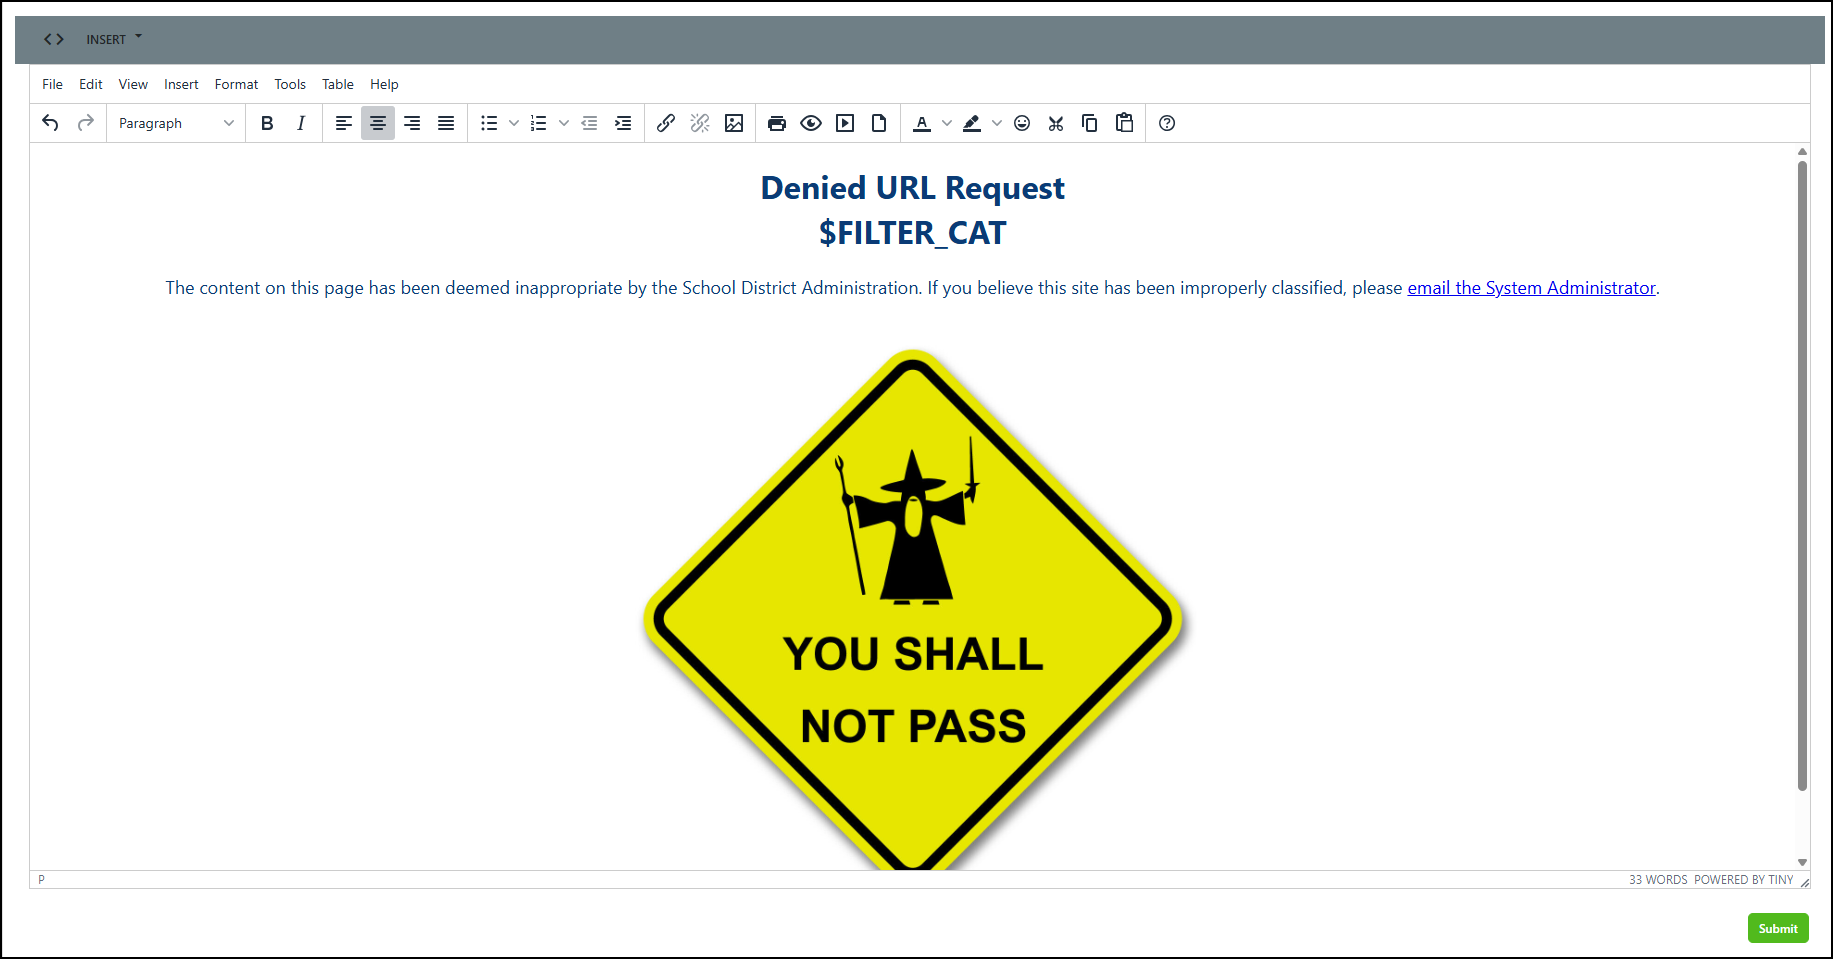
Select the Save button to add your uploaded image.
-
Select the Submit button to apply your changes.
Rich Text Editor Advanced Features
There is a Rich Text Editor for creating and editing Deny Pages. These can be accessed through the menu bar in the Deny Page Editor.
Toggling the Rich Text and Plain Text Displays
The Table Header in the 'Deny Page Editor' allows you to toggle between Plain Text and Rich Text mode.
Rich Text Insert Tool
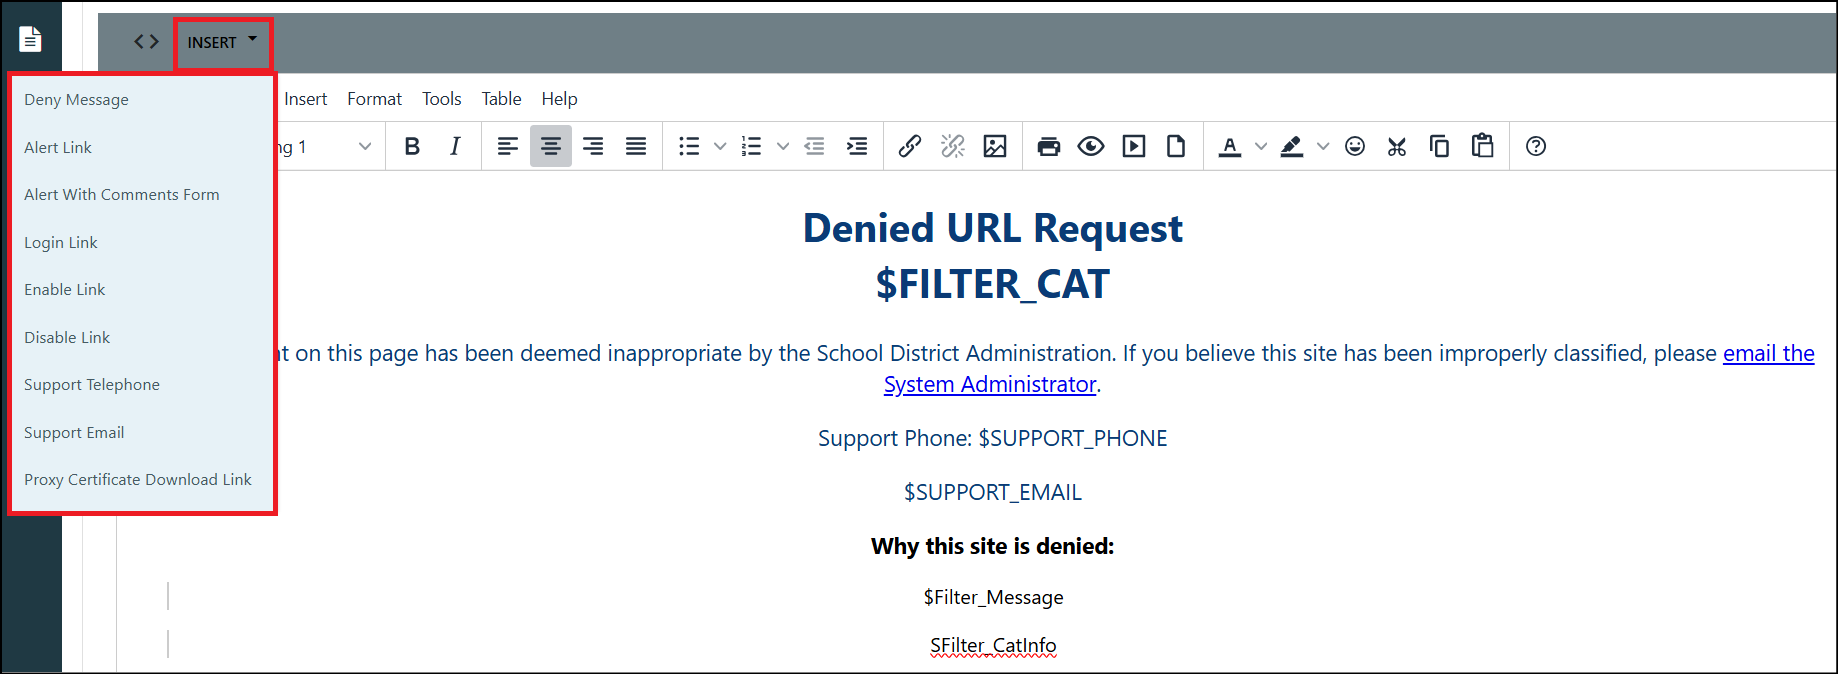
In Rich Text mode, an Insert menu option displays allowing you to insert hypertext links into your Deny Page.
Rich Text Editor - Menu Options
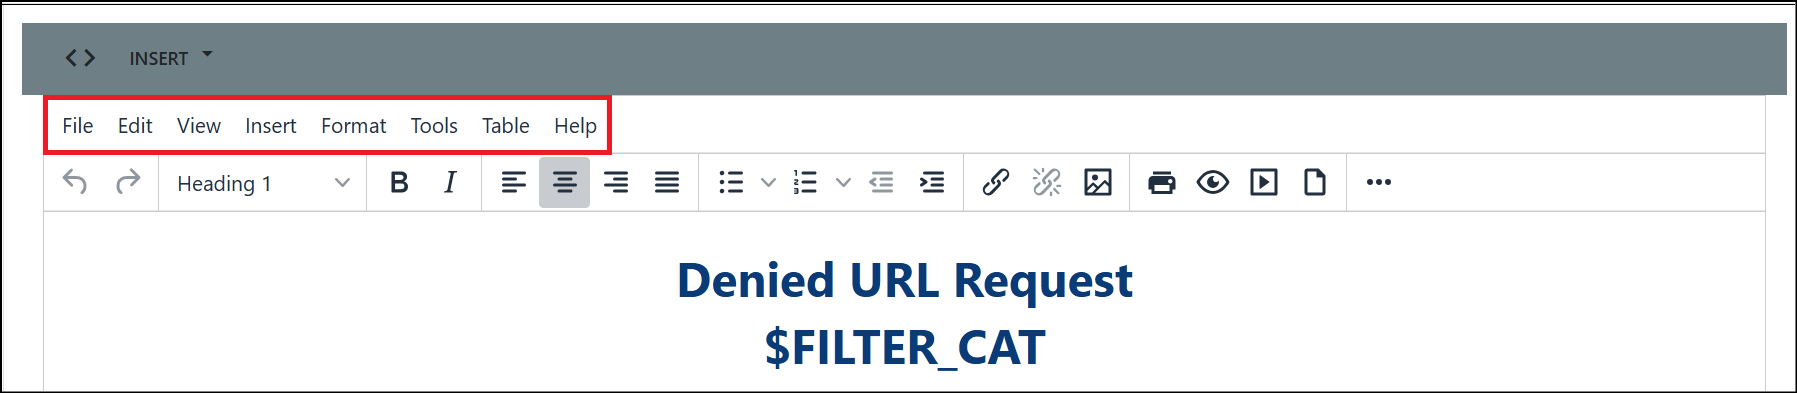
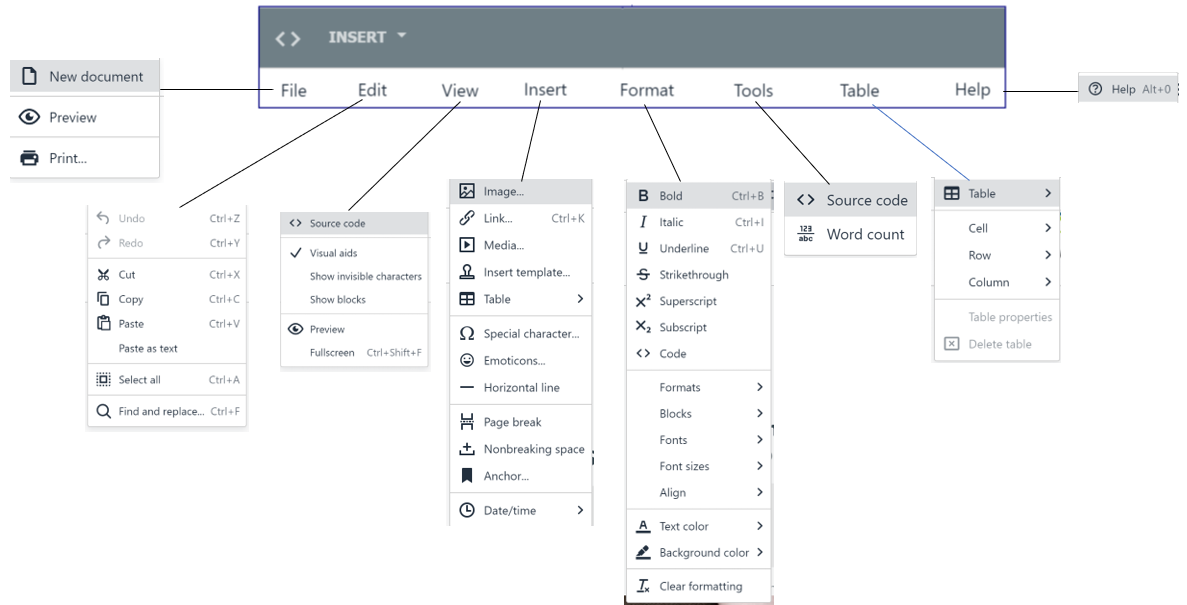
The menu bar contains the following menu options. The Help menu displays Keyboard and Navigation Shortcuts.
Rich Text Editor 'Insert' Options
You can add custom messages, links, and information using the Insert tool in the Deny Page Rich Text Editor.
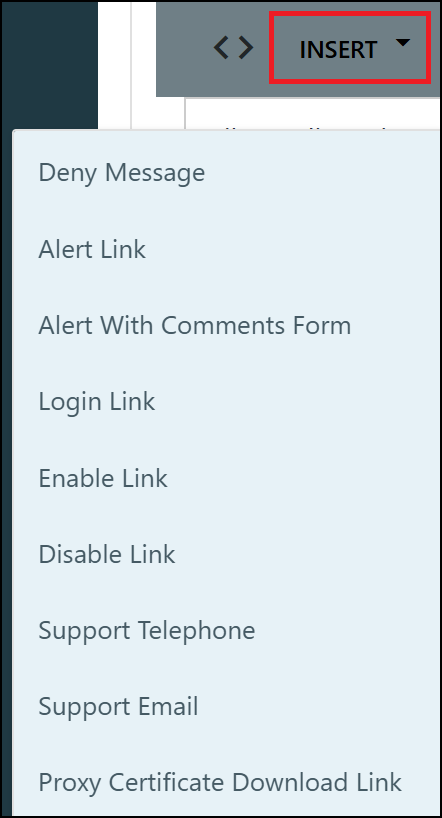
The table shows a description for the Insert options.
|
Option |
Description |
|---|---|
|
Deny Message |
This is the generic deny page message defining the reason why access has been denied. |
|
Alert Link |
Inserts a 'Send URL Alert' link to allow users to request the URL be reviewed by Netsweeper. This feature may require the user to have a WebAdmin login. |
|
Alert with Comments Form |
Inserts a 'Send URL Alert' link along with a comment form allowing users to address why they think the denied URL should be reviewed. The alert is sent to the email address entered in the 'URL Alert Email' field, as configured in Administration > WebAdmin Settings > General Settings. |
|
Login Link |
Inserts a link for a user to log in and modify their settings. |
|
Enable Link |
This button inserts a 'ENABLE FILTERING' link that opens a login page. You must log in with a User Account that has one Group. If not, you will see this message: ' Sorry, your account has not been set up as a filtering account. The group admin does not exist.' Note: This is intended for 'Profile Manager' deployments. |
|
Disable Link |
Inserts a 'DISABLE FILTERING' link, which opens a login page. This allows for a user to authenticate in order to disable filtering. |
|
Support Telephone |
Shows the support telephone number. |
|
Support Email |
Shows the support email address. |
|
WebProxy Link |
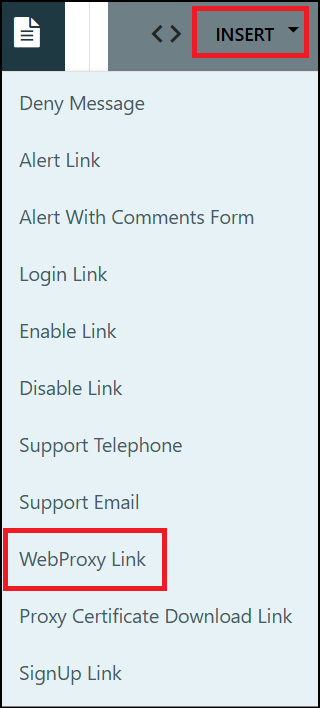
This option inserts a 'Surf using WebProxy' link into the Deny Page. The link displays a login page. Once logged in, it displays a list of Groups using that Deny Page. A Surf link allows you to surf using the selected Group’s Policy. See ‘Insert WebProxy Link’ procedure. Please Note: This option only displays if the Enable WebProxy Link in Deny Page Editor setting is enabled in Administration > WebAdmin Settings > Web Proxy. |
|
Proxy Certificate Download Link |
Inserts a link that, when selected, will download the NSProxy Root Certificate of Authority. |
Rich Text Editor 'Insert Template' Options
The 'Insert Template' option under the Deny Page Rich Text Editor's 'Insert' menu allows you to insert meta links as templates into the Deny Page.
- Choose the Deny Page you want to add the meta links to.
- In the Rich Text Deny Page Editor's Insert Menu, select the Insert Template button to access the 'Insert Template' window.
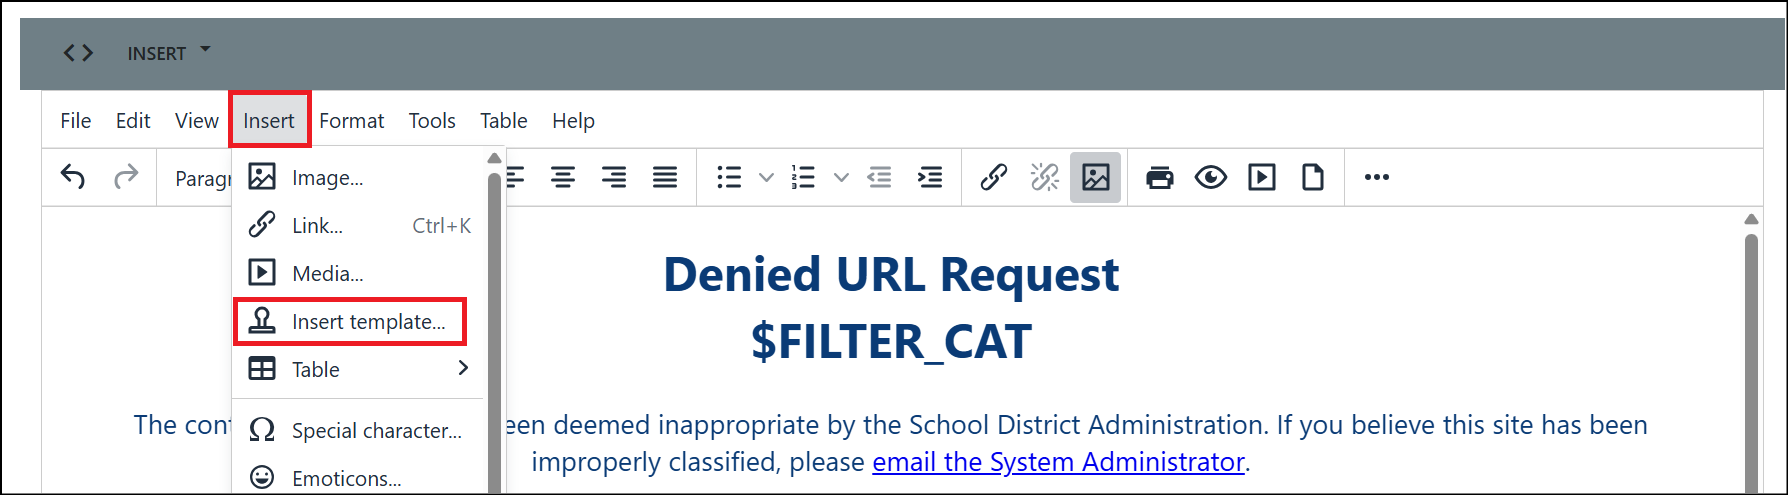
- The 'Insert Template' window displays a dropdown list of template options.
- Choose an option and select the Save button.
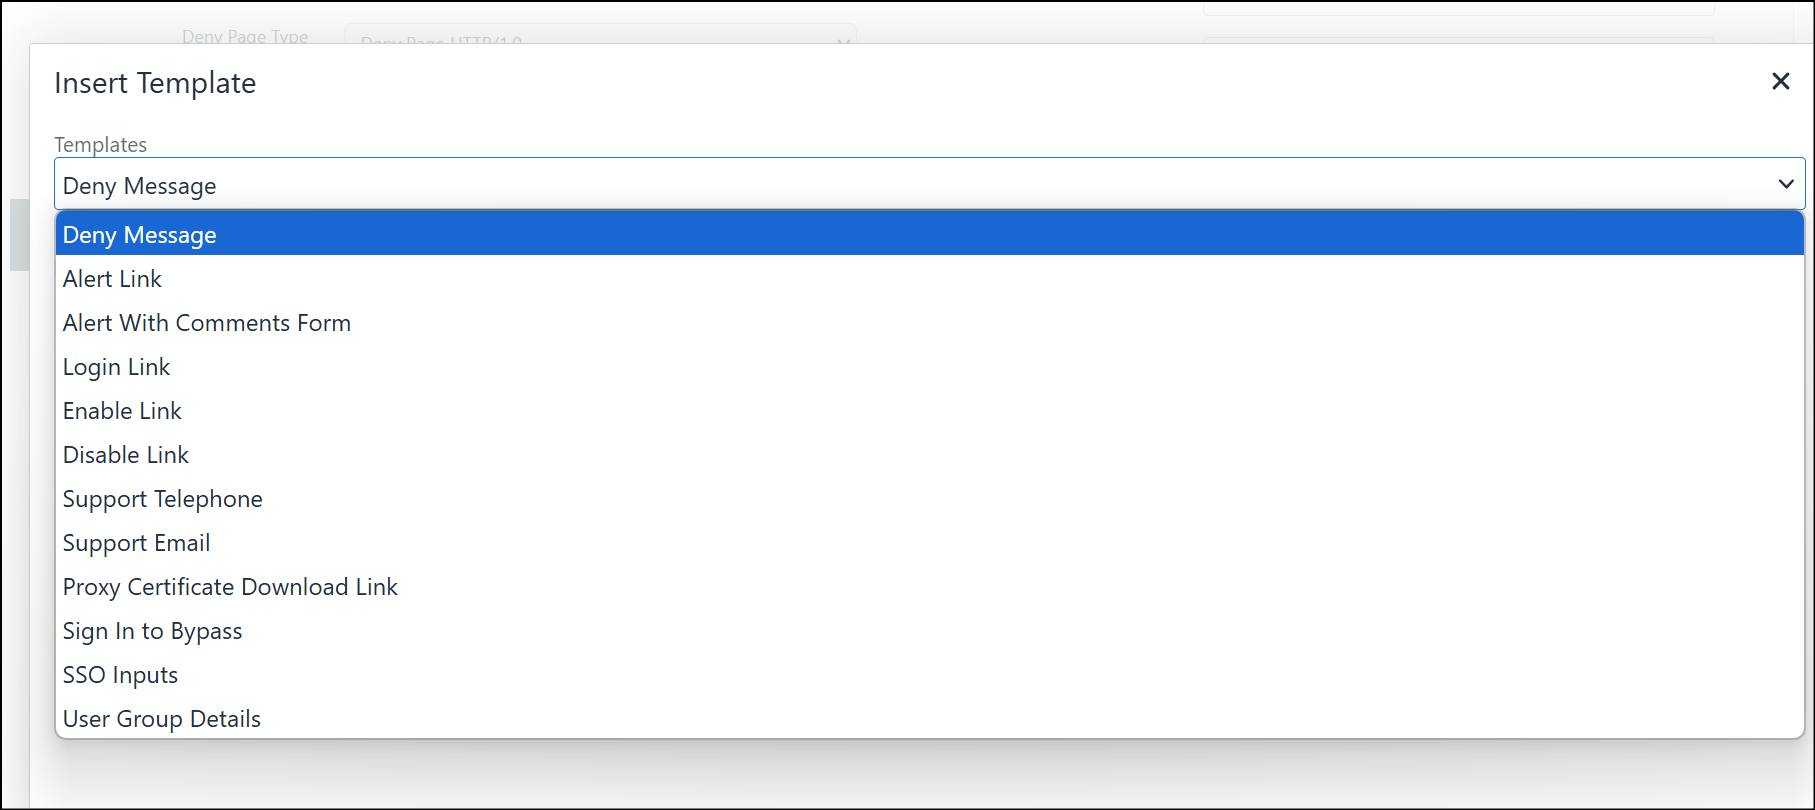
The table below displays descriptions for the Insert Templates.
|
Options |
Description |
|---|---|
|
Deny Message |
This button inserts the code ' $FILTER_MESSAGE'. |
|
Alert Link |
This button inserts the link 'SEND URL ALERT'. |
|
Alert with Comments Form |
This button inserts the link 'SEND URL ALERT WITH COMMENT' with a 'Comment' box. The alert is sent to the email address entered in the 'URL Alert Email' field, as configured in Administration > WebAdmin Settings > General Settings. |
|
Login Link |
This button inserts the 'MODIFY PERSONAL SETTINGS' link . |
|
Enable Link |
This button inserts a 'ENABLE FILTERING' link that opens a login page. You must log in with a User Account that has one Group. If not, you will see this message: ' Sorry, your account has not been set up as a filtering account. The group admin does not exist.' Note: This is intended for 'Profile Manager' deployments. |
|
Disable Link |
Inserts a 'DISABLE FILTERING' link, which opens a login page. This allows for a user to authenticate in order to disable filtering. |
|
Support Telephone |
This button inserts the code '$SUPPORT_PHONE'. This displays the phone number set in the 'Support Phone' field in the 'Support Information' section of 'WebAdmin Settings'. |
|
Support Email |
This button inserts the code '$SUPPORT_EMAIL'. This displays the email address set in the 'Support Email' field in the 'Support Information' section of 'WebAdmin Settings'. |
|
WebProxy Link |
This option inserts a 'Surf using WebProxy' link into the Deny Page. The link displays a login page. Once logged in, it displays a list of Groups using that Deny Page. A Surf link allows you to surf using the selected Group’s Policy. See the ‘Insert WebProxy Link’ section of this document for more information. Please Note: This option only displays if the 'Enable WebProxy Link in Deny Page Editor' option is set in Administration > WebAdmin Settings > Web Proxy. |
|
Proxy Certificate Download Link |
This option inserts a link in the Deny Page that allows the user to download a public certificate without authentication. You can remove this button using the ‘Enable Proxy Certificate Deny Page Download Link’ found in WebAdmin Settings. |
|
Sign Up |
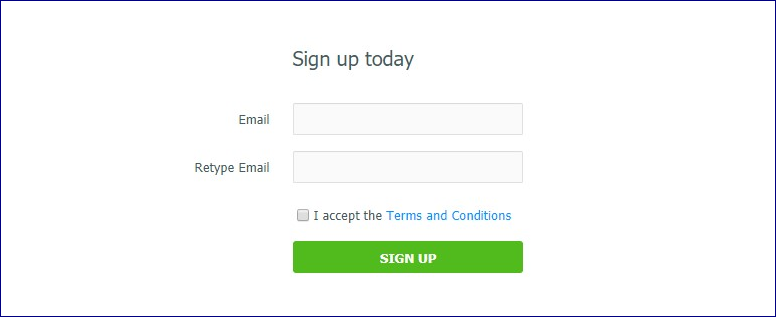
This option inserts a Sign Up link to the Deny Page. Clicking the link opens the Sign Up window which allows you to create a WebAdmin User Account.
Please Note: This option is only available if the 'Enable Signup' option is set in Administration > WebAdmin Settings > Signup/Password Recovery. |
|
Sign In to Bypass |
Provides input fields to sign in for Authentication Redirect. |
|
SSO Inputs |
Provides input fields to sign in for Single Sign On Authentication. |
|
User Group Details |
Provides details about user and group been filtered. |
 Insert WebProxy Link
The Insert WebProxy Link can be inserted into a Deny Page. The Surf using WebProxy link in the Deny Page displays a login window. Once logged in, it displays a list of Groups using that Deny Page. A Surf link allows you to surf using the selected Group’s Policy.
Inserting a WebProxy Link
Please Note: The following steps are only available if the 'Enable WebProxy Link in Deny Page Editor' option has been set in Administration > WebAdmin Settings > WebProxy.

-
In the Rich Text Editor, use the Insert Tool and choose the WebProxy Link option.
-
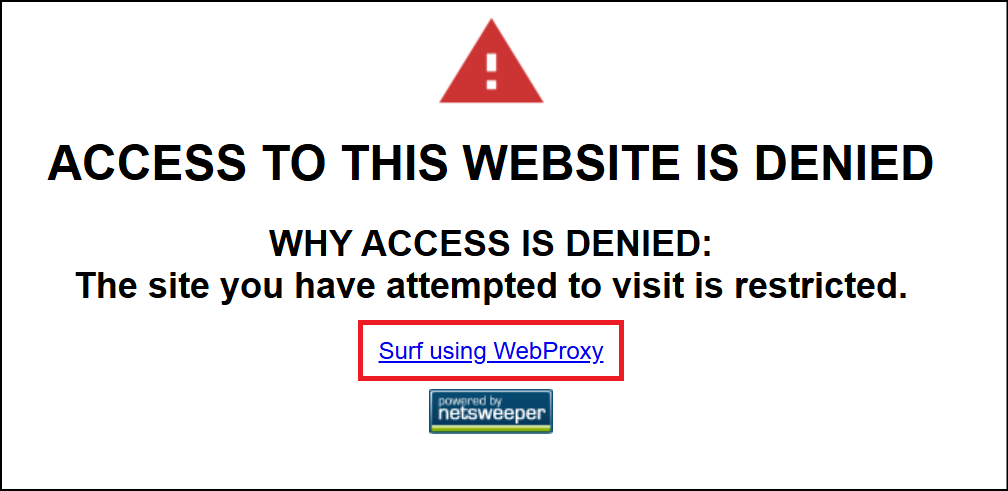
Once added, a 'Surf using WebProxy' link will be embedded into the Deny Page.
-
Select the link to log in. A list of Groups that use this deny page displays.
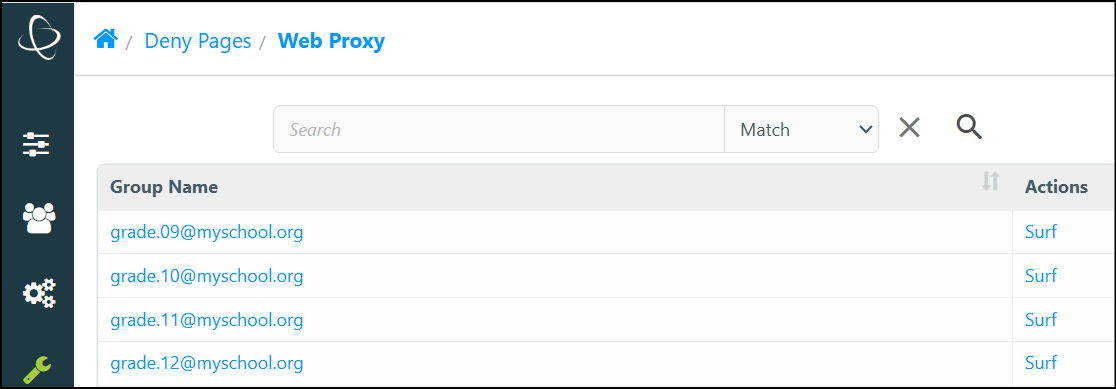
- Select the Surf button for a Group to browse the internet using that Group's Policy rules.
The Deny Page Test Tool
The Deny Page Test tool can be accessed by navigating to Tools > Deny Pages > Test. It is used to test and ensure all Policy Servers are properly configured to allow Deny Pages. For multi-server deployments, best practice is to ensure all Policy Servers properly allow all Deny Page Servers.
For administrators, It is recommended that you manually add each Deny Page Server to the Filter Bypass List. This will ensure that all Deny Pages can be loaded and the Policy Servers will always allow deny page requests.
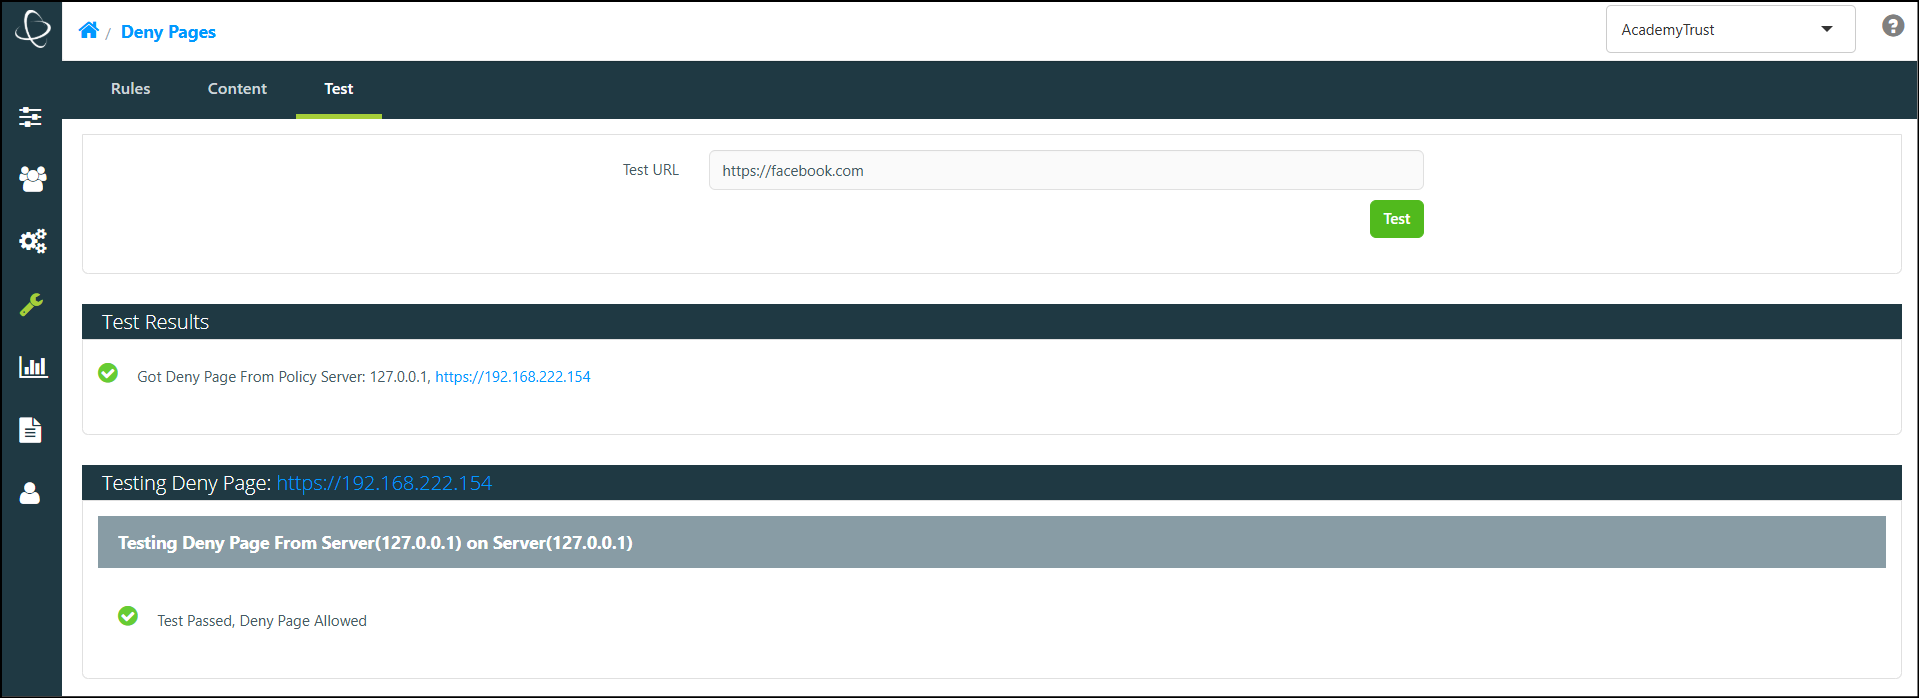
Please Note: The ‘Test URL’ must be denied by the default group for this tool to work properly.