You can specify a custom Deny Page to display for a specific Group. Group Deny Pages can then be prioritized, as well as linked and assigned to other Groups.
 Creating a Group Deny Page
Creating a Group Deny Page
In this example, we will create a new Deny Page for our 'students' Group.
- Navigate to Policies > Groups > List and choose the Group you wish to modify.
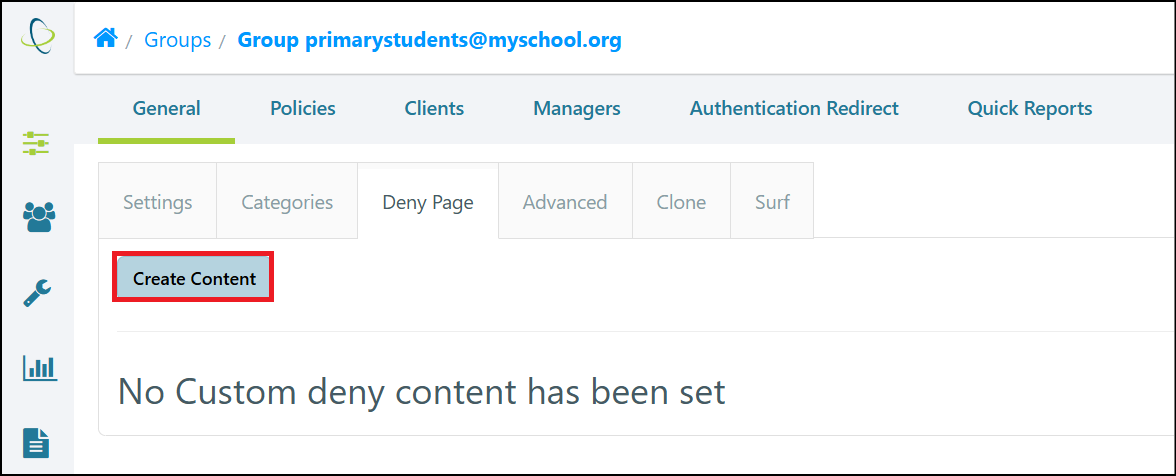
- In the ‘Group's General tab, choose the Deny Page sub-tab. If no Deny Page has been previously set, you will see a 'No Custom deny content has been set' message.
- Select the Create Content button.
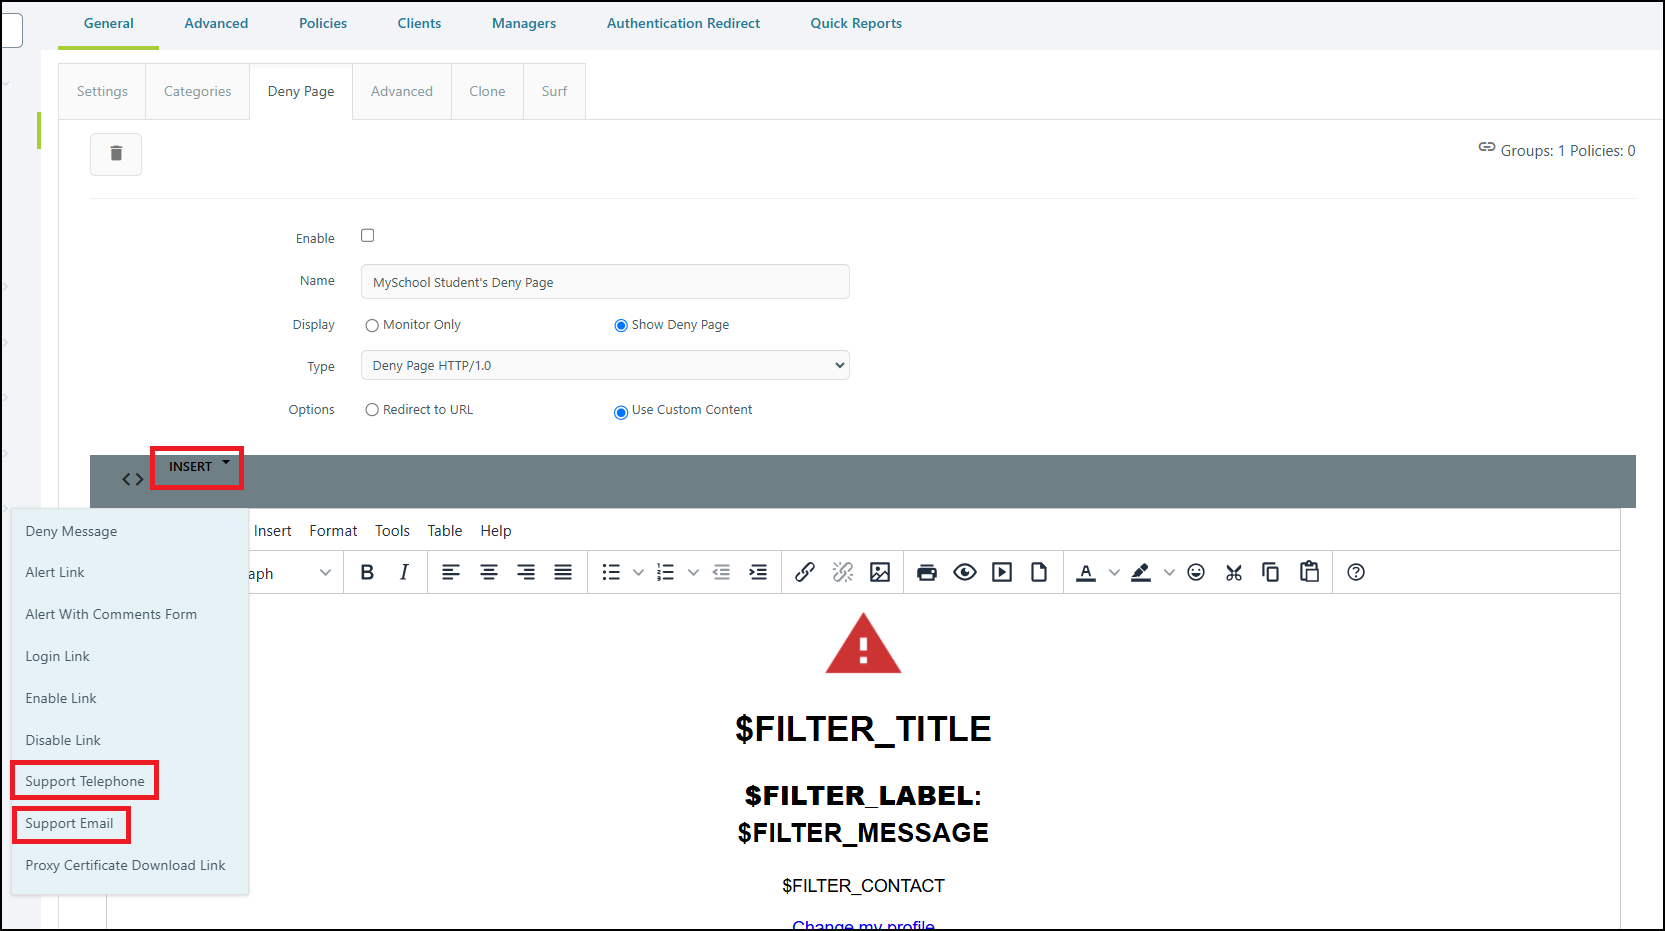
- The Deny Page Editor displays. Enter the desired name into the Name field.
- The default setting for the Editor is Plain Text / HTML. Select the Rich Text icon in the Table Header to switch to 'Rich Tex Editor' mode.
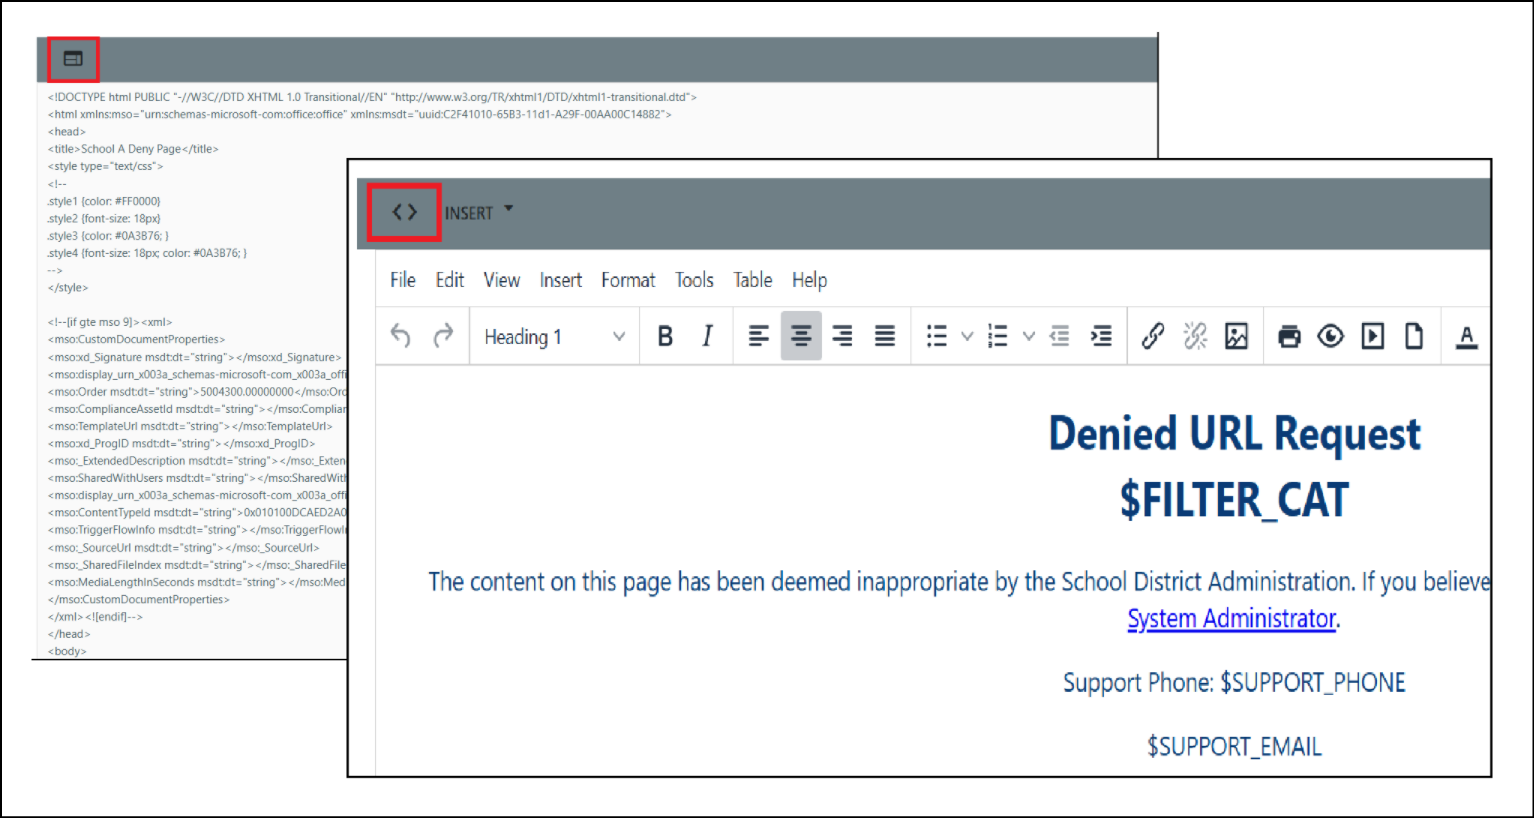
- The 'Rich Text' editor has options under the Insert icon that can insert fields into the Deny Page.
- Use the Insert Support Telephone and Insert Support Email options to populate the Deny Page with custom content.
- Select the Submit button to finish creating the Deny Page. You can link this Deny Page to any Group you manage.
For more information on variable options, refer to our Deny Page Variables documentation.
Linking a Group Deny Page
Linking a Group Deny Page
- Navigate to Policies > Groups > List and choose the Group you wish to modify.
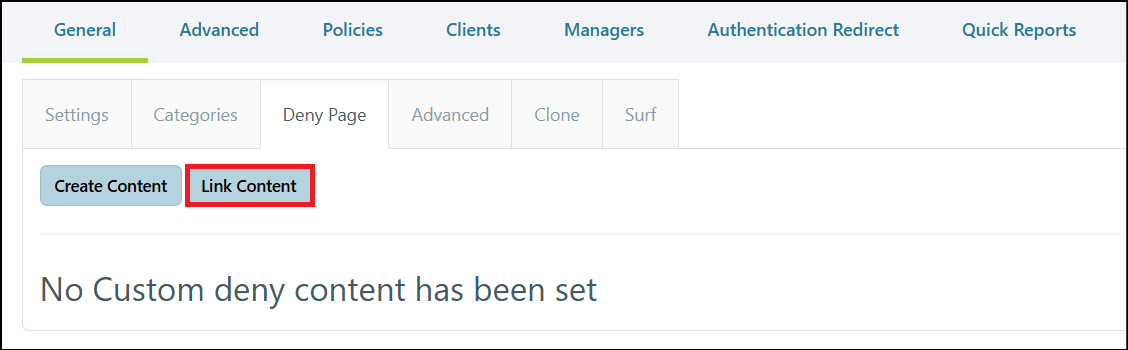
- In the Group's Deny Page tab, select the Link Content button.
- The 'Link Pages' popup window displays. Use the Content Pages dropdown field to choose the desired Group's Deny Page.
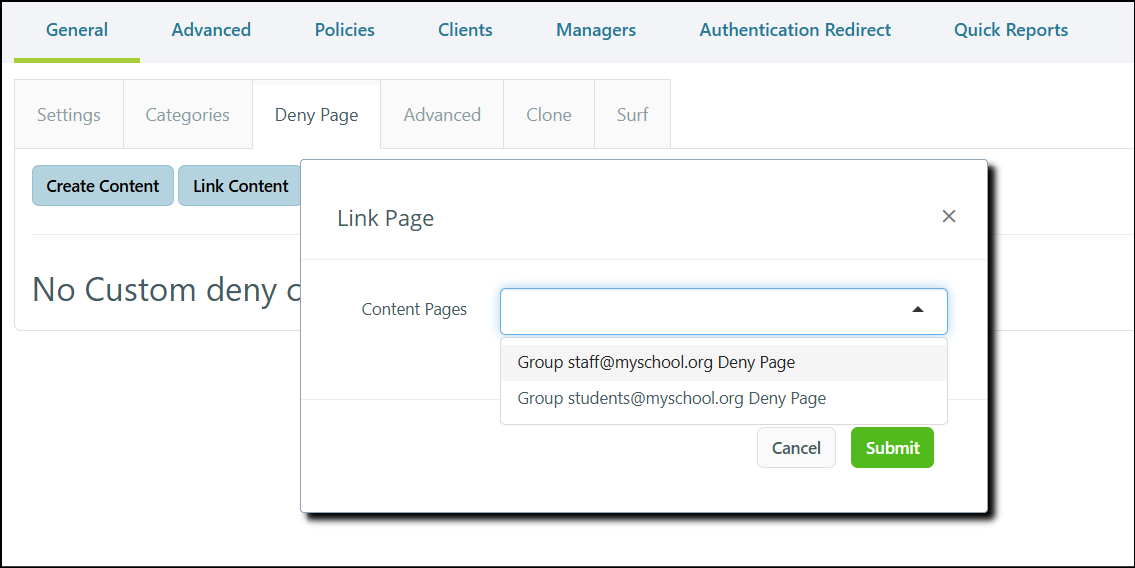
- Select the Submit button to Link the Deny Page and close the popup window.
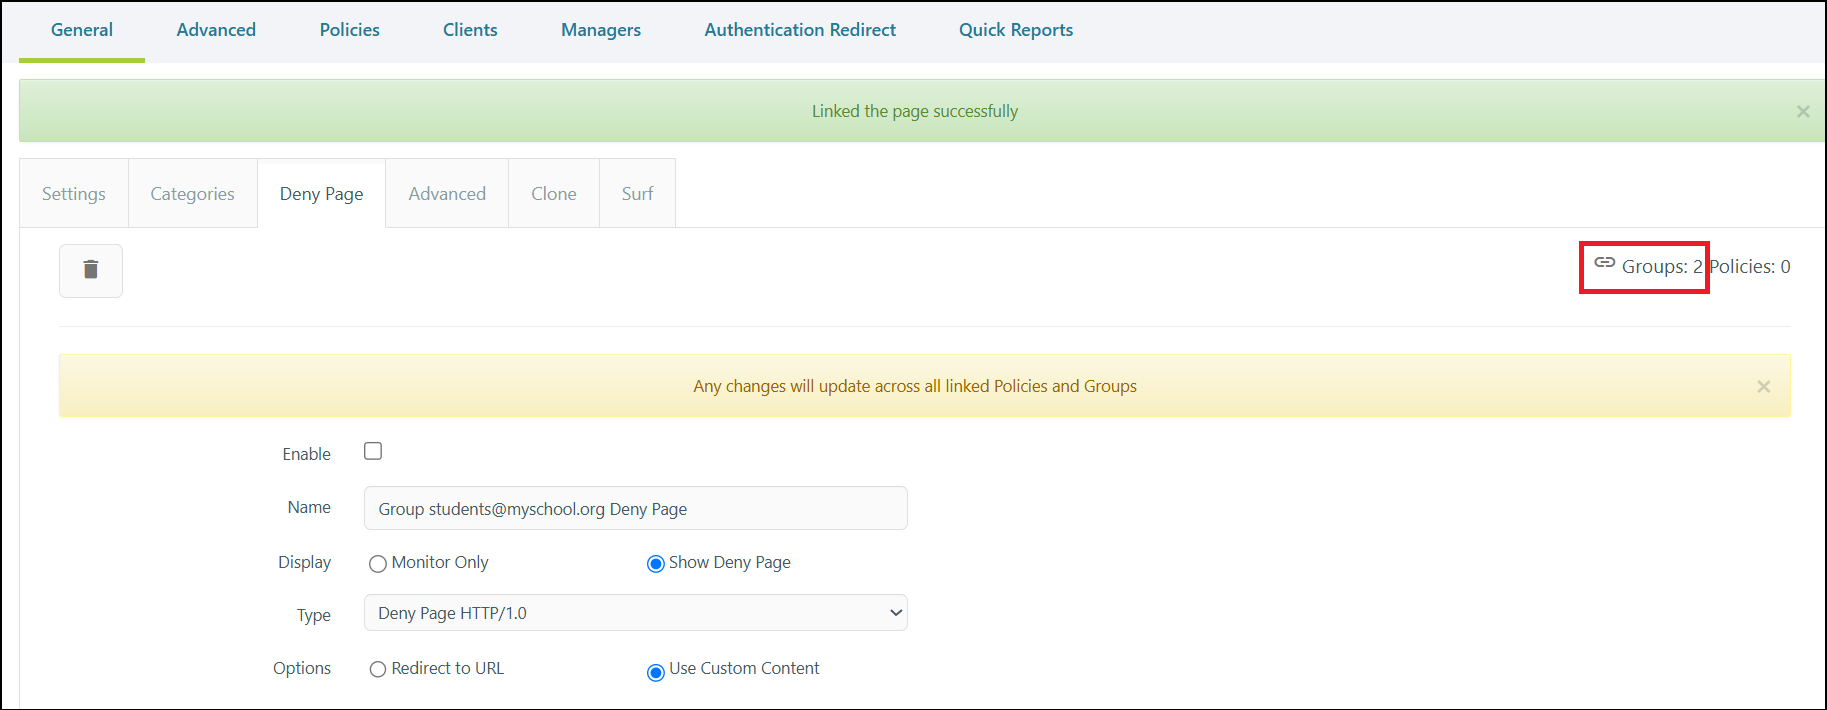
- The custom Deny Page is now assigned to this Group. Please note that the 'Groups' number in the top right corner has increased by one.
Assigning a Group Deny Page from the Deny Page Editor
Assigning a Group Deny Page from Deny Page Editor
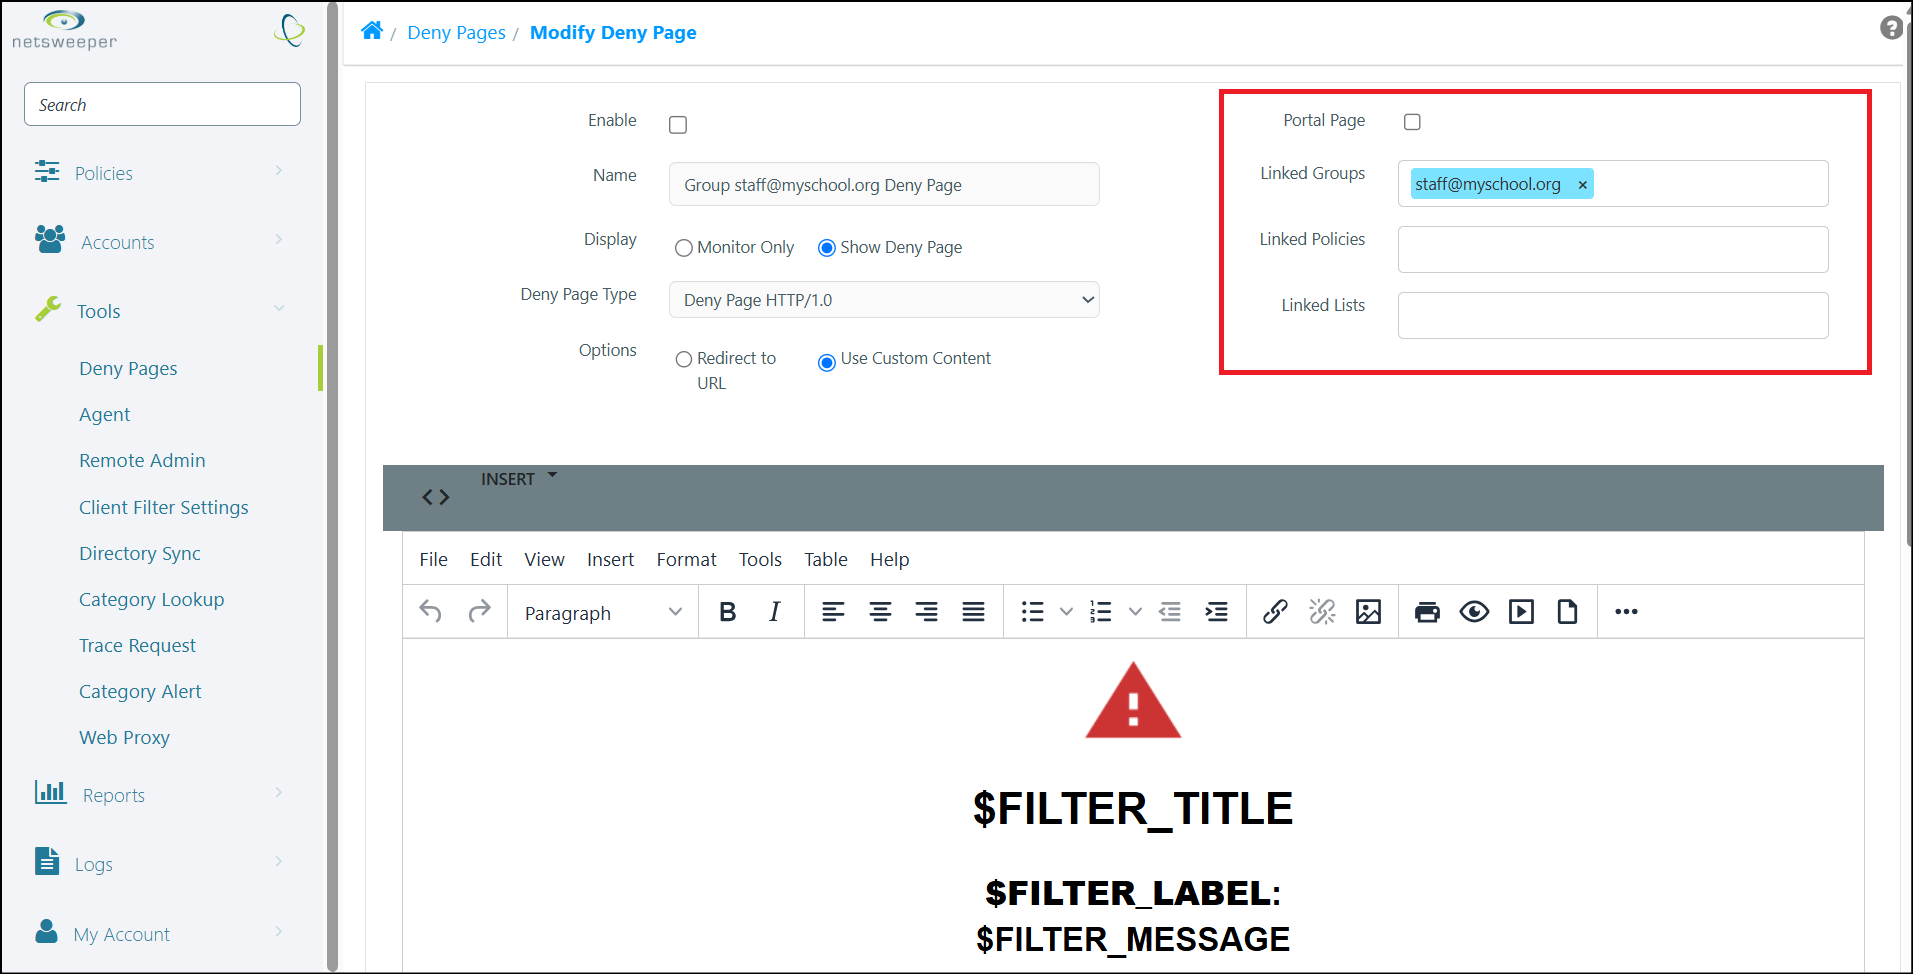
The area in the top-righthand corner of a Deny Page allows you to assign the selected Deny Page to Groups, Policies, Lists and Portals.
-
To assign an existing Deny Page, navigate to Tools > Deny Pages and select the desired Deny Page to access the 'Modify Deny Page' window.
-
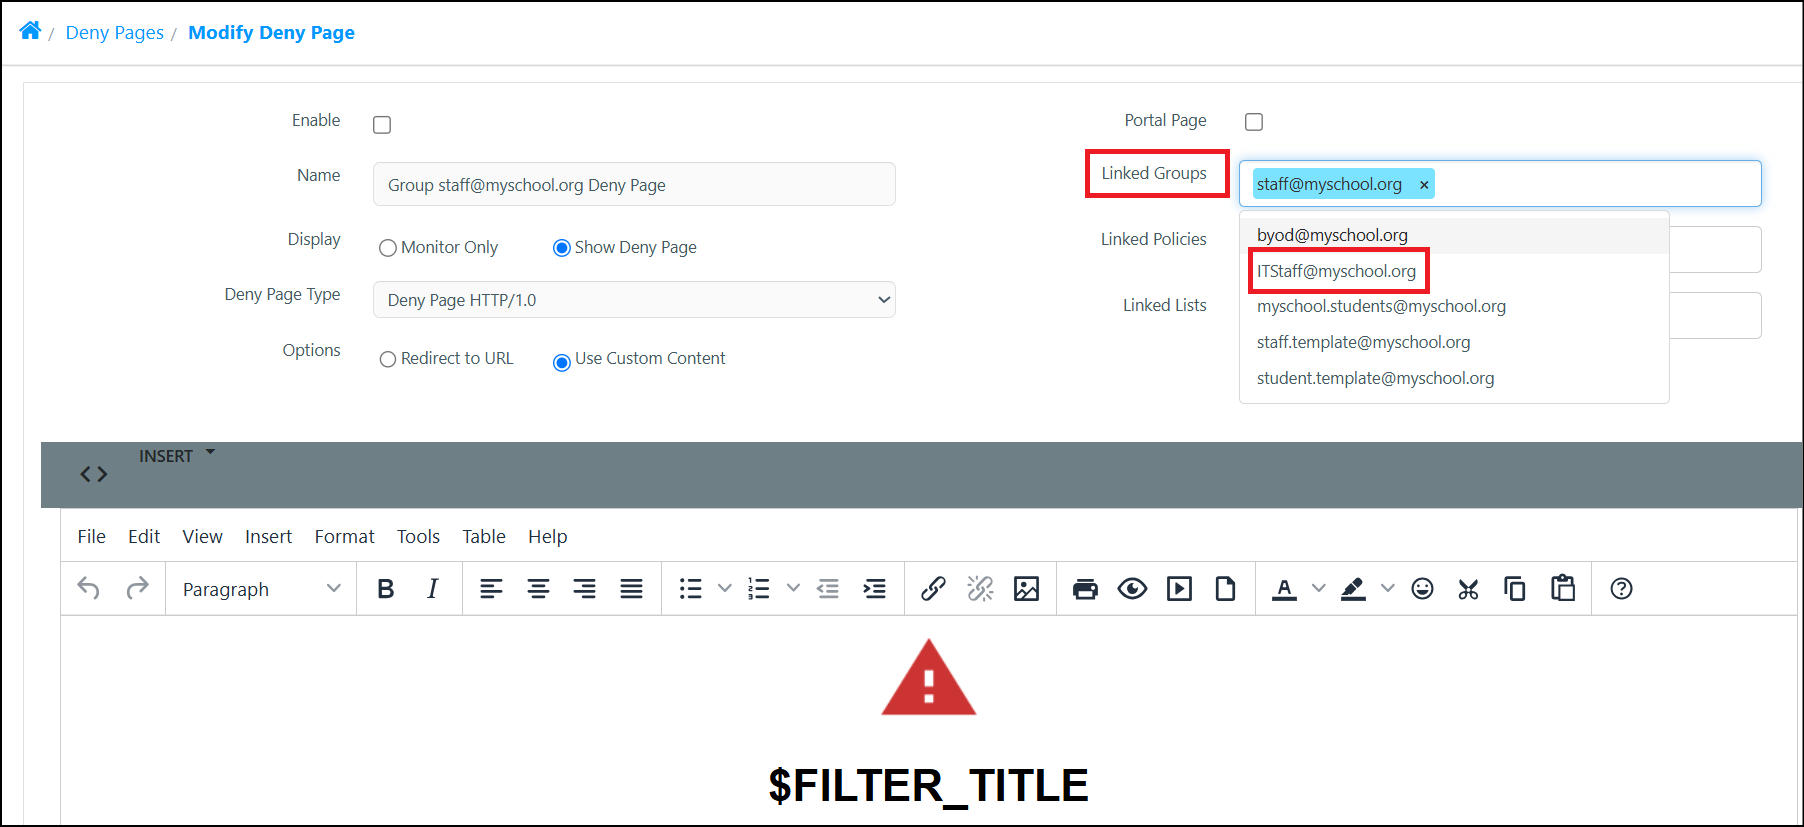
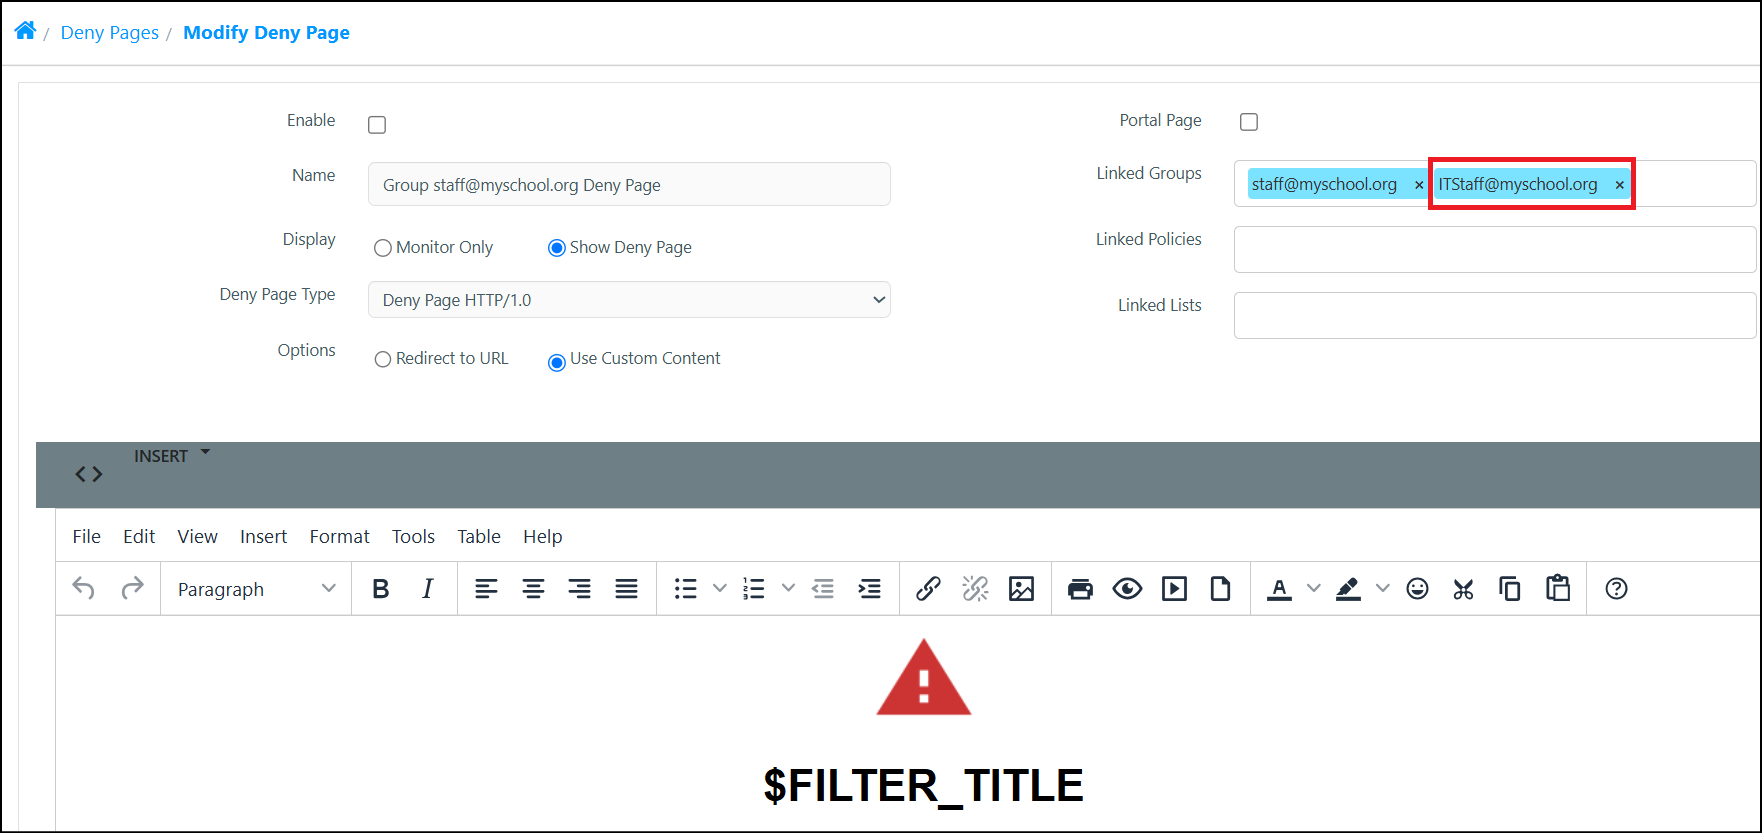
Select the Linked Groups field and choose the desired Group(s).
-
Selected Groups now display in the field.
-
Scroll to the bottom of the window and select the Submit button to apply the changes.
-
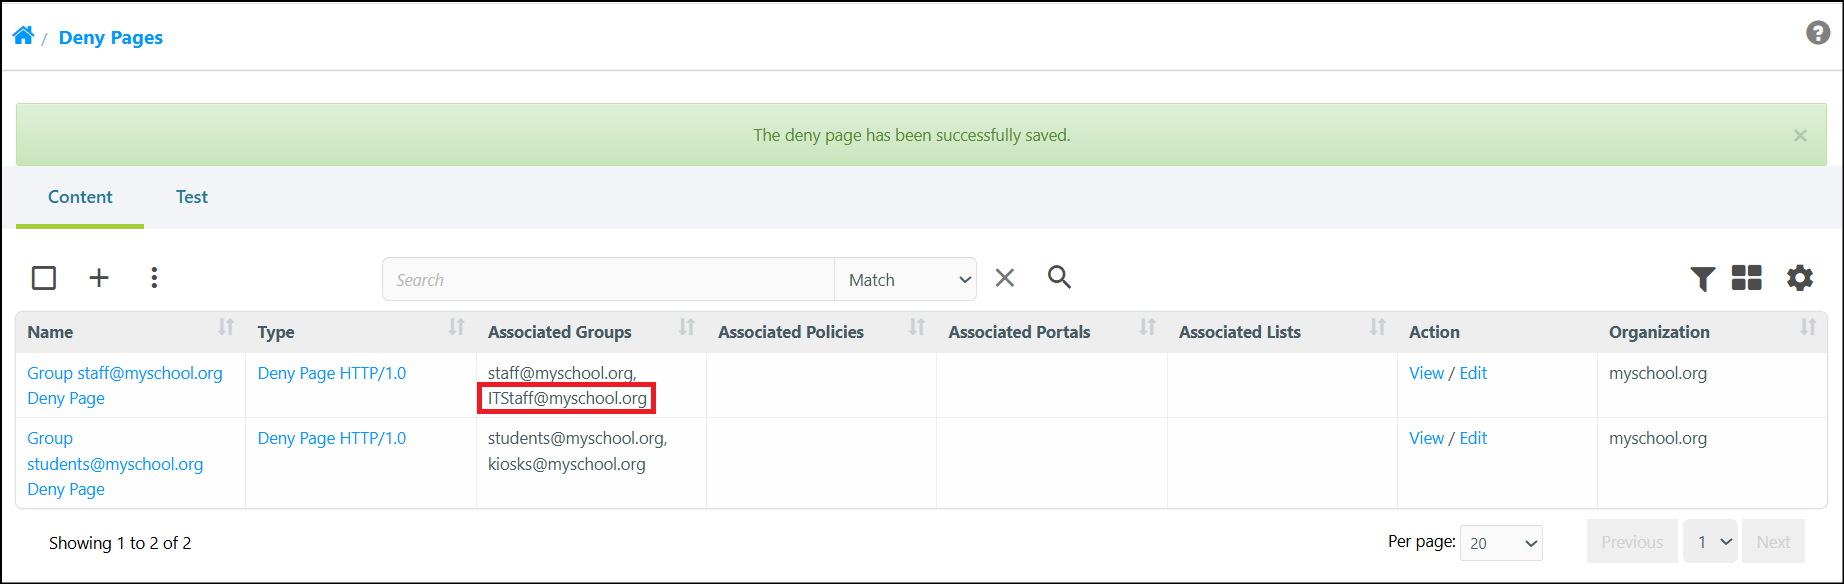
The 'Success' message displays and you are returned to the Deny Pages window, where we can see our Group has been linked.
Prioritizing Group and Policy Deny Pages
Prioritizing Group and Policy Deny Pages
You may need to prioritize your Group Deny Page so that it overrides the default deny pages.
Please note that only Admin Accounts with the necessary Permissions can modify Deny Page Priorities.
-
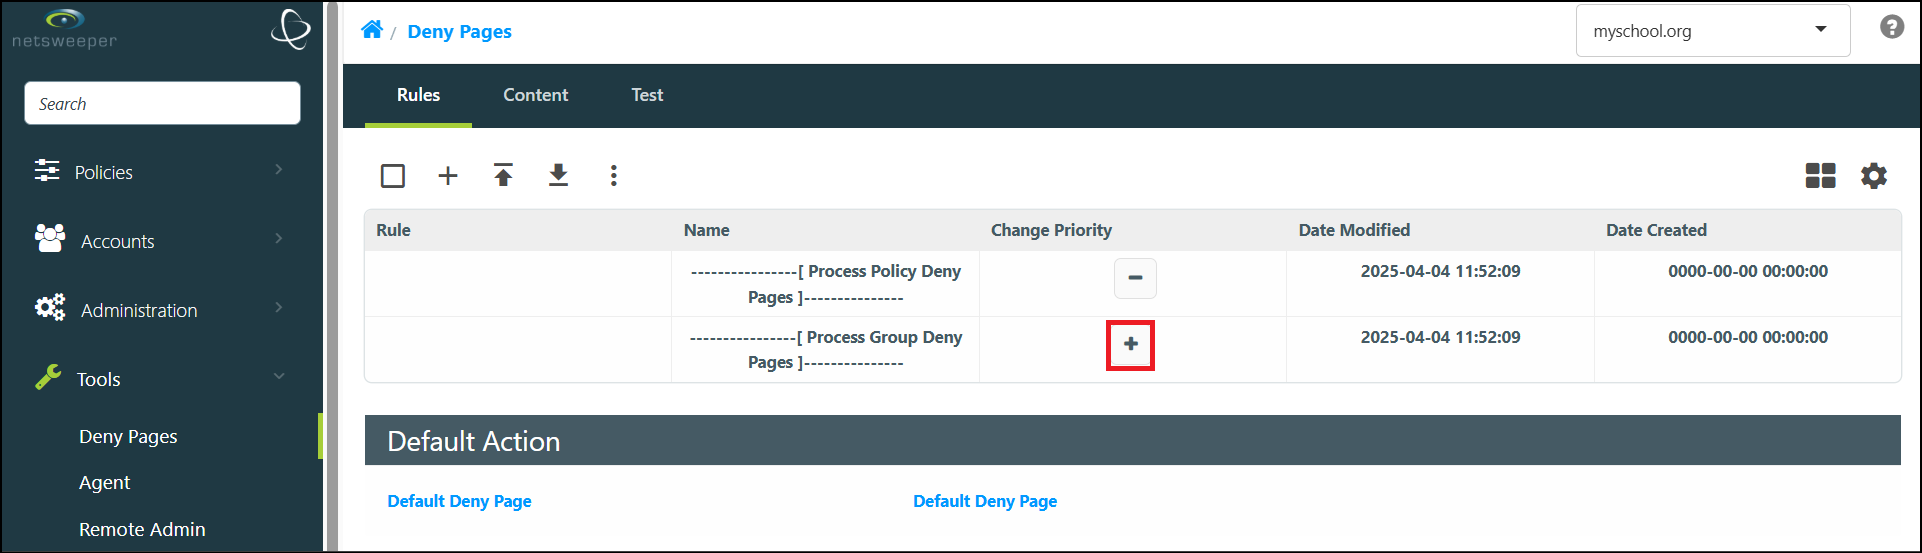
Navigate to Tools > Deny Pages and select the Rules tab.
-
To prioritize Group Deny Pages above Policy Deny Pages, select the 'Plus' (+) icon beside the ‘Process Group Deny Pages’ row.
-
The priority is changed.
Best practice is to confirm the expected Deny Page is being served with the Trace Request tool.
Additional Deny Page Information
For more information on Netsweeper Deny Pages, please refer to the Deny Pages section of our documentation.