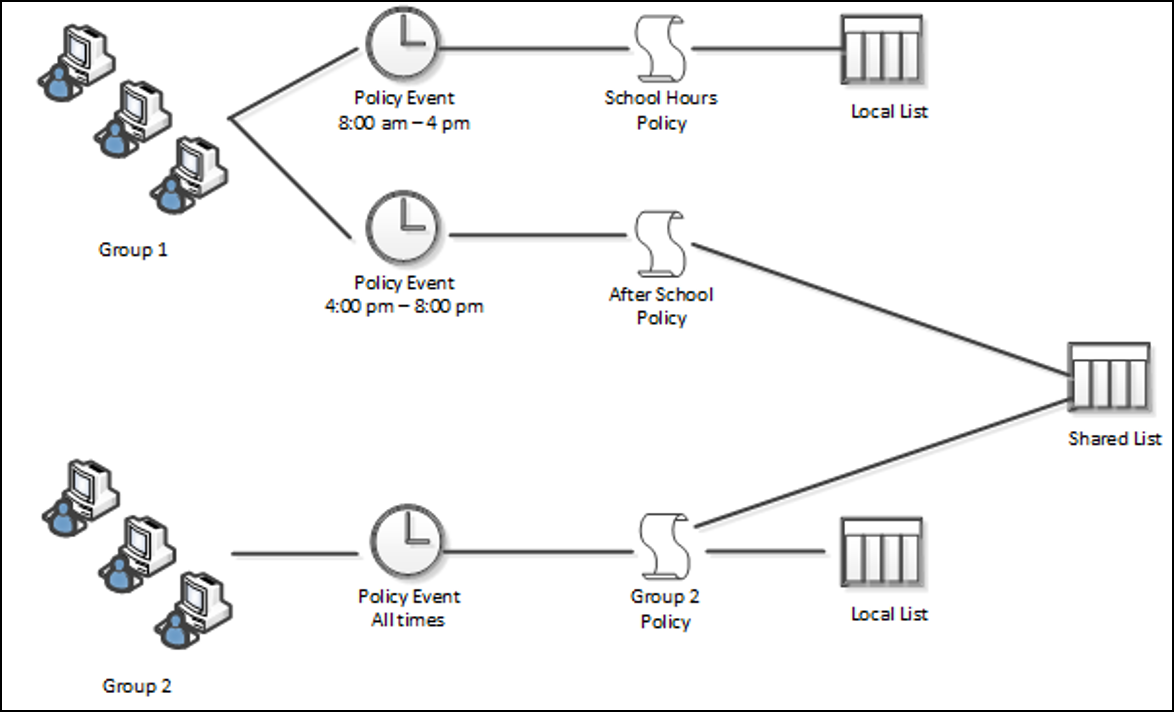
Shared Lists can be created in the 'Lists' window, List Search, the List Migration window, or they can be converted from a Local List. They can then be shared with Group or Policy Templates. Shared Lists support the same List actions as Local or System Wide Lists, such as allow, deny, assign a Category, or rewrite a whole URL. It should be noted that System Wide Lists will also appear in the Shared Lists section of the 'Lists' window, as they are Shared Lists that have been allocated the 'System Wide' processing step, (which in effect means they are shared with all users).
Some advantages of using Shared Lists:
- Shared Lists can be shared and updated across multiple Groups
- They can be used o consolidate entries from multiple Local Lists
- They can be applied to Groups and through Group and Policy Templates
- They can be assigned to SysOps for administration
Shared Lists How-To Guides
Expand the following sections for step-by-step walkthroughs on each topic.
 Creating Shared Lists
Creating a Shared List
Unlike Local Lists, Shared Lists are not created through a Group's Policy, Shared Lists are created in the 'Lists' window. They can then be applied to a Group through their Policies' URL/Keyword Shared Lists tab, or bulk assigned to multiple Policies through the List's Assignment tab. (Both discussed in later sections of this document).
Creating a Shared List in the Lists Window
-
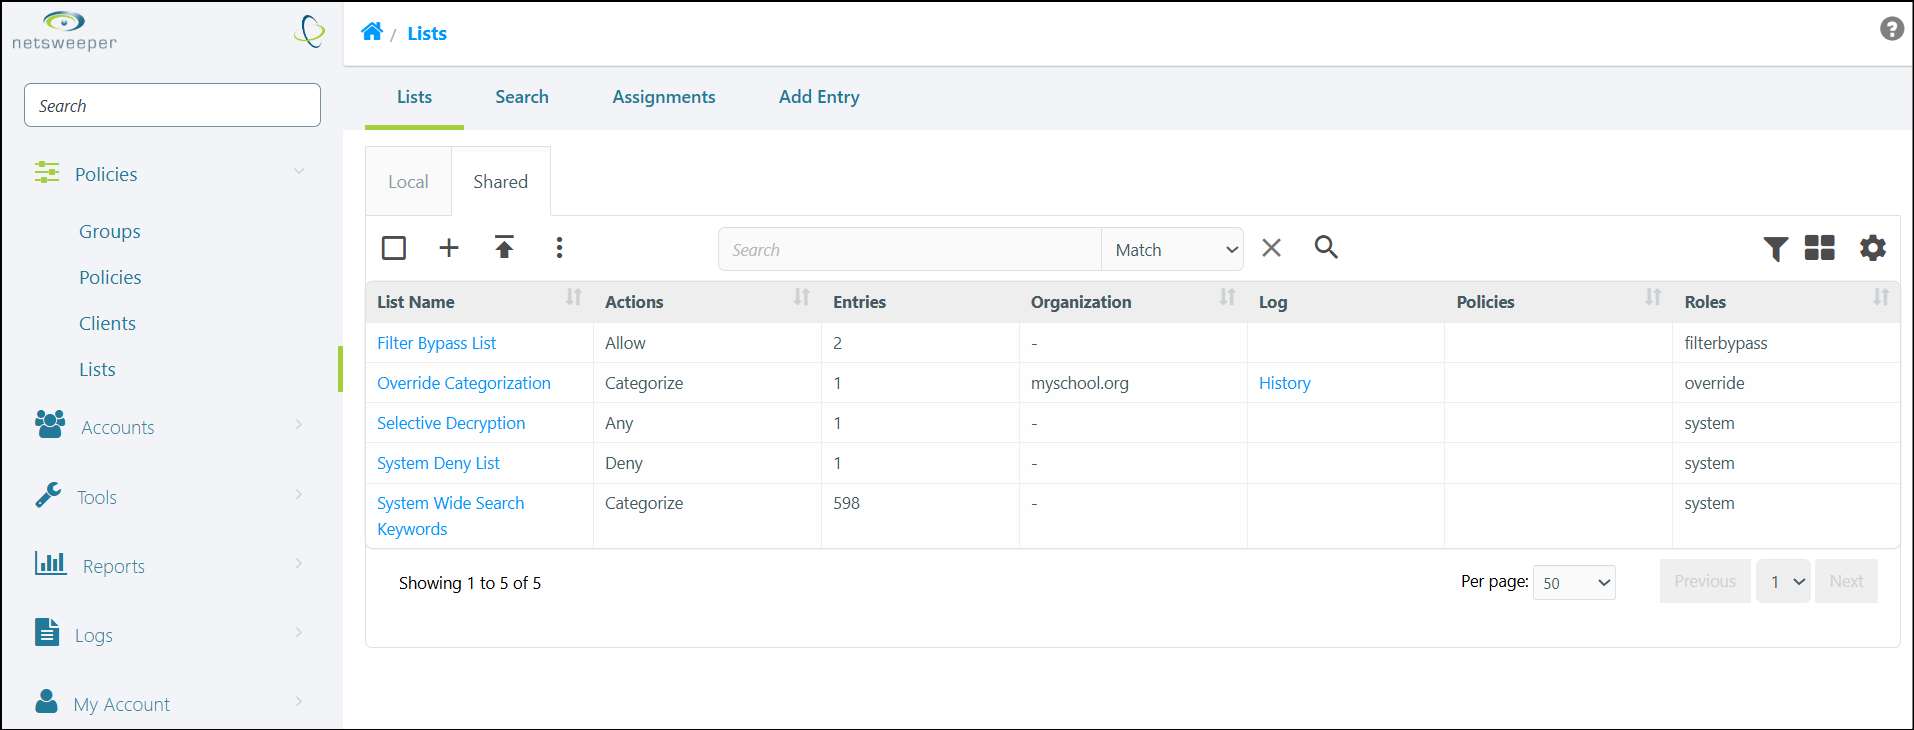
Navigate to the Policies > Lists window and ensure you are on the 'Shared' subsection of the 'Lists' tab.
-
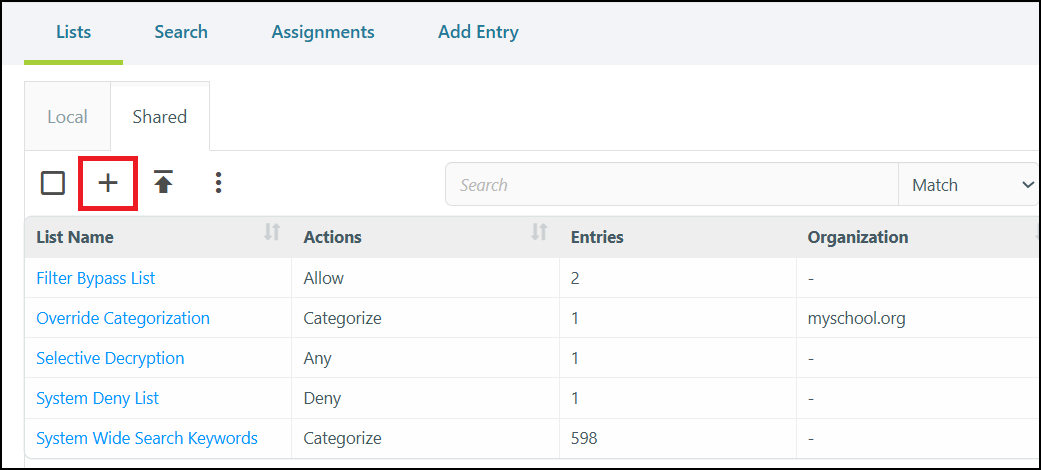
Select the 'Create' (+) icon to access the 'New List' window.
-
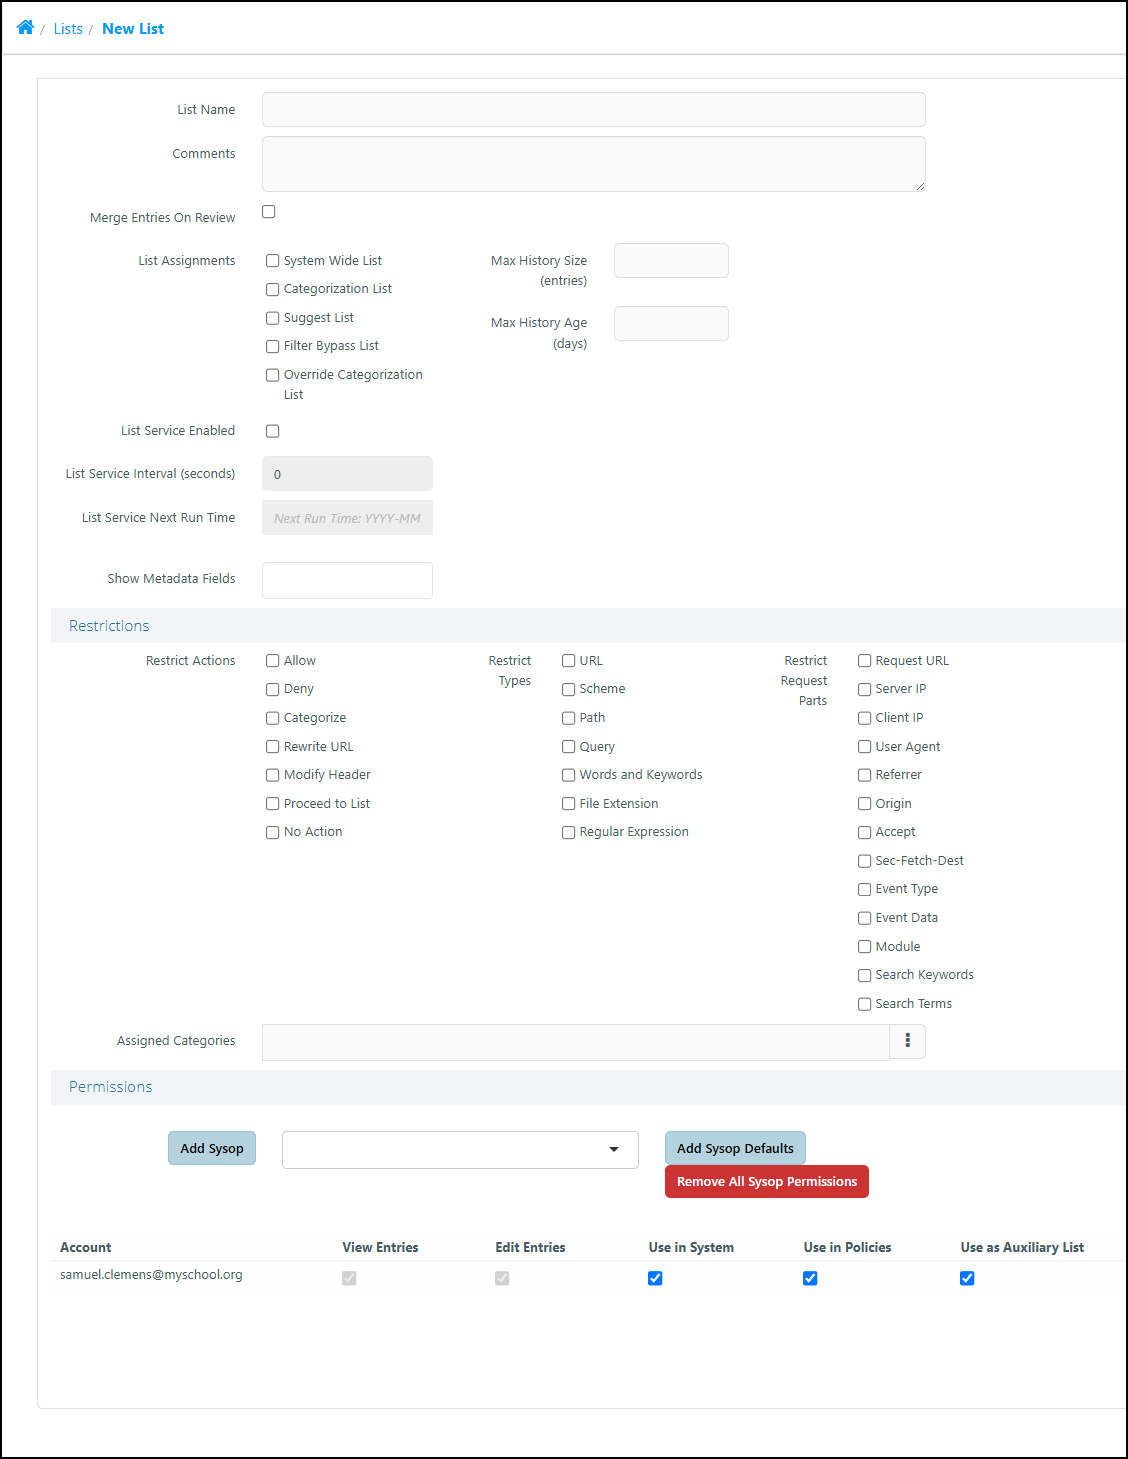
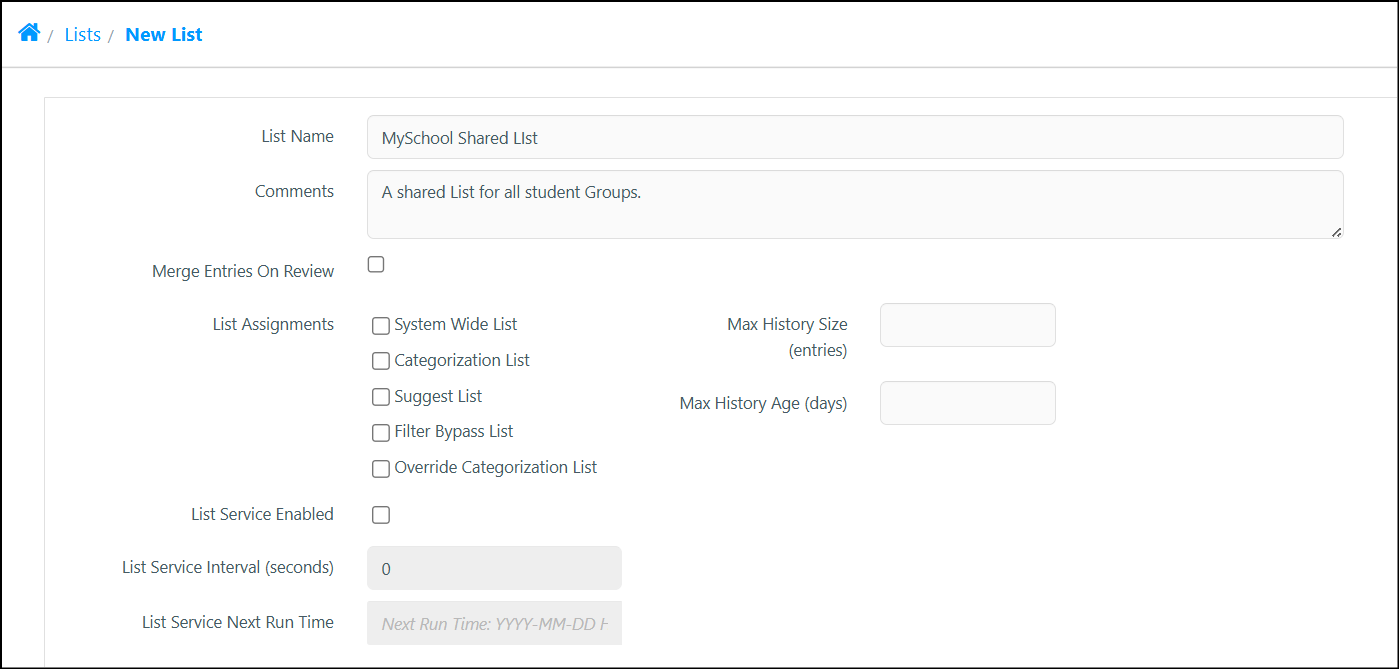
The 'New List' window consists of three sections. A 'general options' section, 'Restrictions', and 'Permissions'. (For more information, please refer to our List Creation and Management documentation).
-
Provide a name for your List in the List Name field. This is the only mandatory field in this window. You can add an optional comment, if desired.
-
We will skip over the 'List Assignments' and 'List Services' sections for this example.
-
The 'Restrictions' section consists of three parts, Restrict Actions, Restrict Types, and 'Restrict Request Parts'. If no restrictions are chosen, all options will be available when creating new entries for this List.
-
The 'Permissions' section allows you to assign Sysops to this List and configure the level of permissions they will have when interfacing with it.
-
When you are ready, select the Create List button to finish creating this Shared List.
-
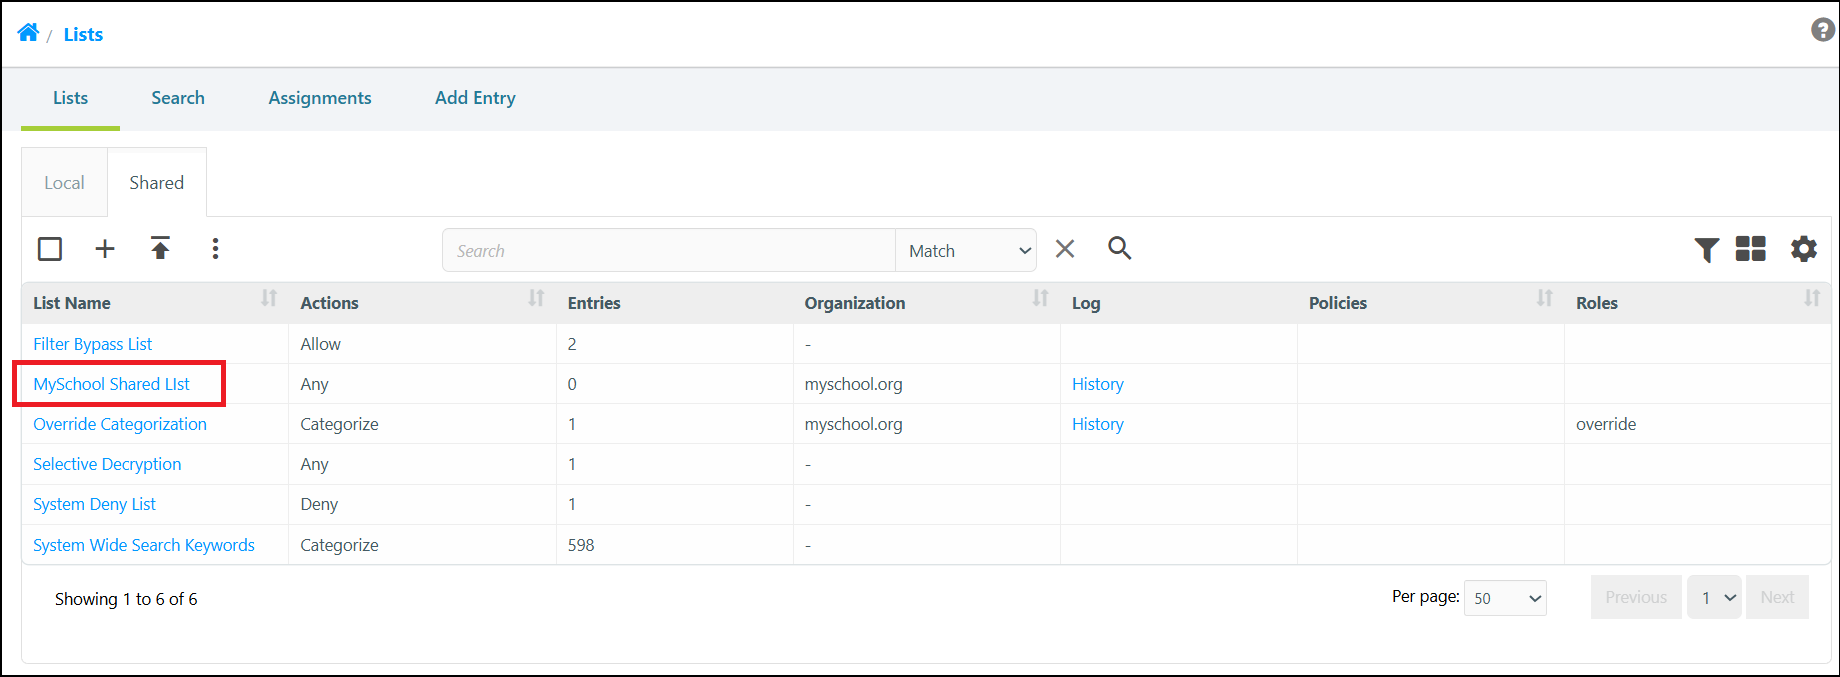
The List is added and you are returned to the 'Lists' window, where the new List appears.
The Shared List Tabs
Shared List Tabs
A Shared List contains five tabs. 'Entries', 'Settings', 'Rules', 'Alerts', and 'Policies'.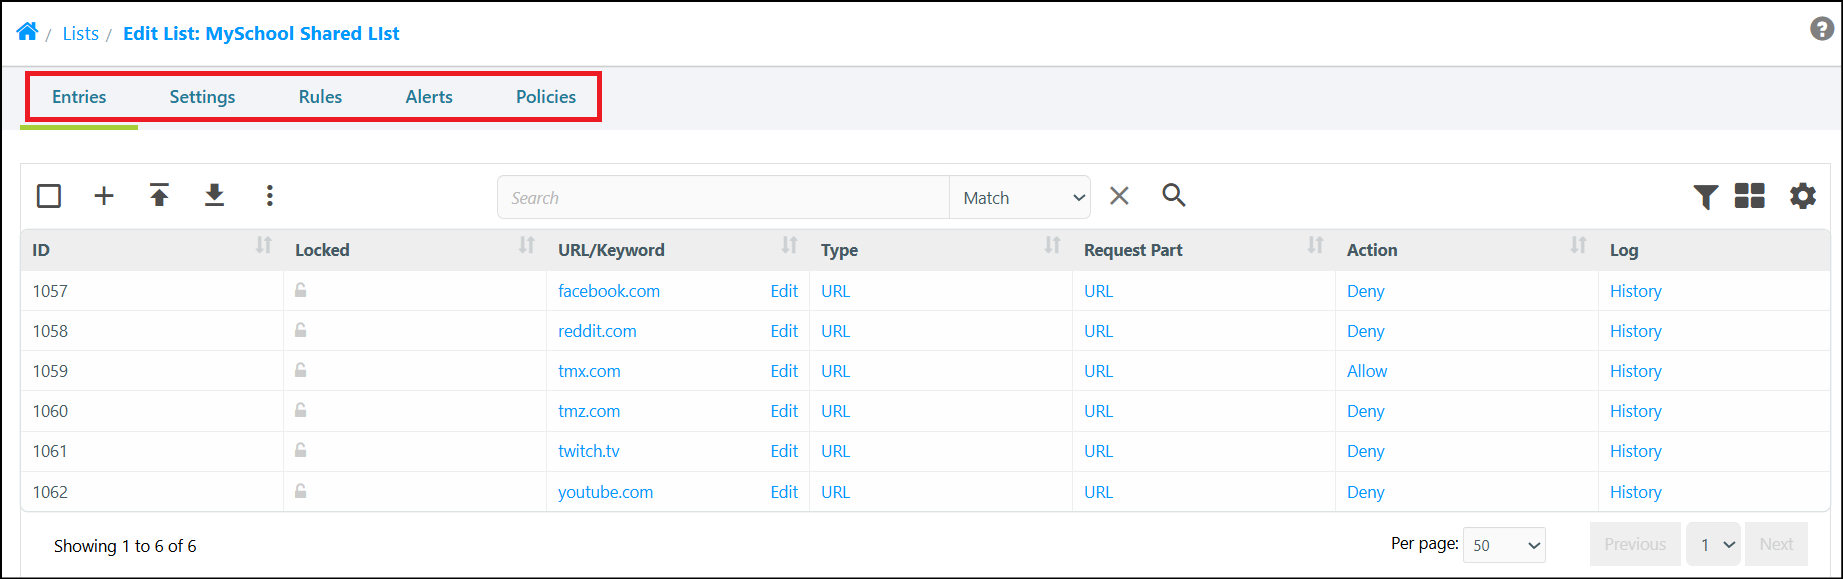
-
The Entries tab is where you add and manage the List's entries.
-
The'Settings tab allows you to manage and modify the options from the 'New List' window.
-
The Rules tab allows you to create and manage List Suggestion Rules.
-
The Alerts tab allows you to the List for Alert Processing.
-
The Policies tab allows you to bulk-assign this List to your available Group Policies.
Assigning a Shared List
Assigning a Shared List to a Group Policy
-
Navigate to Policies > Groups > List and choose the Group you wish to assign the List to.
-
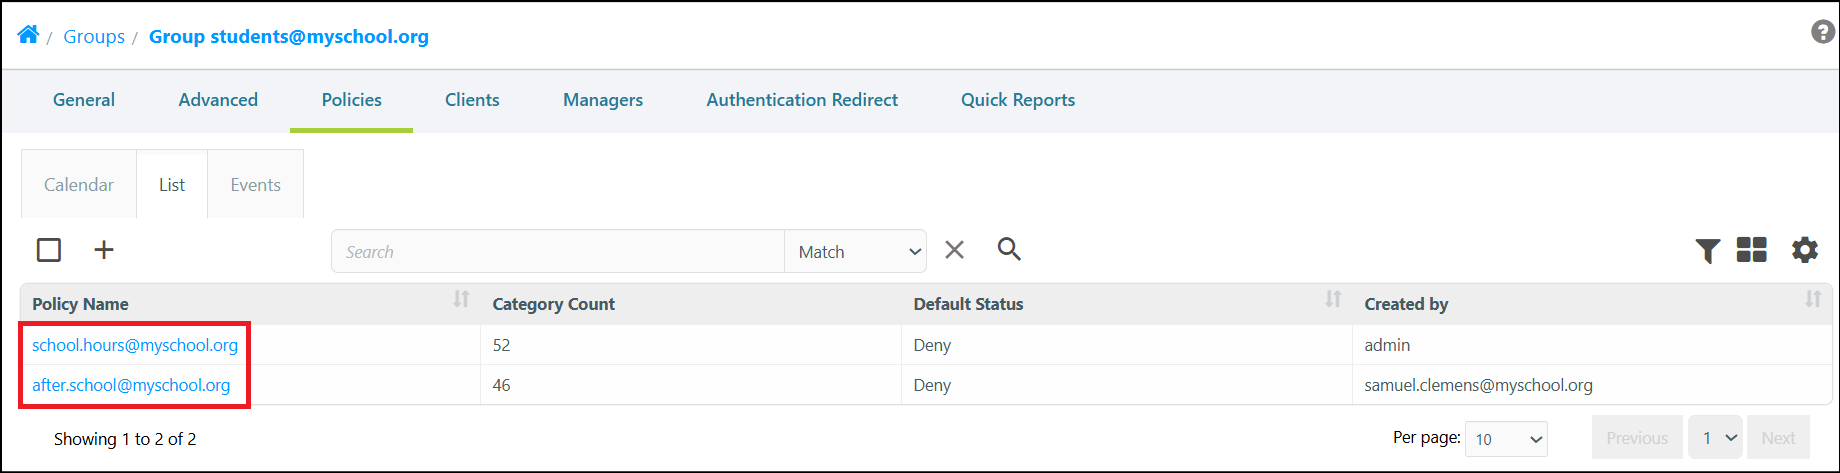
Navigate to that Group's Policies tab and List subsection. Select the desired Policy. (Many Groups only have one Policy).
-
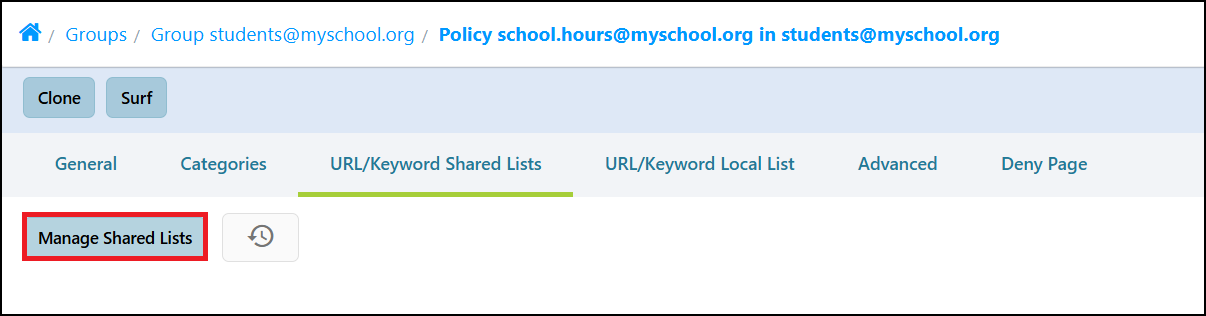
Next, navigate to the Policies' URL/Keyword Shared List tab and select the Manage Shared Lists button.
-
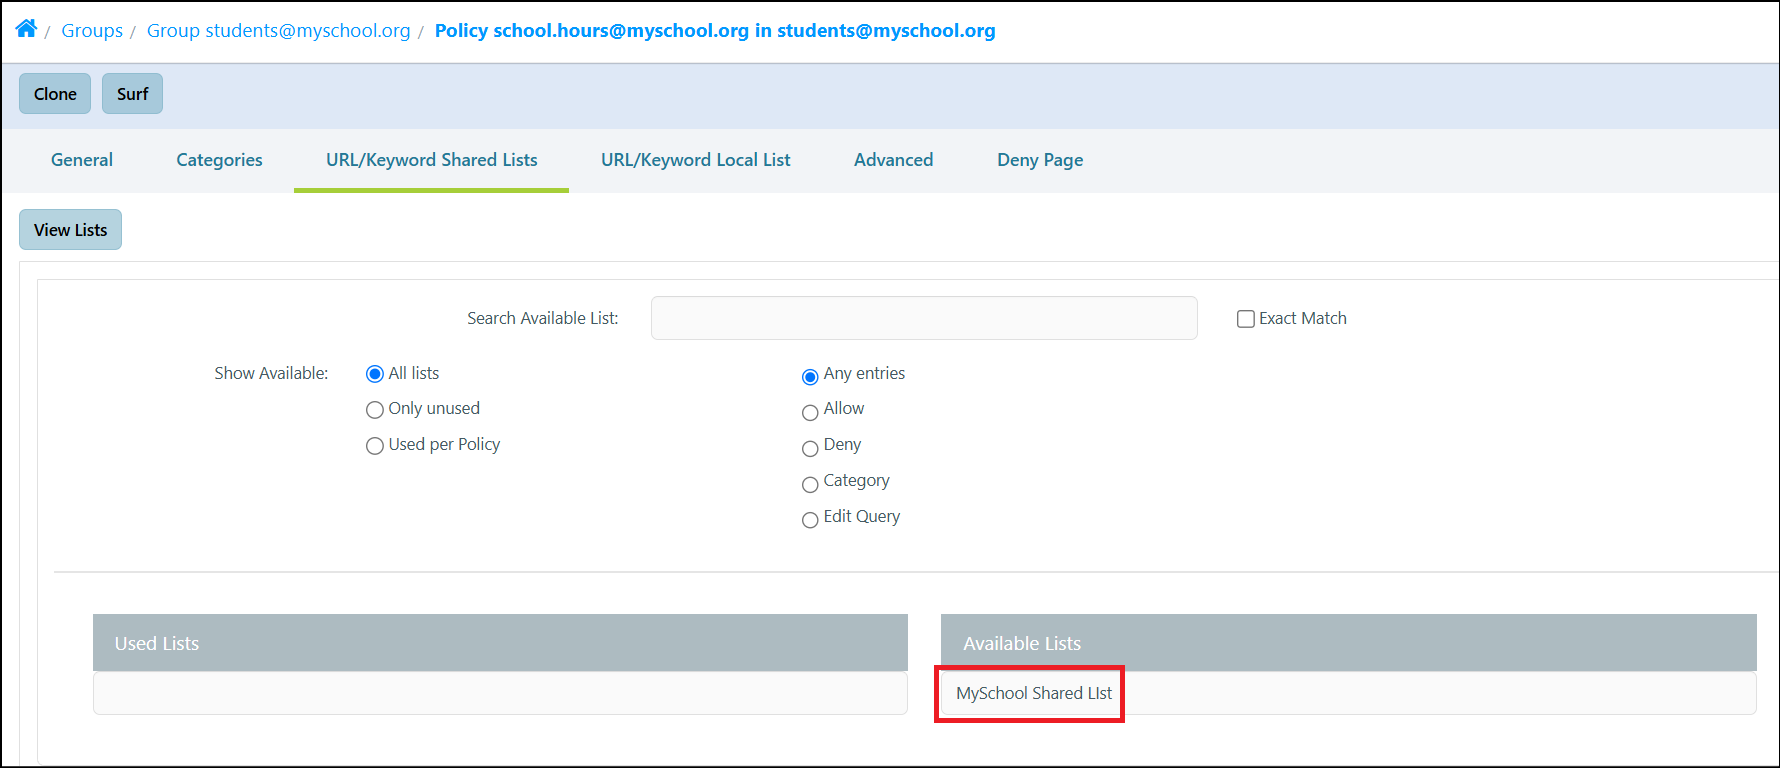
Choose the desired List(s) from the 'Available Lists' column.
-
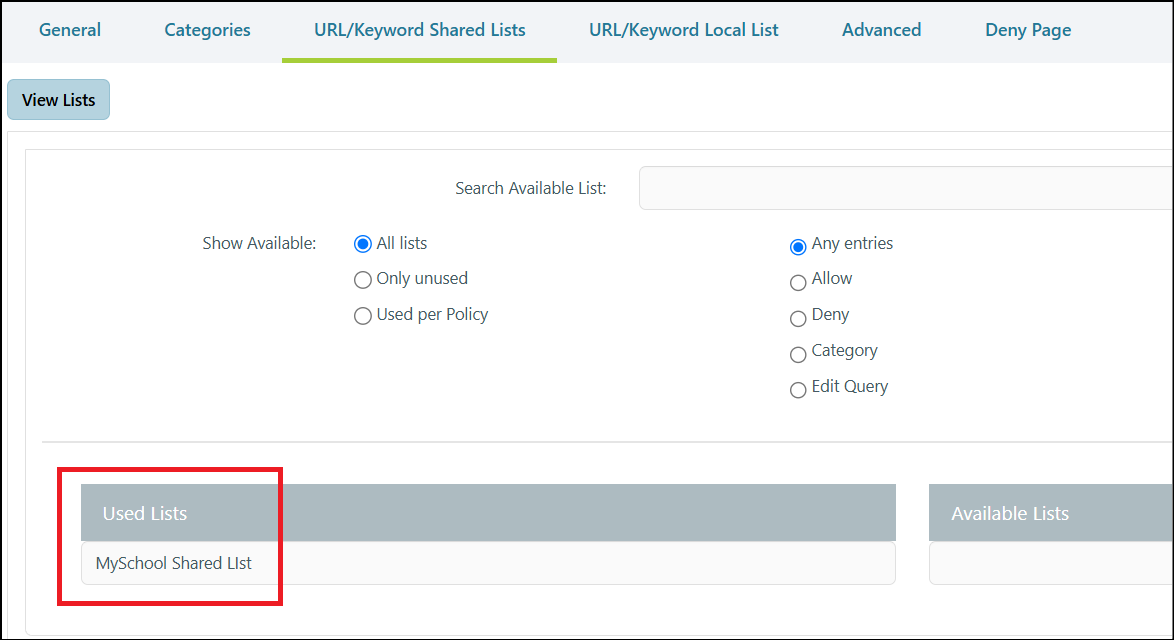
Selected Lists are moved to the 'Used Lists' column and are automatically assigned to this Group's Policy.
-
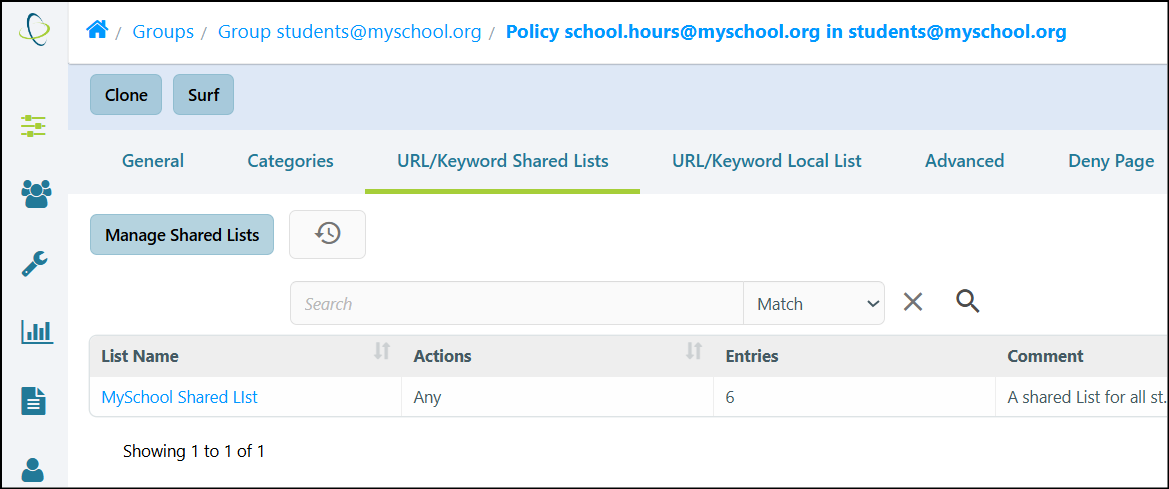
You can select the View Lists button to view and manage Lists that have been shared with this Policy.
Bulk Assigning Lists
Bulk Assigning Shared Lists to Policies
-
Navigate to Policies > Lists, ensure you are on the List tab and the Shared subsection.
-
Choose the List you wish to bulk assign and select its Policies tab.
-
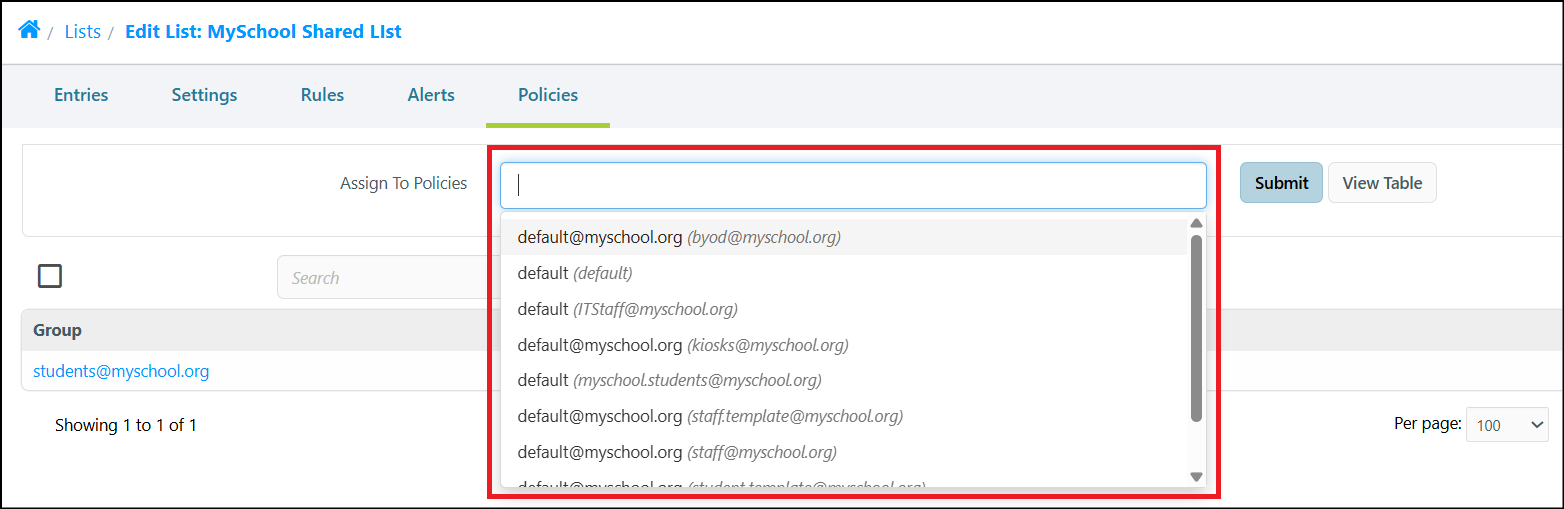
Selecting the Assign to Policies field will open a drop-down list of available Policies (with their respective Groups in brackets).
-
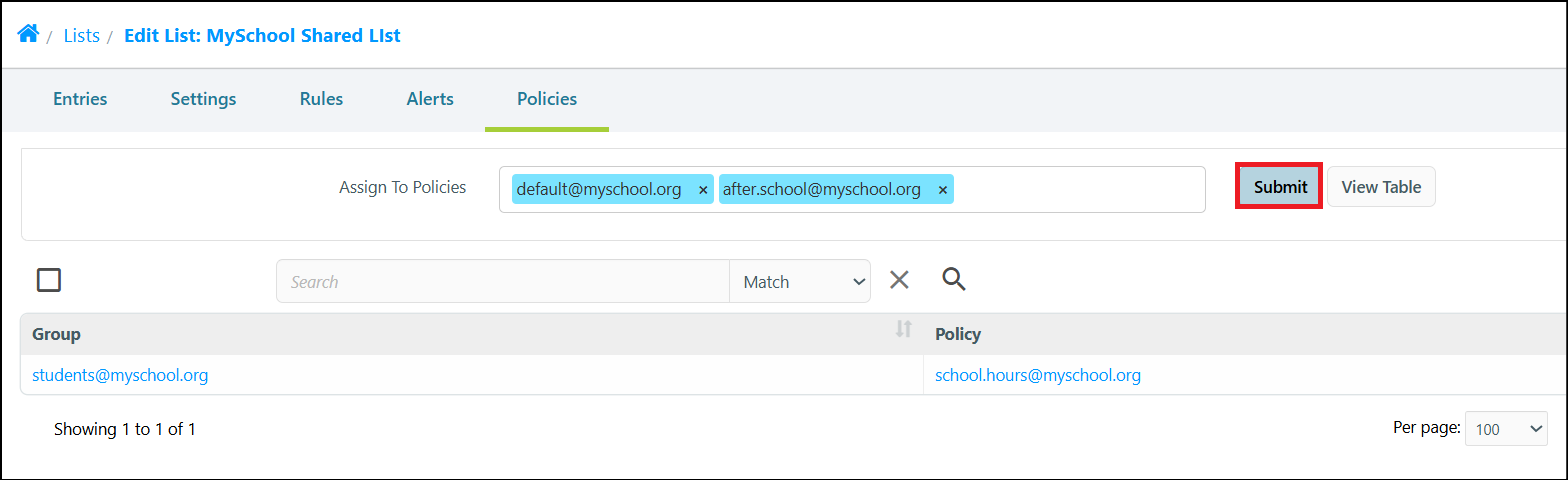
Choose any desired Policies from the list and then select the Submit button.
-
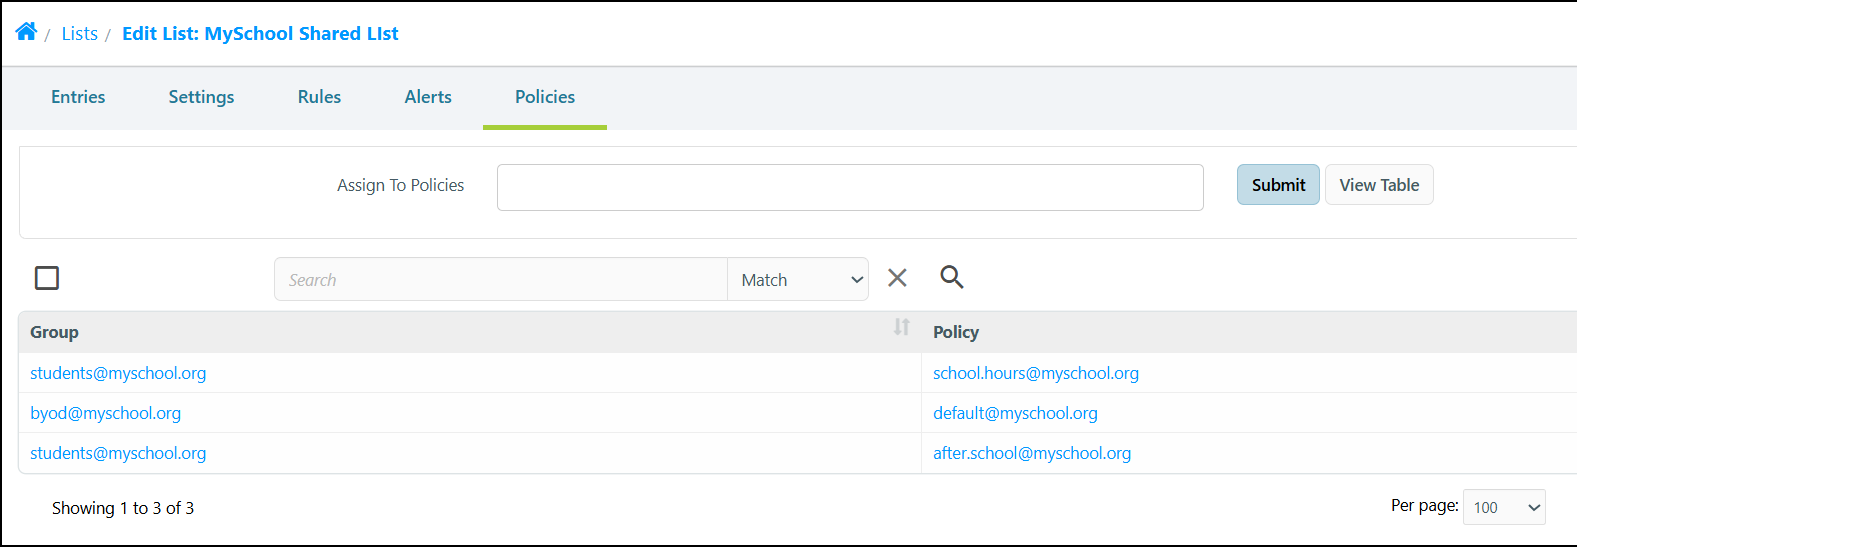
The List is now assigned to all selected Policies.
Shared Lists and WebAdmin Templates
Shared Lists and WebAdmin Templates
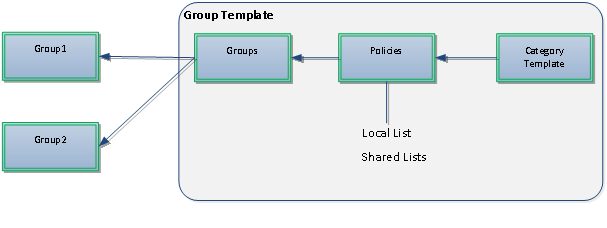
WebAdmin Templates can be assigned to multiple Groups. A WebAdmin Template contains a Policy Template and a Policy Template contains Local and Shared Lists. Thus, any Shared Lists are copied over to all Groups where the Template is applied.
Adding Entries to a Shared List that Exists in a Template
When a new entry is added to a Shared Lists, the Shared List is automatically updated in all Groups were the Template is applied. The WebAdmin Template does not have to be re-applied to the Groups. It should be noted that if a new Shared List is added to a WebAdmin Template, it will have to be re-applied for all Groups for that new Shared List to be applied.
Shared Lists Policy Processing Order
How Shared List are Checked
Shared List Policy Processing Order
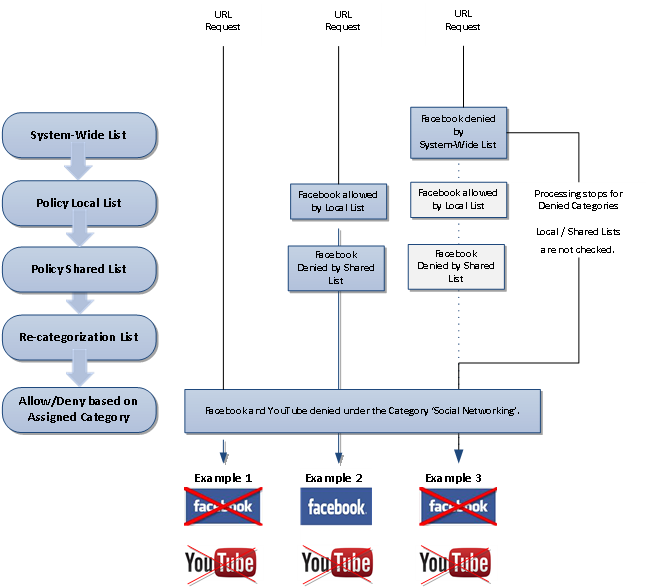
Shared Lists perform the same actions (allow, deny, assign a category, rewrite the whole URL) as Local or System Wide Lists. However, it is important to note that when Lists are checked, the System Wide Lists have a higher priority than the Local Lists and the Local Lists have a higher priority that the Shared Lists. This is called 'Policy Processing Order'.
It should also be noted that when a Category or URL is denied by a rule in the System Wide List Processing Order, the Policy Processing stops and Local and Shared Lists processing is ignored. Once the Policy Service finds a rule that matches, it will apply that rule and move on.
Policy Processing Example
In this example, when a request is made, you can see in Example 1 that Facebook and YouTube are denied by the Category 'Social Networking'. In Example 2, Facebook is denied by the Shared List but allowed by the Group Local List and therefore it allowed for that Group. In Example 3, Facebook is still allowed by the Group's Local List but denied by the System-Wide List and Facebook is now denied.
For more information on this topic, please refer to our How Lists are Checked documentation