Creating a Policy Event
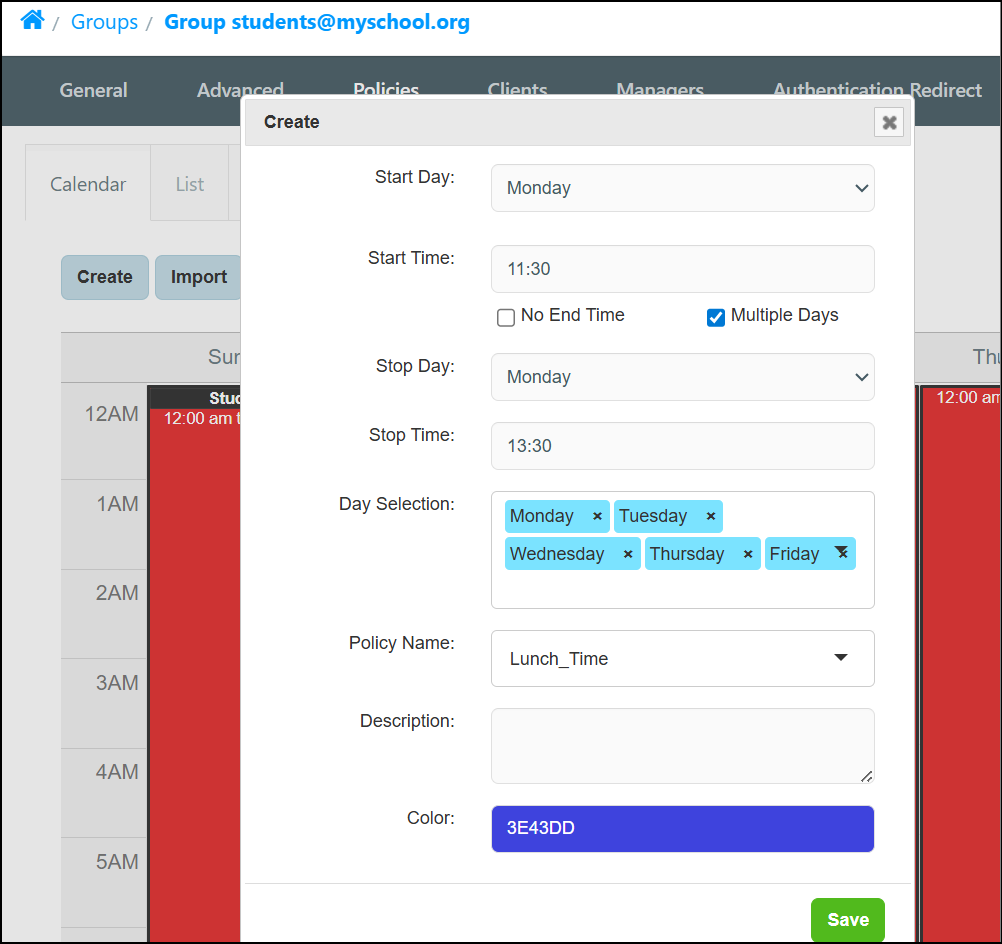
- To create a basic Policy Event, navigate to the Policies tab for the desired Group, choose the Calendar subsection and select the Create button to open the ‘Create’ window. In this scenario, we will add a single Policy Event for the lunch period at a school.
- In the window, choose Monday as the Start Day and the Stop Day. Enter the Start Time as 11:30 and the Stop Time as 13:30.
- There is no Lunch_Hour Policy yet, so create it in the window by typing the name and the description. Apply a color and select the Save button.
Please note that Policy names can only contain alpha-numeric characters with no spaces and colors are not assigned to the Policy Event but to the Policy.
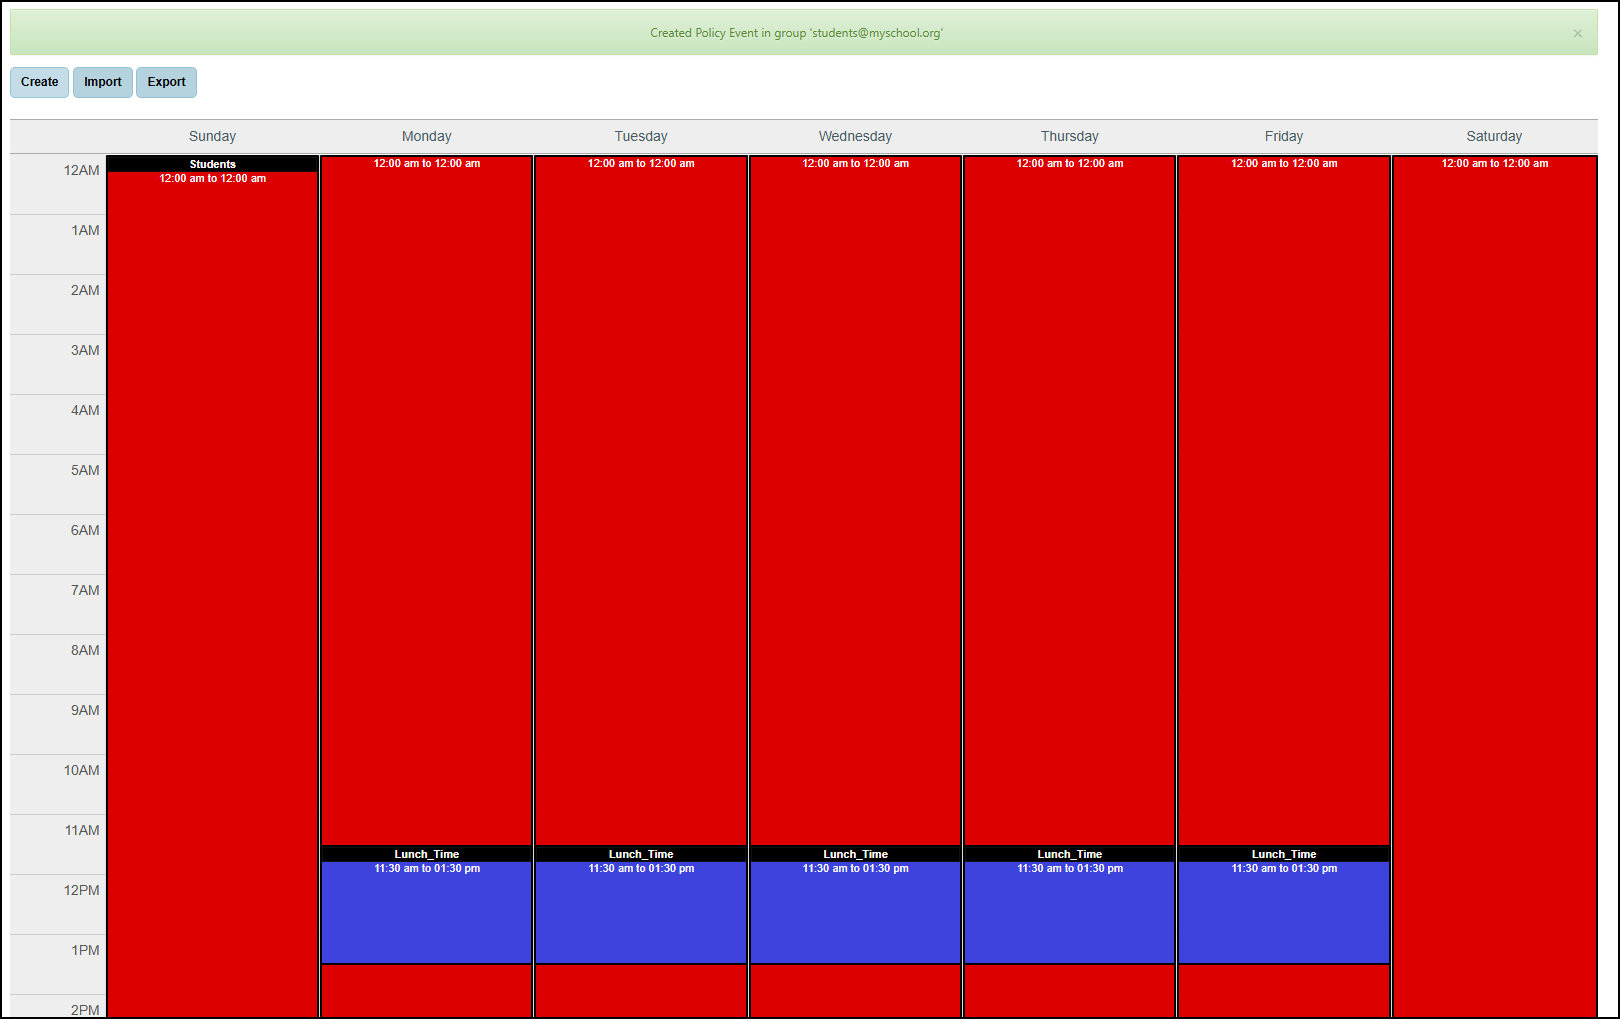
- The Lunch_Time Policy Event displays.
About Dragging and Dropping Policy Events
You can drag a Policy Event by the Title. If the Policy Event spans multiple days, you cannot drag it down. You can only drag it left, right or up.
Keystrokes for Policy Events
- Pressing the Enter key when on any of the fields, excluding Description, will save the Policy Event.
- Pressing the Del key with Start Day / Stop Day or after either check box check, will delete the Policy Event.
- Pressing Esc will close the add/edit Policy Event pop-up.