Flexible Logging Use Case
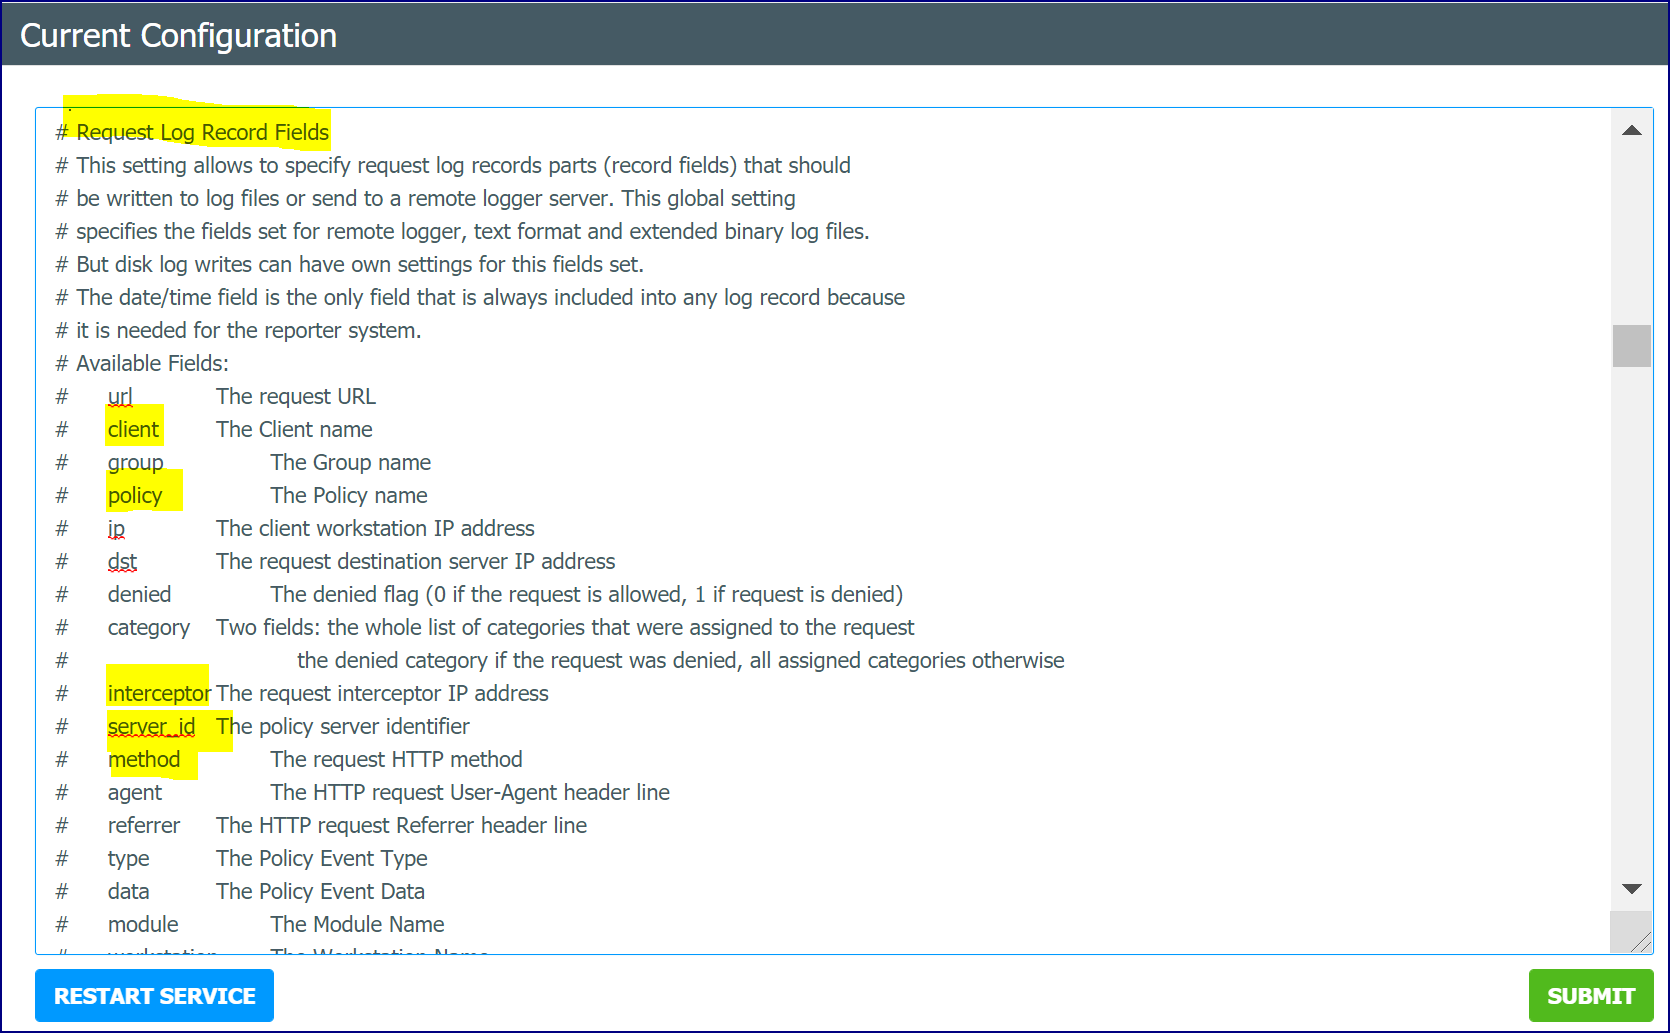
Flexible logging allows you to specify request log record fields that should be written to log files or sent to a remote logger server. The 'Request Log Record Fields' section found in Policy Server Settings (nsd) allows you to specify request log fields. This global setting specifies the fields set for remote logger, text format and extended binary log files.
Available fields are:
-
url
-
client
-
group
-
policy
-
ip
-
dst
-
denied
-
category
-
interceptor
-
server_id
-
method
-
agent
-
referrer
-
type
-
data
-
module
-
workstation
-
screenshot
-
allcategories
-
deniedcategories
For a complete list, please see the ‘Request Log Record Fields’ settings in Policy Server Settings
Setting up Policy Server
-
Go to Administration > Configuration and click the Policy Server Settings button.
-
Scroll down to the’ Request Log Record Fields’ section.
-
We are going to add the client, policy, interceptor, and server_id, to our fields so add this line under the logger_fields section.
-
Add
logger_fields interceptor server_id client policy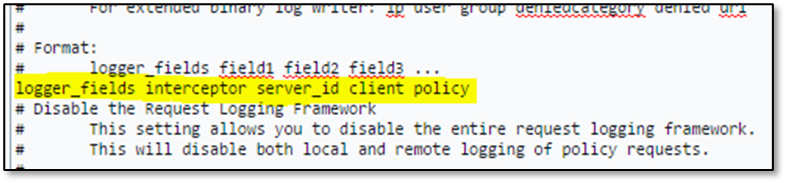
-
Click Submit to save the changes and return to the System Configuration window.
-
Click the Restart Policy Server button.
View Request Log Archives
Generate requests for all the Groups.
-
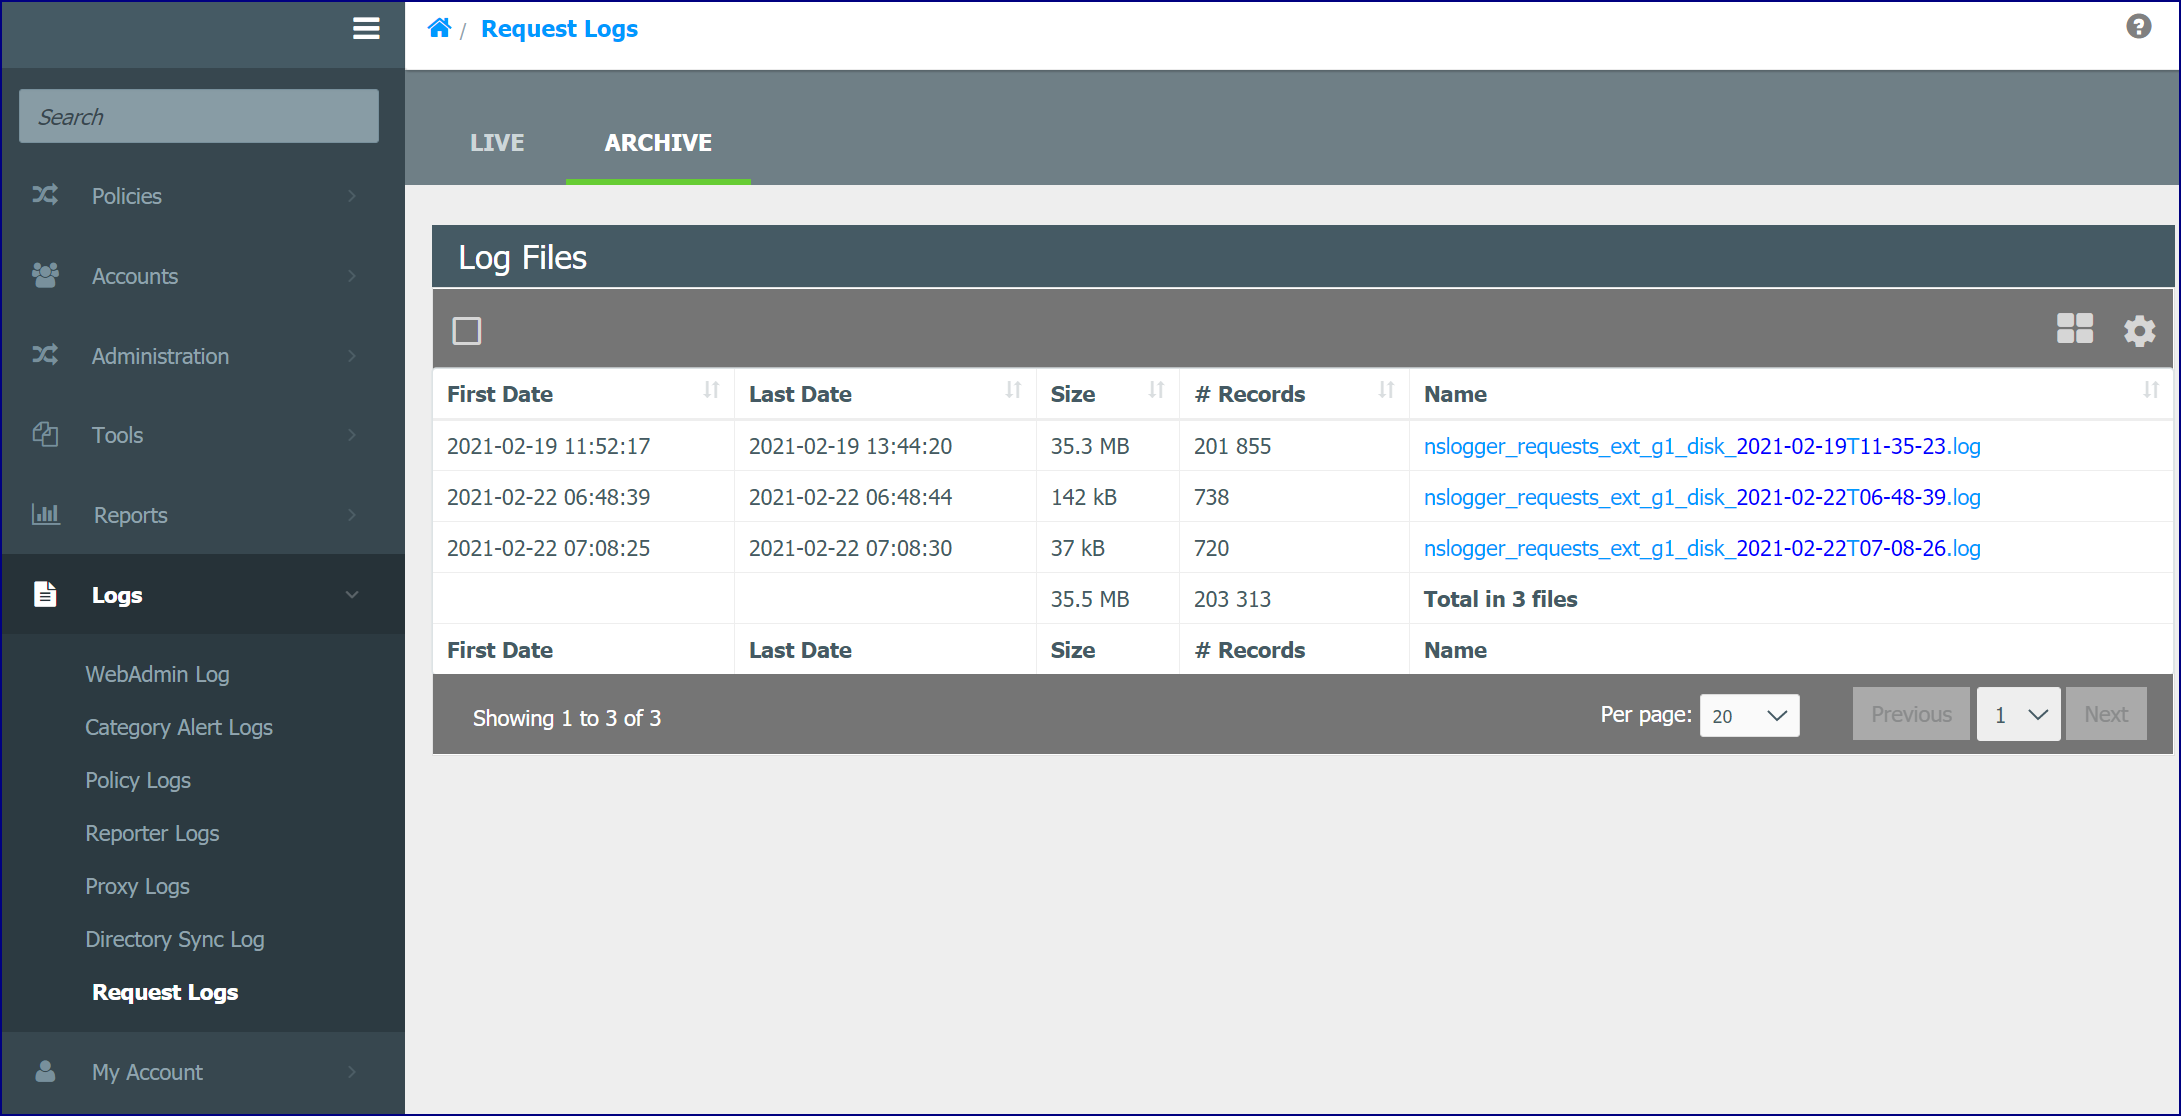
Go to Logs > Request Logs and click the Archives tab.
-
Click on the Archive you wish to view
-
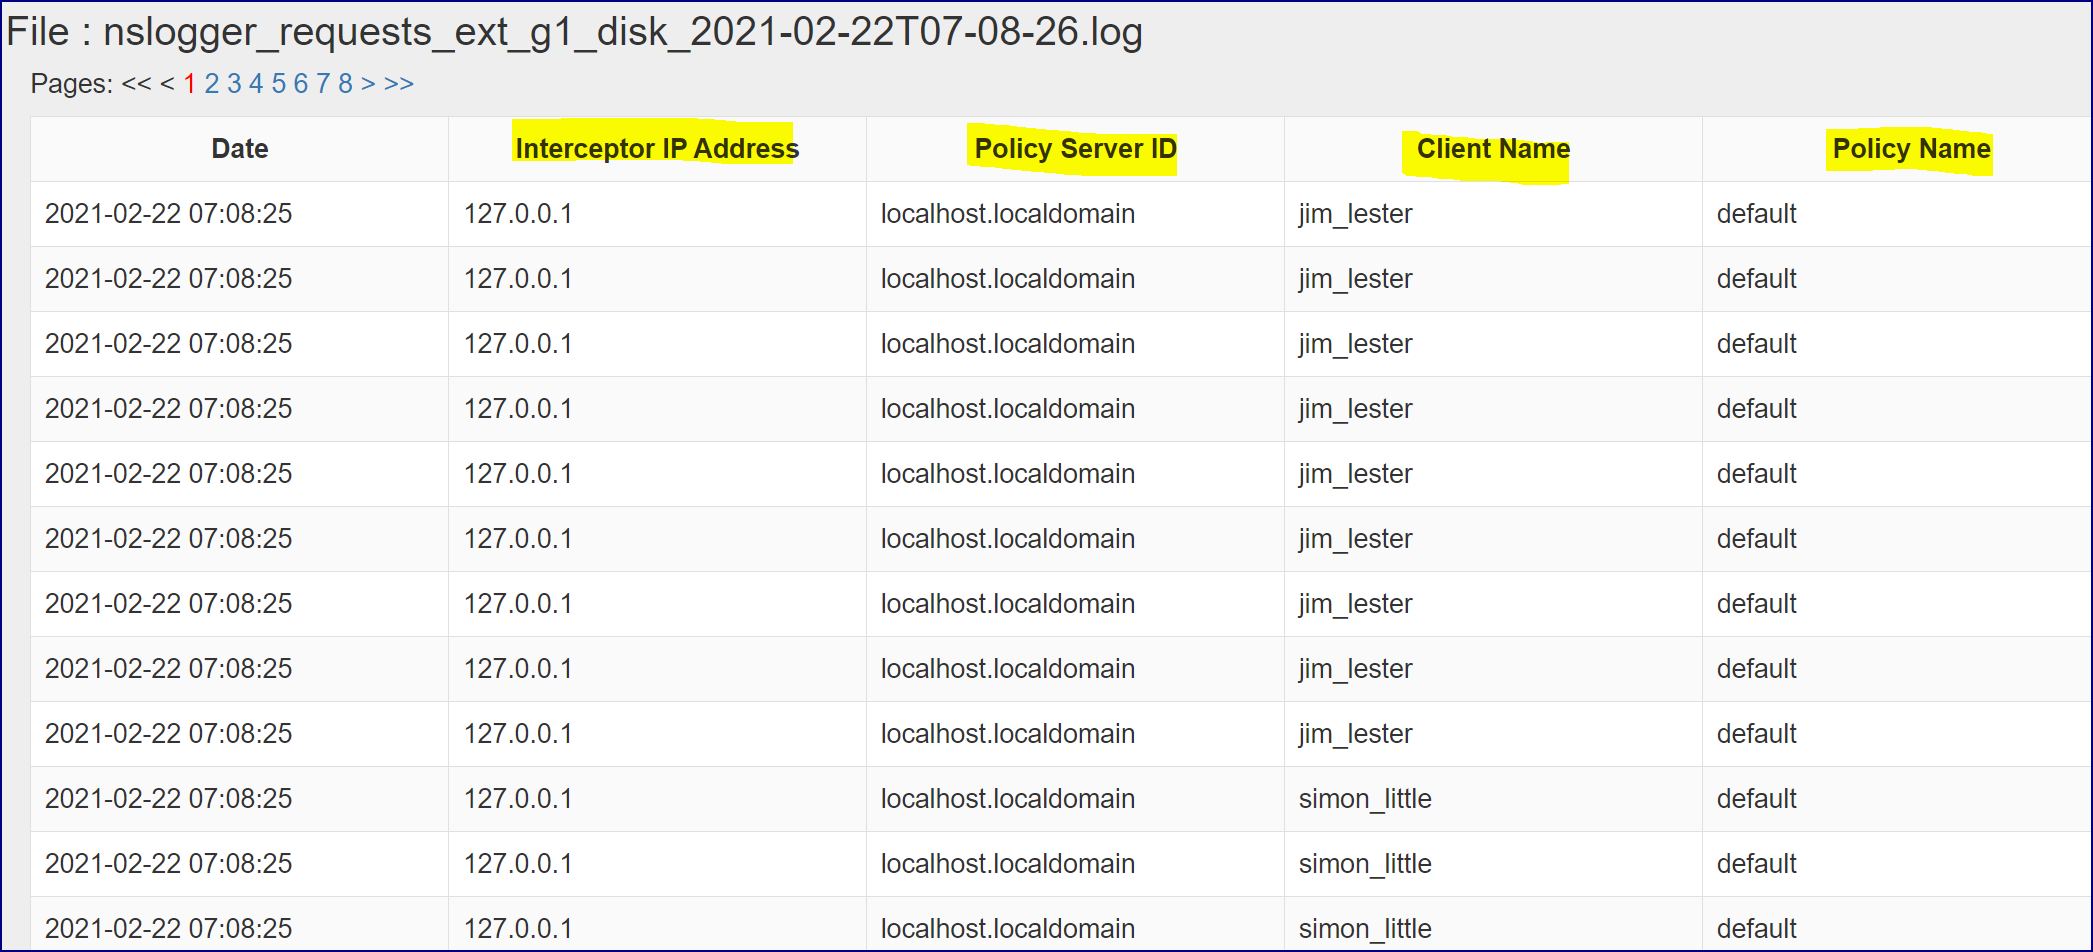
The file displays with the added fields.
Running a Report with Log File Name Tag
If you have log files that are not segmented from earlier releases, Reports will also use these log files.
Enable Report Filter Fields
You may have to add the ‘Log File Name Tag’ to your Report through the ‘Enabled Report Filter Fields’ section of the WebAdmin Settings.

Modify Policy Server Settings
Go to Administration > Configuration and click the Policy Server Settings link.
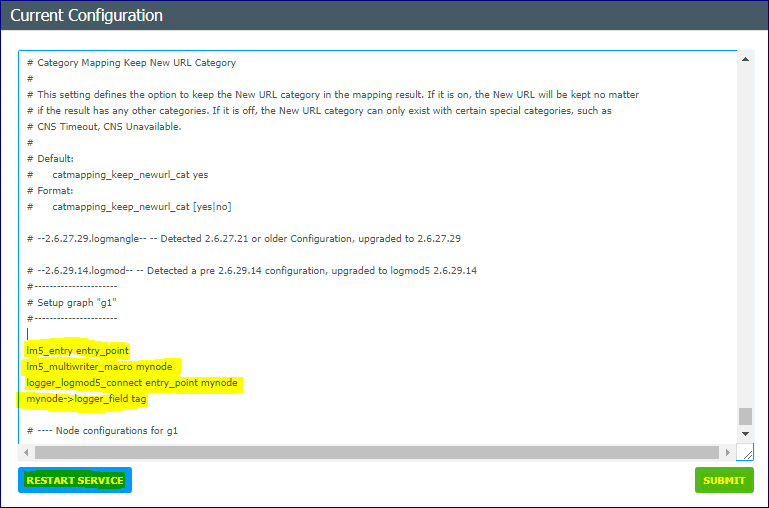
Scroll to the bottom of the page to the Setup graph “g1” section.
Comment out or remove the entries that are there and add these entries. It should be noted that the entry point in the example below is defined and the multiwriter_macro node is defined as 'mynode'. The mynode defines the logger_field as group.
lm5_entry entry_point
lm5_multiwriter_macro mynode
logger_logmod5_connect entry_point mynode
mynode->logger_field tag
Create the Custom Report
In this example Report,
-
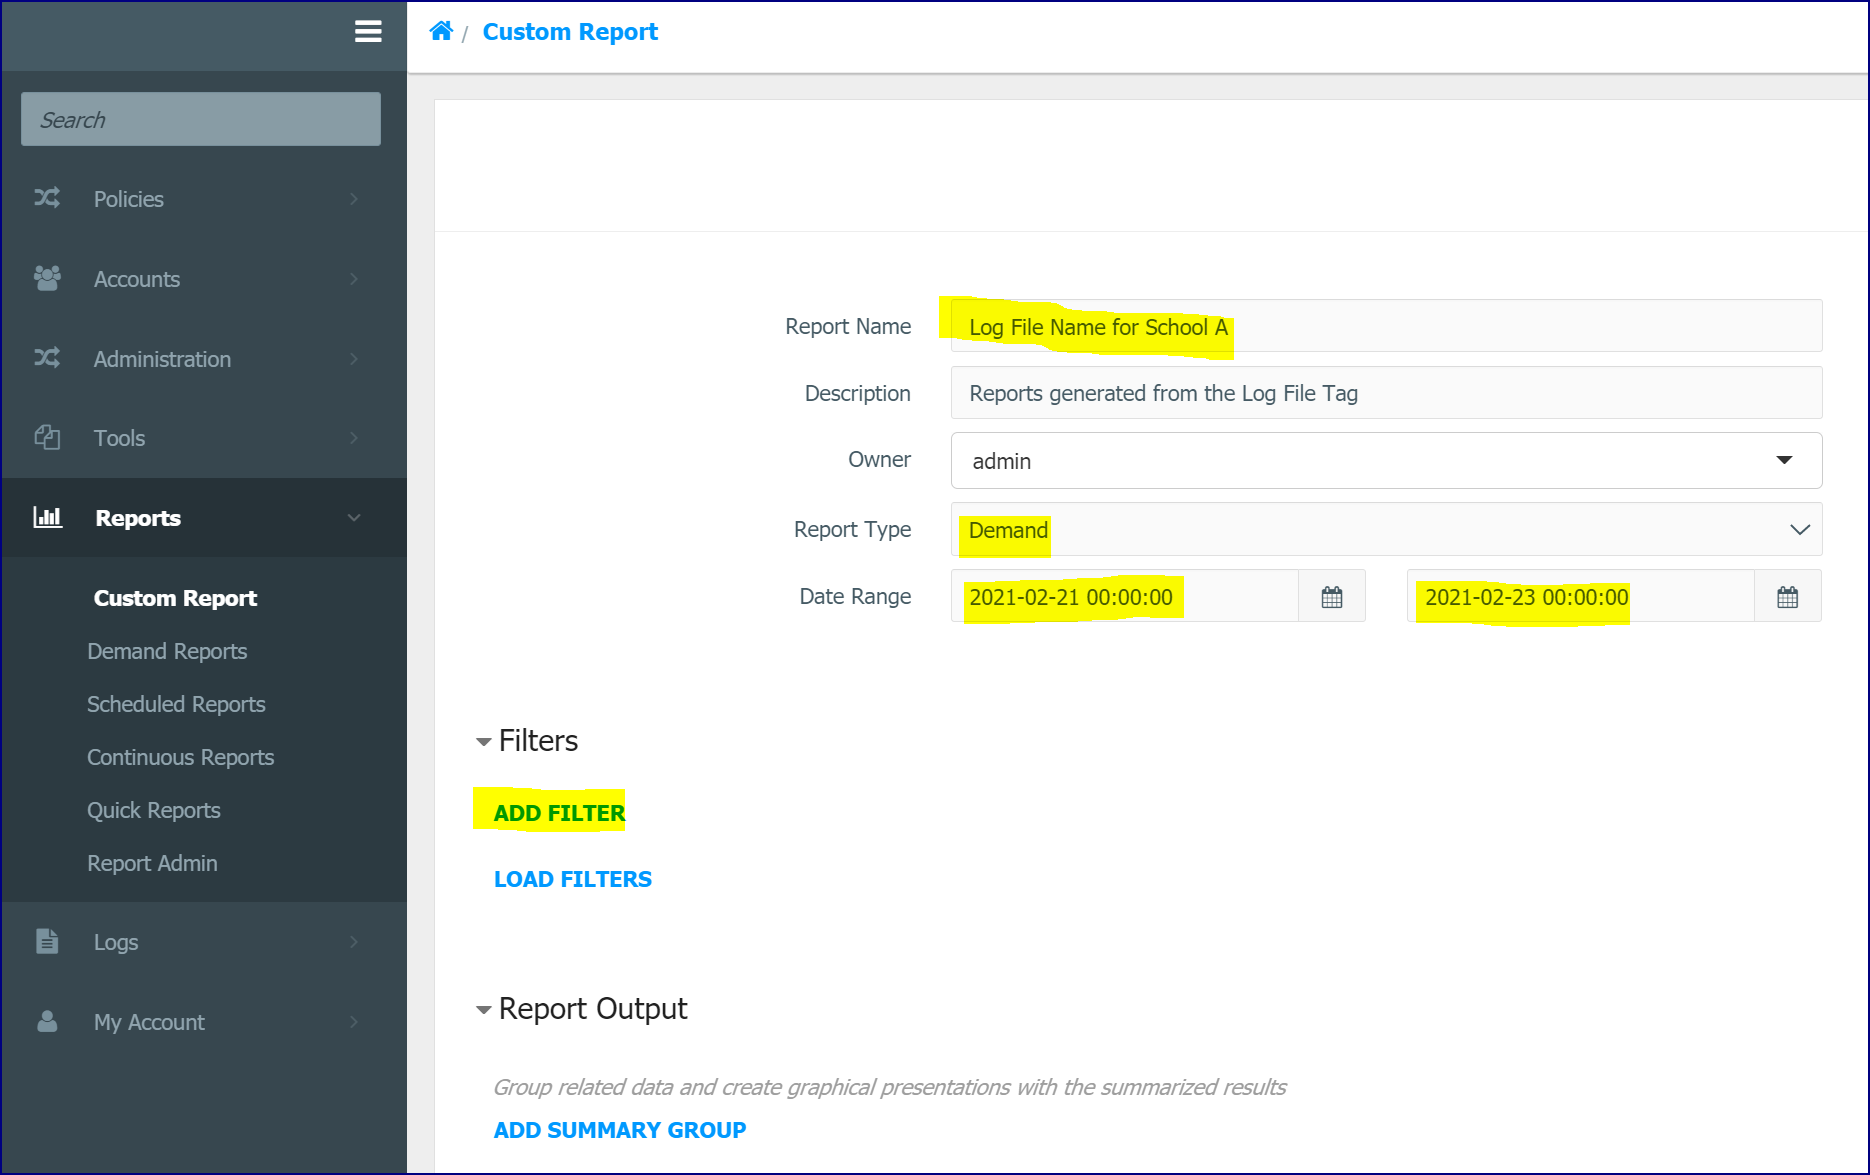
Go to Reports >Custom Report.
-
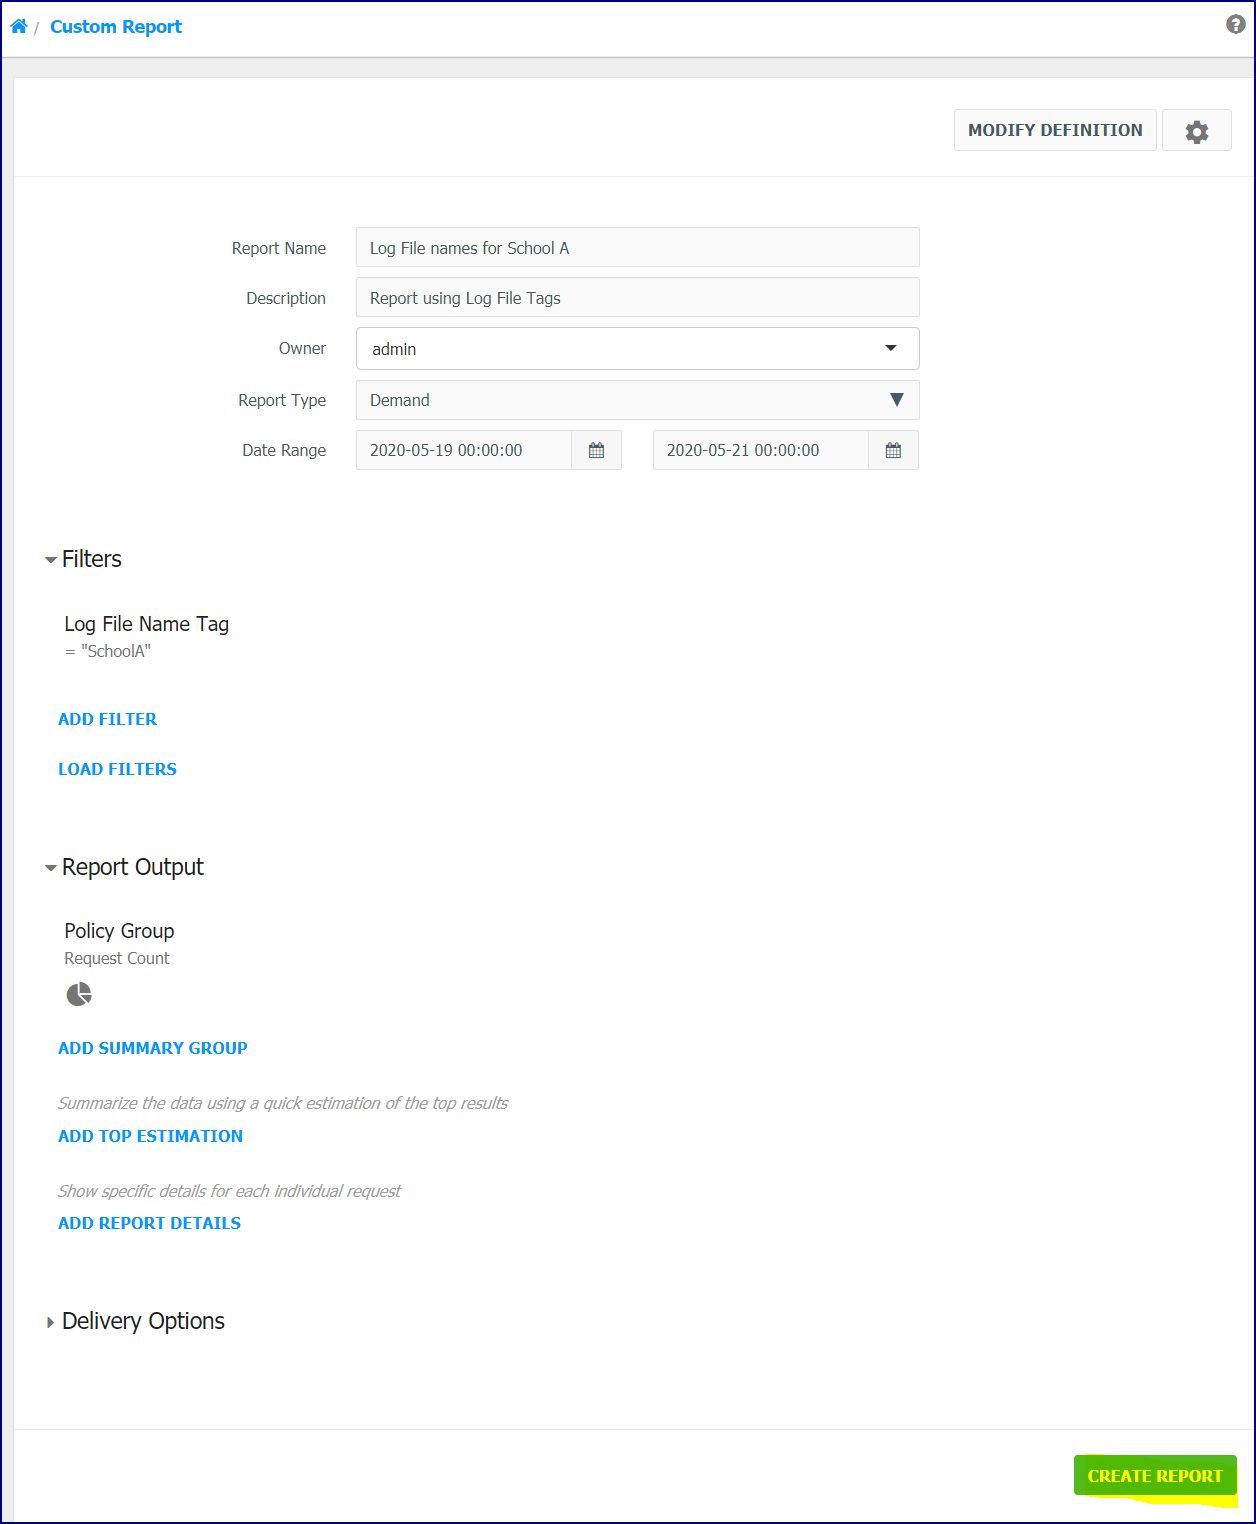
Enter the name Log File Name for School A and add an optional Description.
-
Select Demand for 'Report Type and set the Start/End date. Set the end date to tomorrow's date
-
Click the Add Filter link.
-
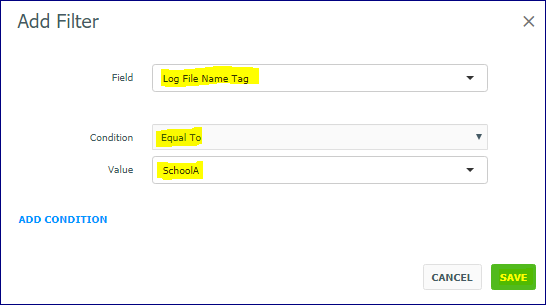
Select the field Log File Name Tab, the Condition Equal To, and the Value SchoolA.
-
Click Save.
-
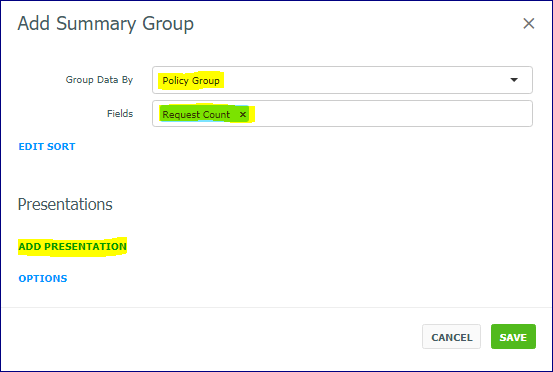
Click the Add Summary Group link.
-
Choose Policy Group for 'Group Data By' and select Request Count for the 'Field'.
-
Click Add Presentation.
-
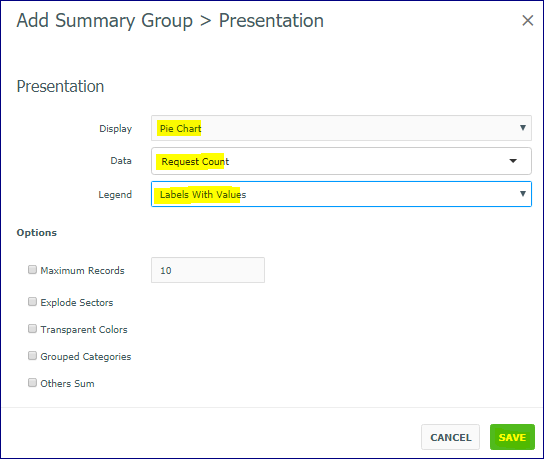
Select the Pie Graph and Labels with Values. Choose Save.
Click Save again to save the 'Summary Group'.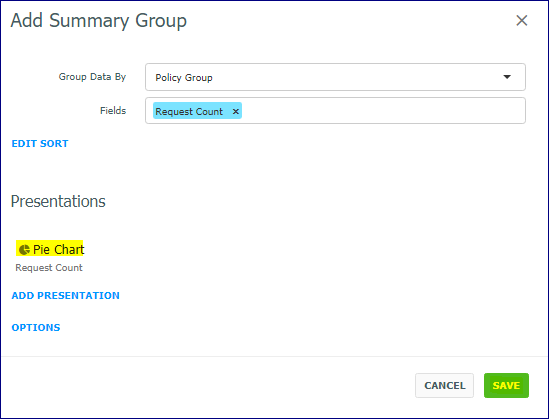
-
Click Create Report.
-
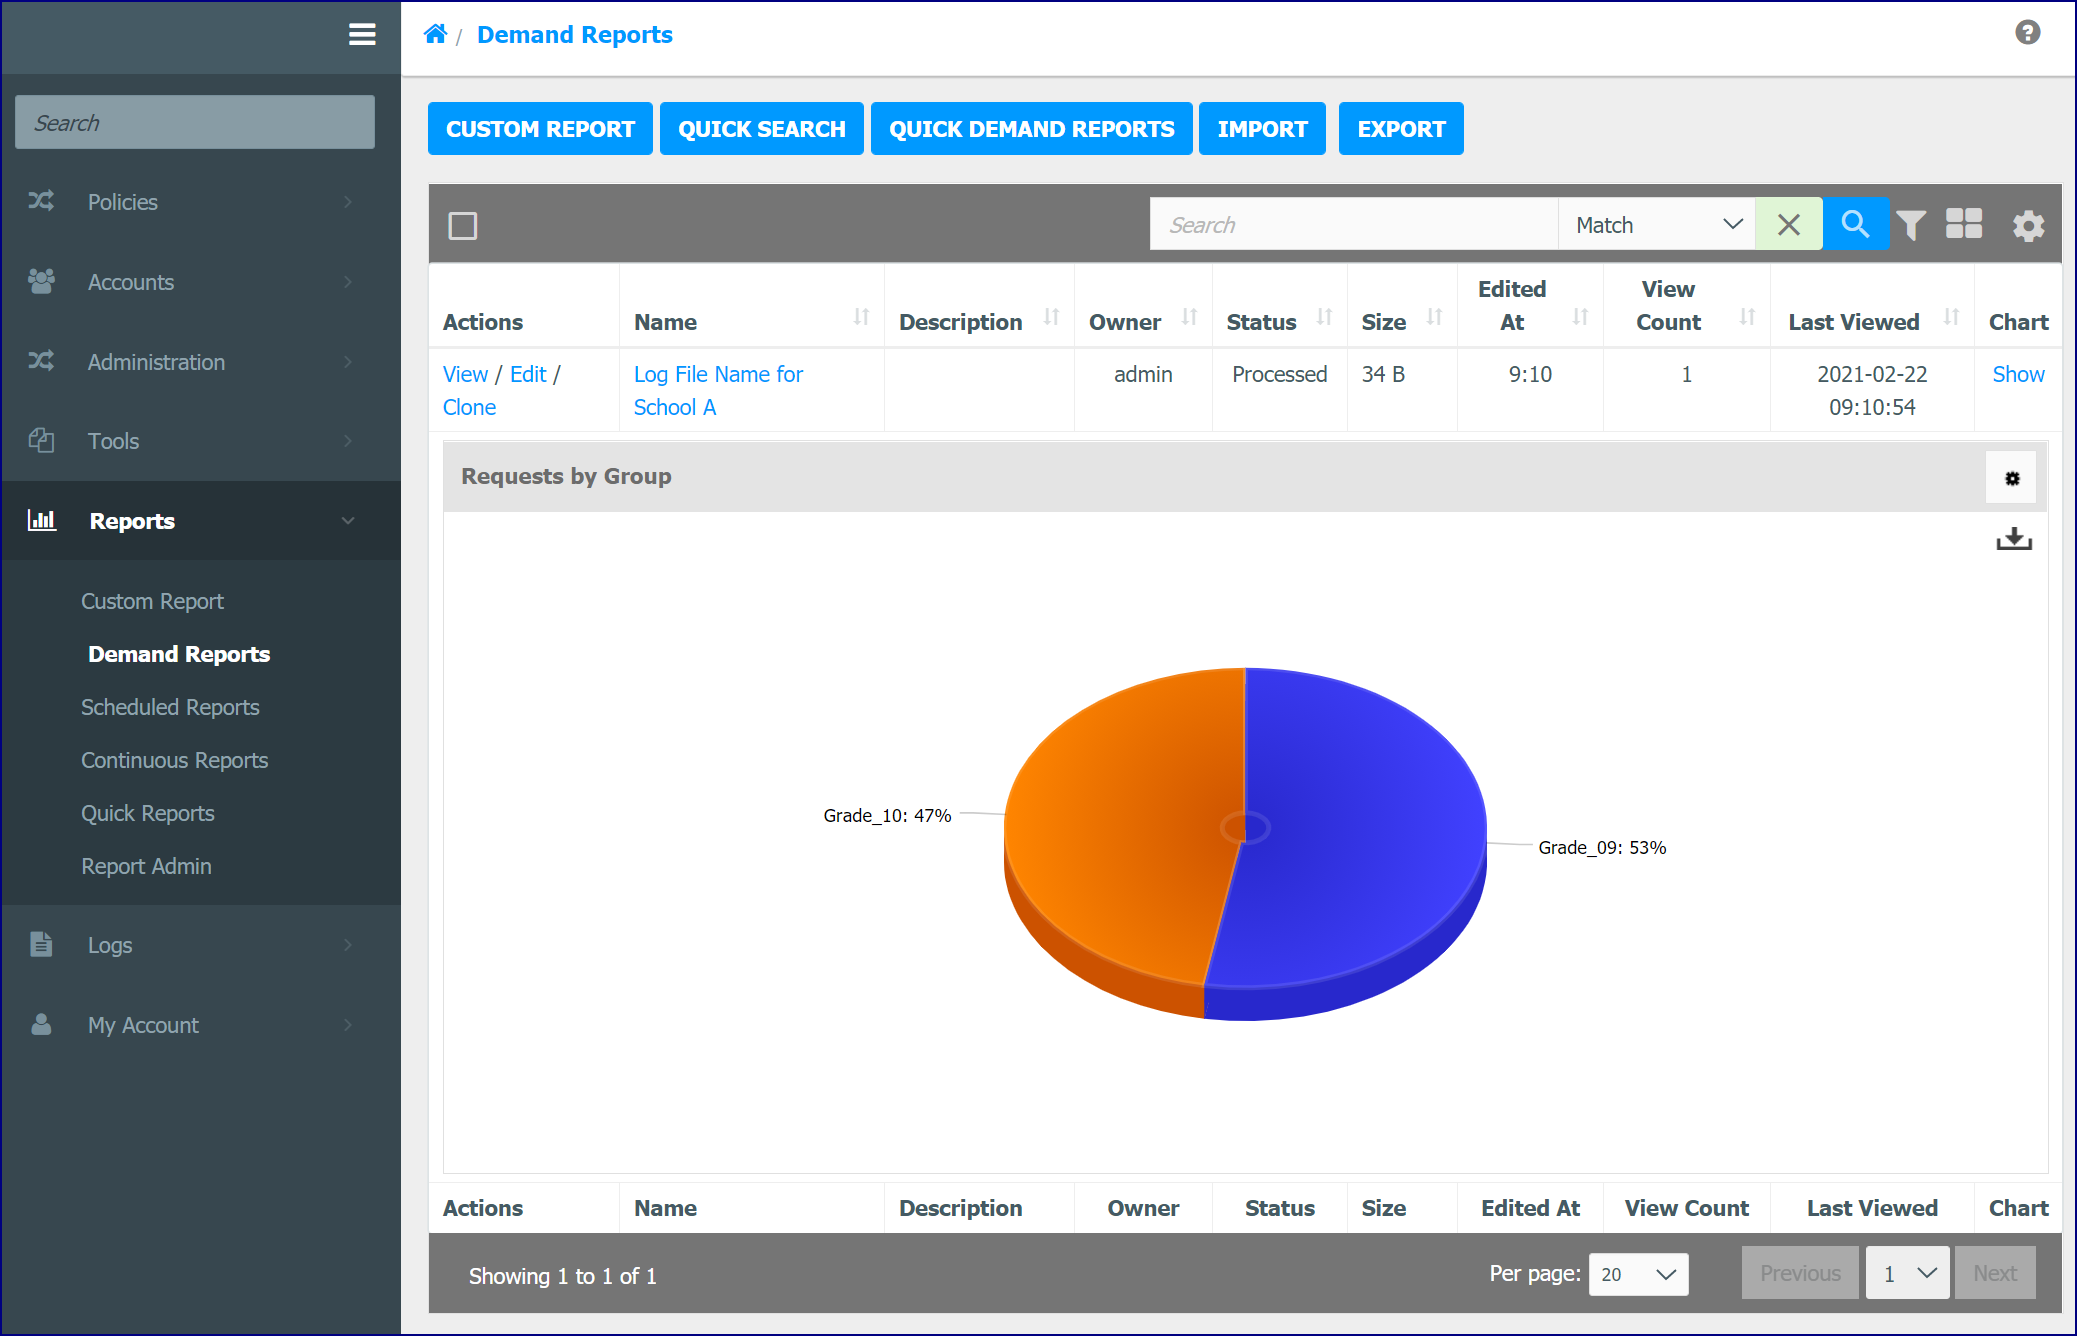
The Report will display the two Groups with the 'SchoolA' tag.