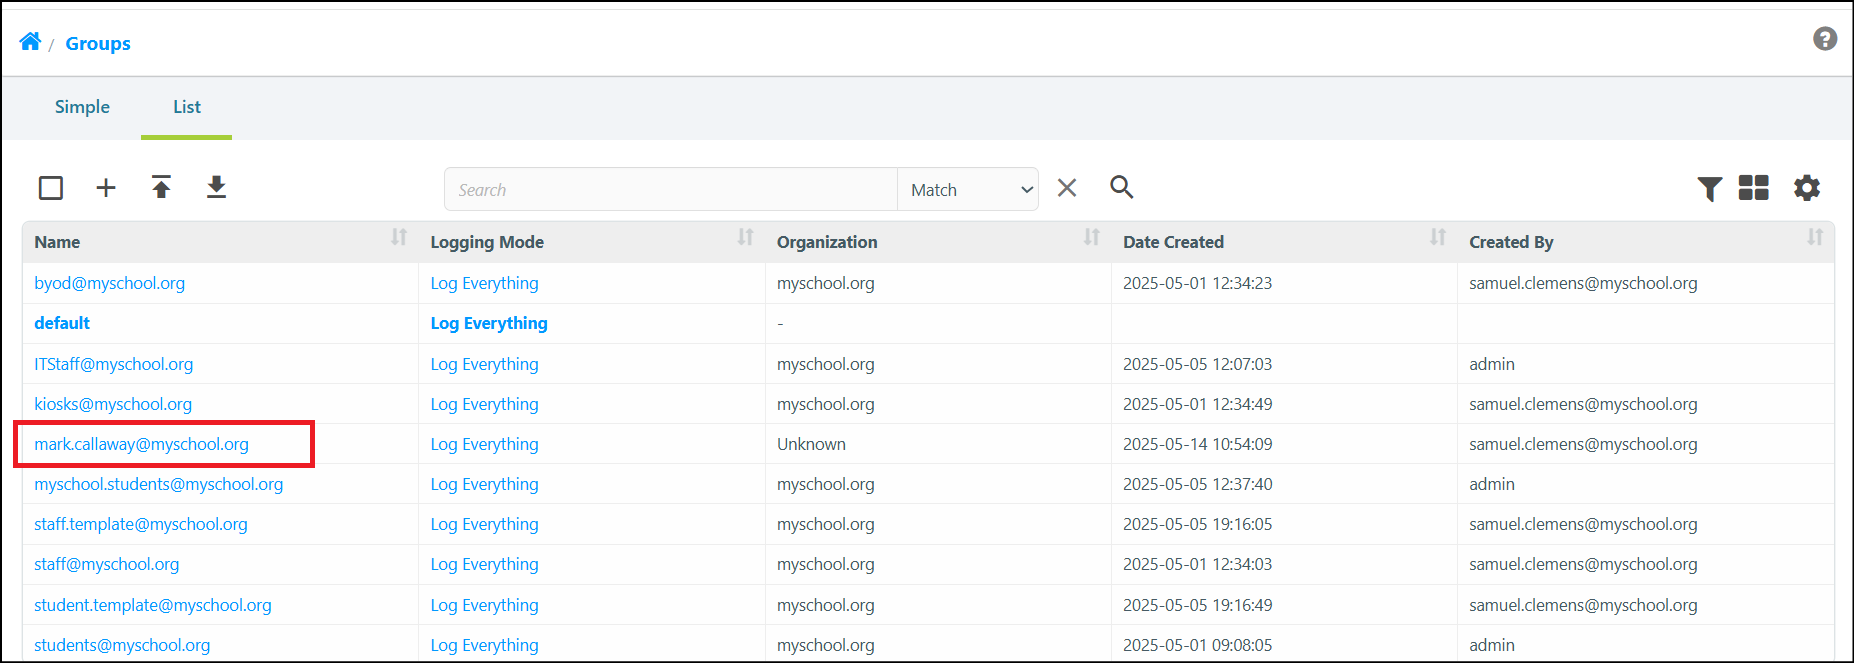
Create Group from Client
You can create a Group from an existing Client. You can use this procedure when you discover that a Client belongs to an incorrect Group but a correct Group does not exist, for example.
- Navigate to Policies > Groups > List and choose the Group you wish to modify.
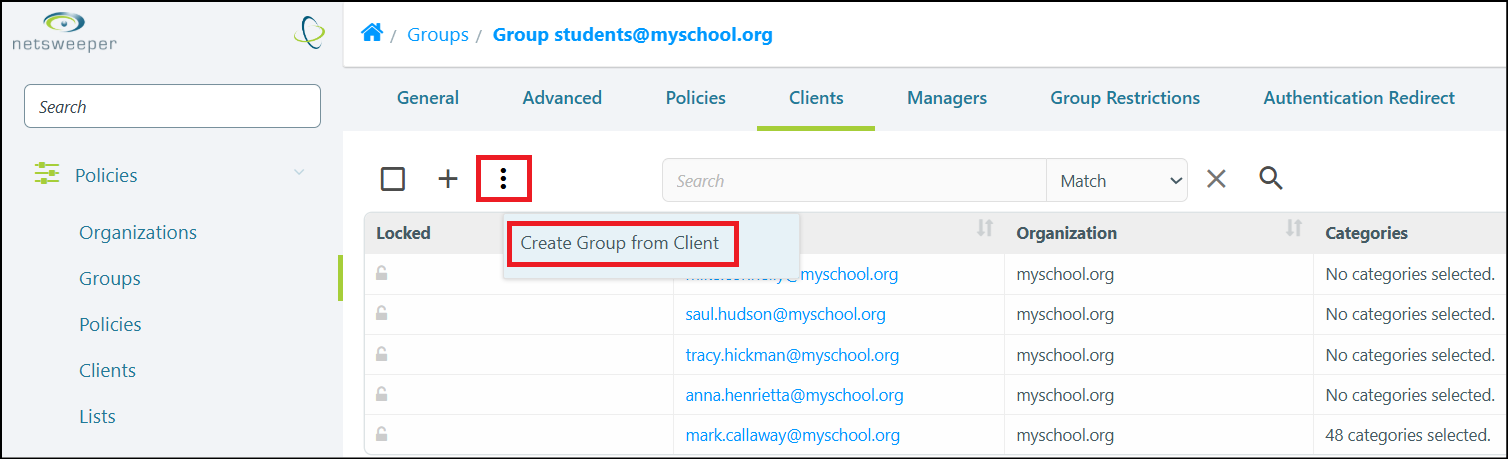
- In the Group's Clients tab, select the Actions icon and then Create Group from Client
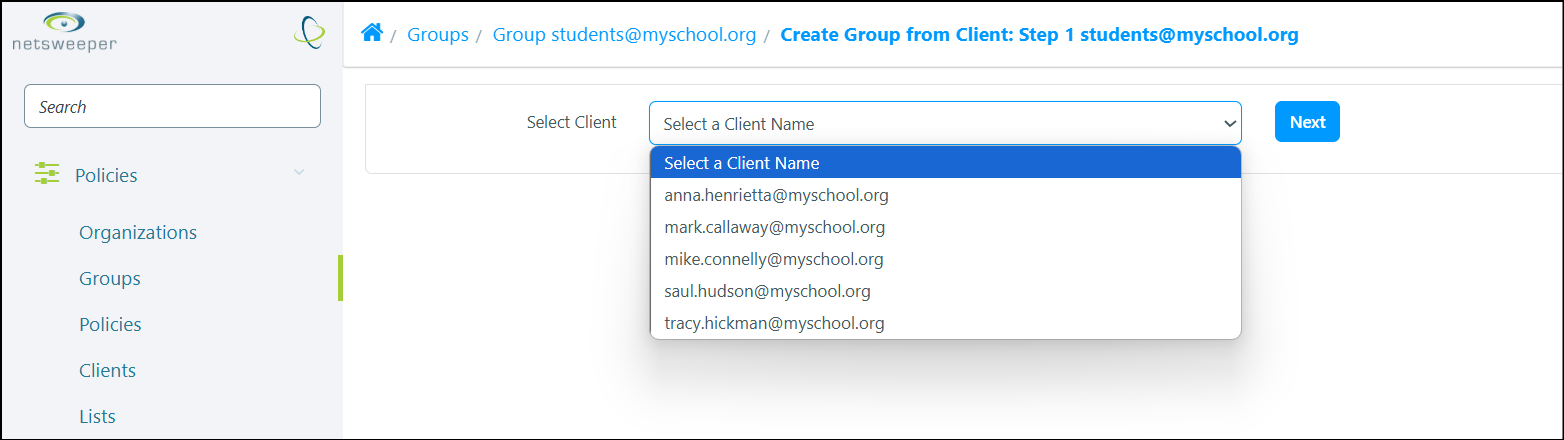
- In the 'Create Group from Client: Step 1' window, expand the Select Client field and choose a Client from the list. Select the Next button to proceed.
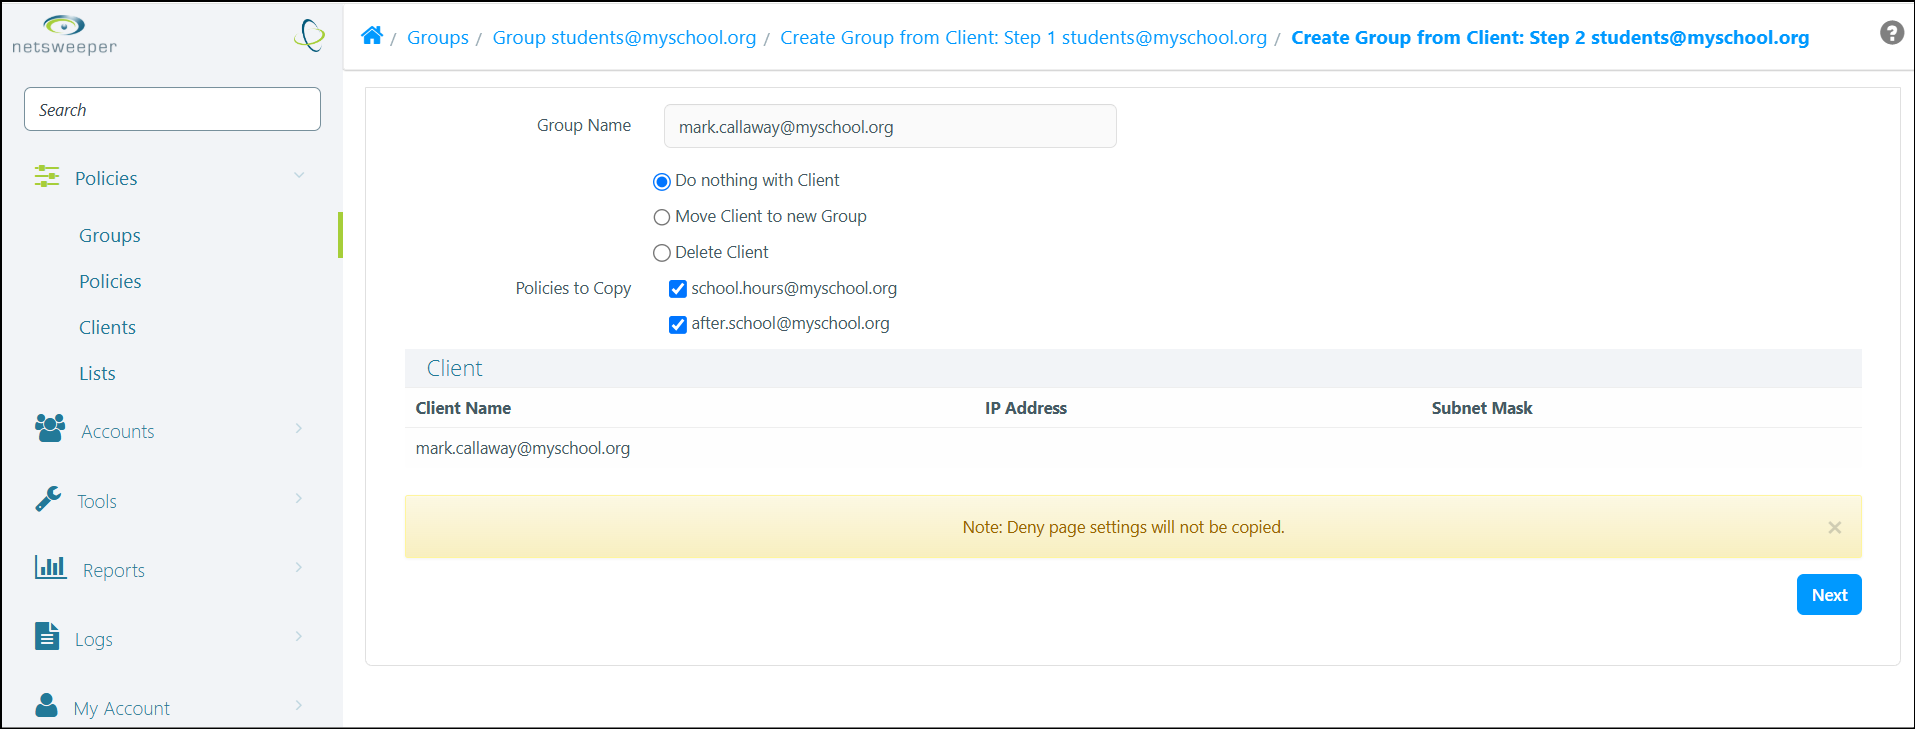
- In the Create Group from Client: Step 2' window, select the desired options for your new Group.
| Option | Description |
|---|---|
| Do noting with Client | This is the default setting . If chosen, the selected Client will not be moved to the new Group |
| Move Client to new Group | This option will move the Client to the new Group you are creating. |
| Delete Client | Remove the Client from the WebAdmin. |
|
Policies to Copy |
Choose from the available Policies for the existing Group. If you do not choose any of the available Policies, the new Group will be created without one. |
- When you have finished choosing the desired options, select the Next button.
- The message ‘Successfully created a Group from the specified client’ displays. Select the Back button to return to the Groups window.

- Your newly created Group appears in the list of Groups.