The Edit Account Window
The 'Edit Account' window is used to manage existing WebAdmin Accounts. It consists of six tabs: General, Suspend, Groups, Permissions, IP Restrictions, and Assume Identity.. Each of these tabs provides access to specific management aspects for a WebAdmin Account.
Please note: Not all of the 'Edit Account' tabs may be available, depending on your Account Type as well as your assigned Account Permissions.
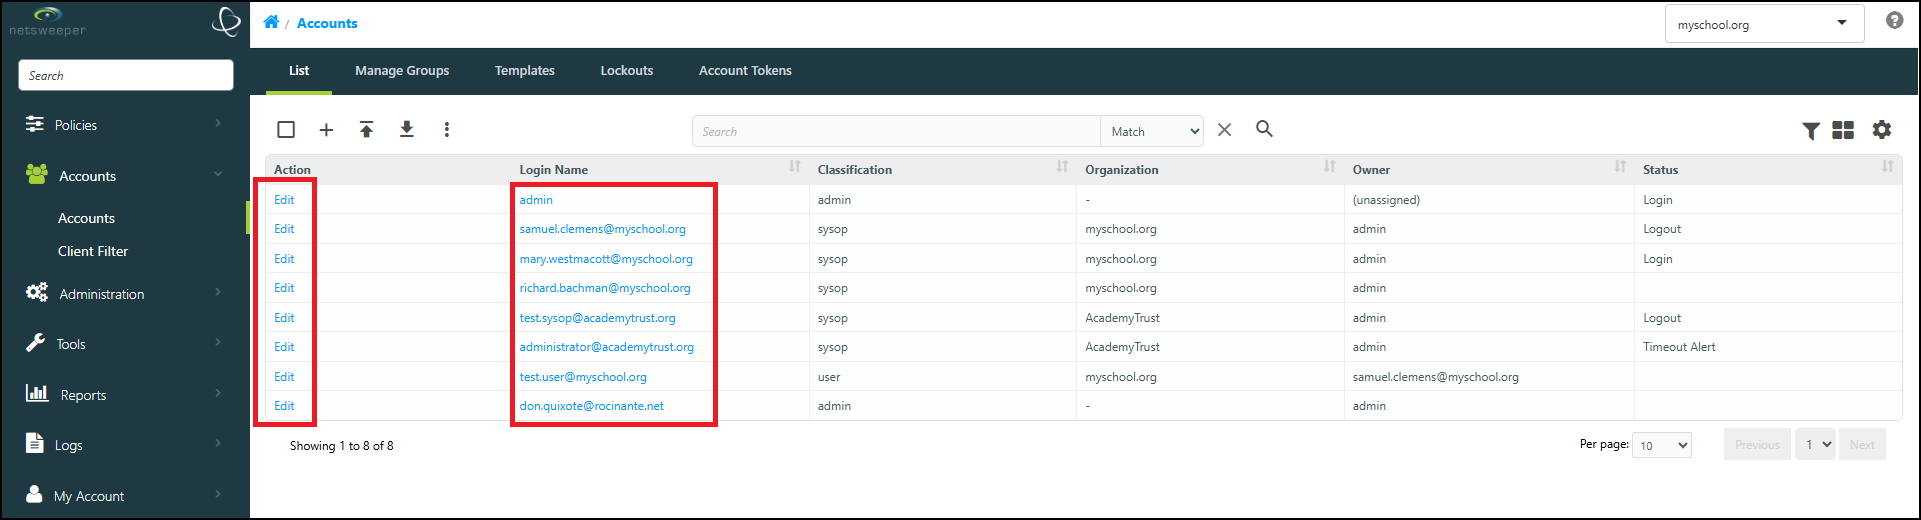
You can access the Edit Accounts window by navigating to Accounts > Accounts > List and selecting either the Edit button or the Login Name for one of the available Accounts.
The General Tab
Use the 'General' tab to edit the selected Accounts user-information.
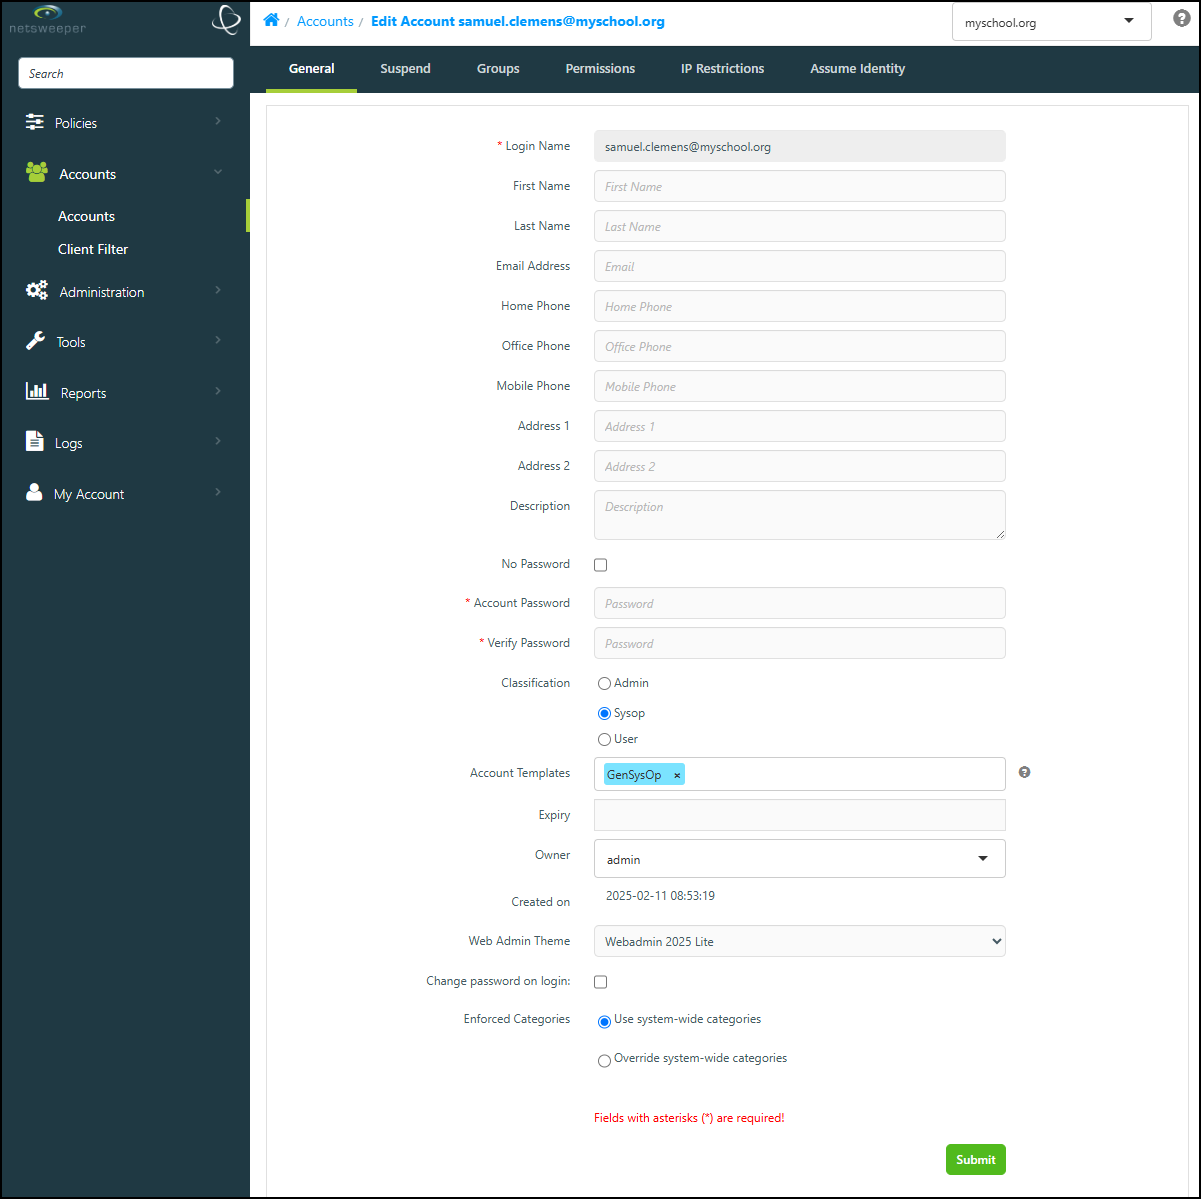
General Account Information Fields
|
Option |
Description |
|---|---|
|
Login Name |
Enter the Login name. This is typically (but not necessarily) the user's Email Address. This is a Mandatory field. |
|
First Name |
Enter an optional first name. |
|
Last Name |
Enter an optional last name. |
|
Email Address |
Enter the email address for this user. |
|
Notify User |
This optional feature must be enabled in WebAdmin Settings in order to be available. See: Notify User |
|
Home Phone |
Enter an optional home-phone number. |
|
Office Phone |
Enter an optional office-phone number. |
|
Mobile Phone |
Enter an optional mobile number. |
|
Address 1 |
Enter an optional address info. |
|
Address 2 |
Enter an optional unit or suite number. |
|
Description |
Add an optional description for this Account. |
|
No Password: |
This is used External Authentication Accounts, check this to remove the Password fields. |
|
Account Password |
Create and set the Accounts password. This dynamic field will rate the strength of your password as you create it. |
|
Verify Password |
Verify the Account's password by entering a second time. |
|
Classification: |
Select a classification: Admin, SysOp, or User. See: Account Types |
|
Account Templates: |
You can apply permissions by selecting one or more Account Templates. Each template will be applied in order, setting permissions on or off for any permissions that not already set. |
|
Expiry: |
Set an optional expiry-date for the Account by choosing the date and time. |
|
Owner: |
Change the 'Owner' of the Account. |
|
WebAdmin Theme: |
Change a theme (interface appearance) for the Account. (You may have a custom or preferred interface.) |
| Profile Manager Theme | This option only displays if User is selected. Change a theme (interface appearance) for the Account. (You may have a custom or preferred interface.) |
|
Create Account Group Policy: |
If this is checked an Account Group Policy will be created. User Accounts must be linked to a specific group to access Quick Reports for that Group only. When creating a User Account, you should always choose ‘Create account group policy’ if you want these options. |
|
Assign to all Managed Groups: |
It this is checked it will assign all Groups managed by the logged in user. |
|
Change password on login: |
If this is checked, regardless of password enforcement settings, the user will have to change their password before accessing the WebAdmin. |
| Enforced Categories |
Choose either 'Use system-wide categories' or 'Override system-wide categories'. |
The Suspend Tab
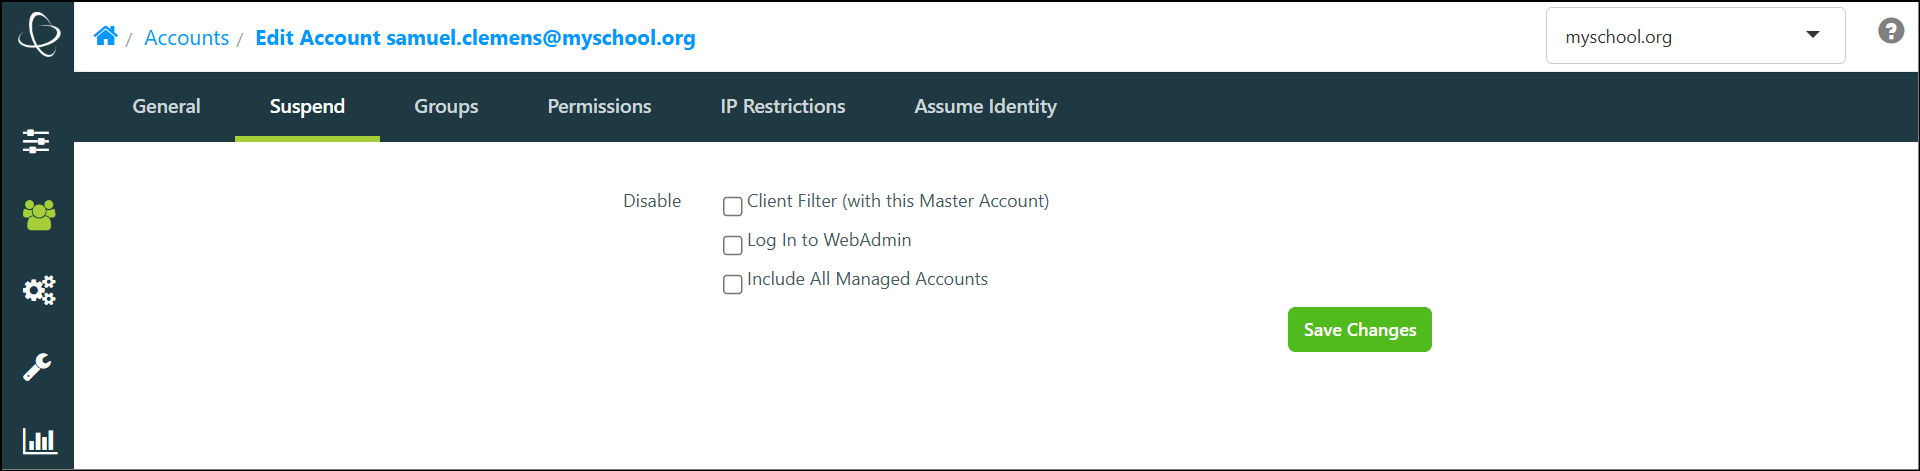
The 'Suspend' tab lets you enable or disable the selected Account.
-
The Client Filter checkbox lets you disable access to the Client Filter.
-
The Log in to WebAdmin checkbox prevents the selected Account from being able to log in to the WebAdmin.
-
The Include All Managed Accounts checkbox does not suspend the selected Account. Instead, it will suspend or resume all Accounts managed by the selected Account.
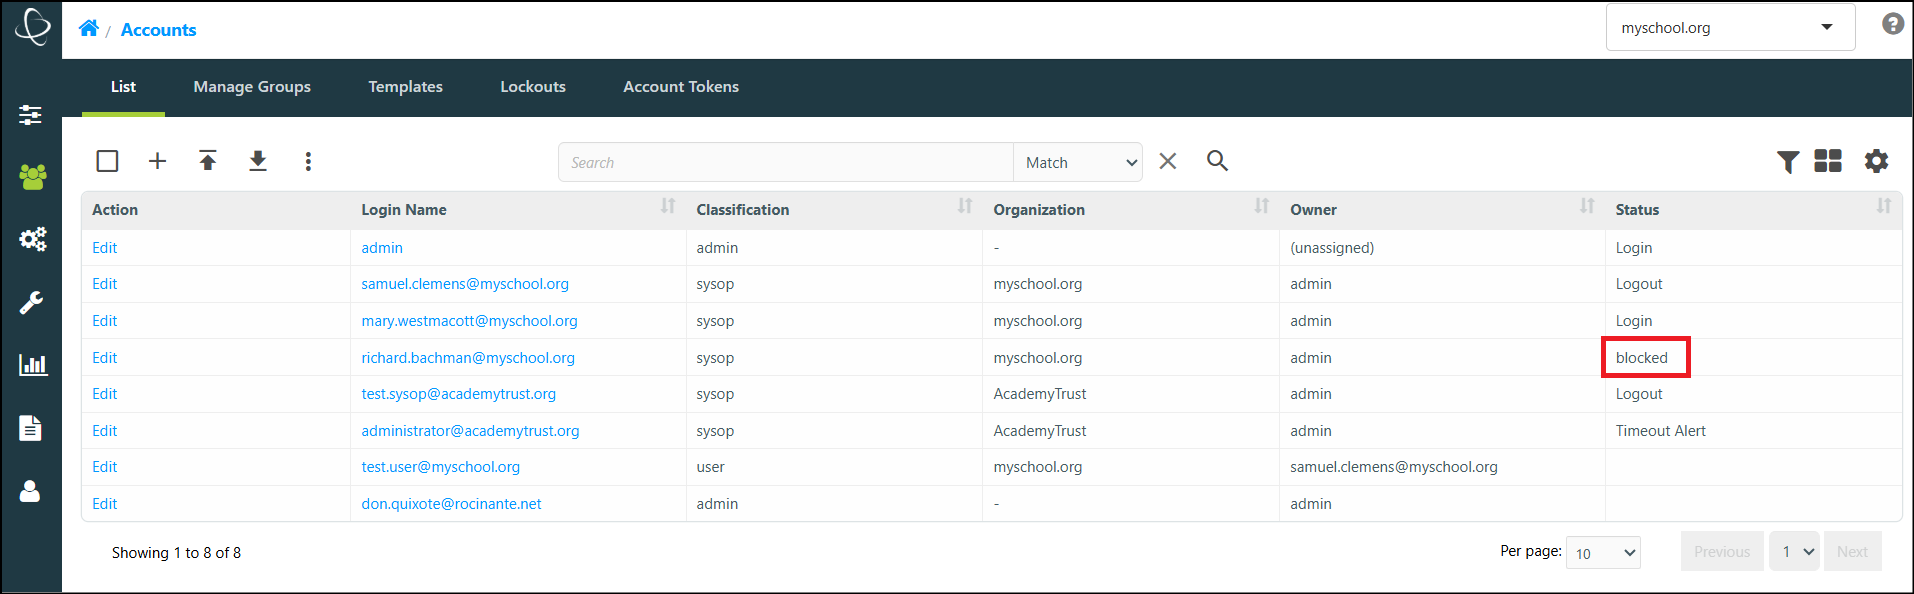
Please note: When the Include All Managed Accounts suspension is applied, the checkbox will not appear as selected in this window, since this option does not affect the selected Account. Use the Accounts > Accounts > List window and refer to the 'Status' tab for this information.
The Groups Tab
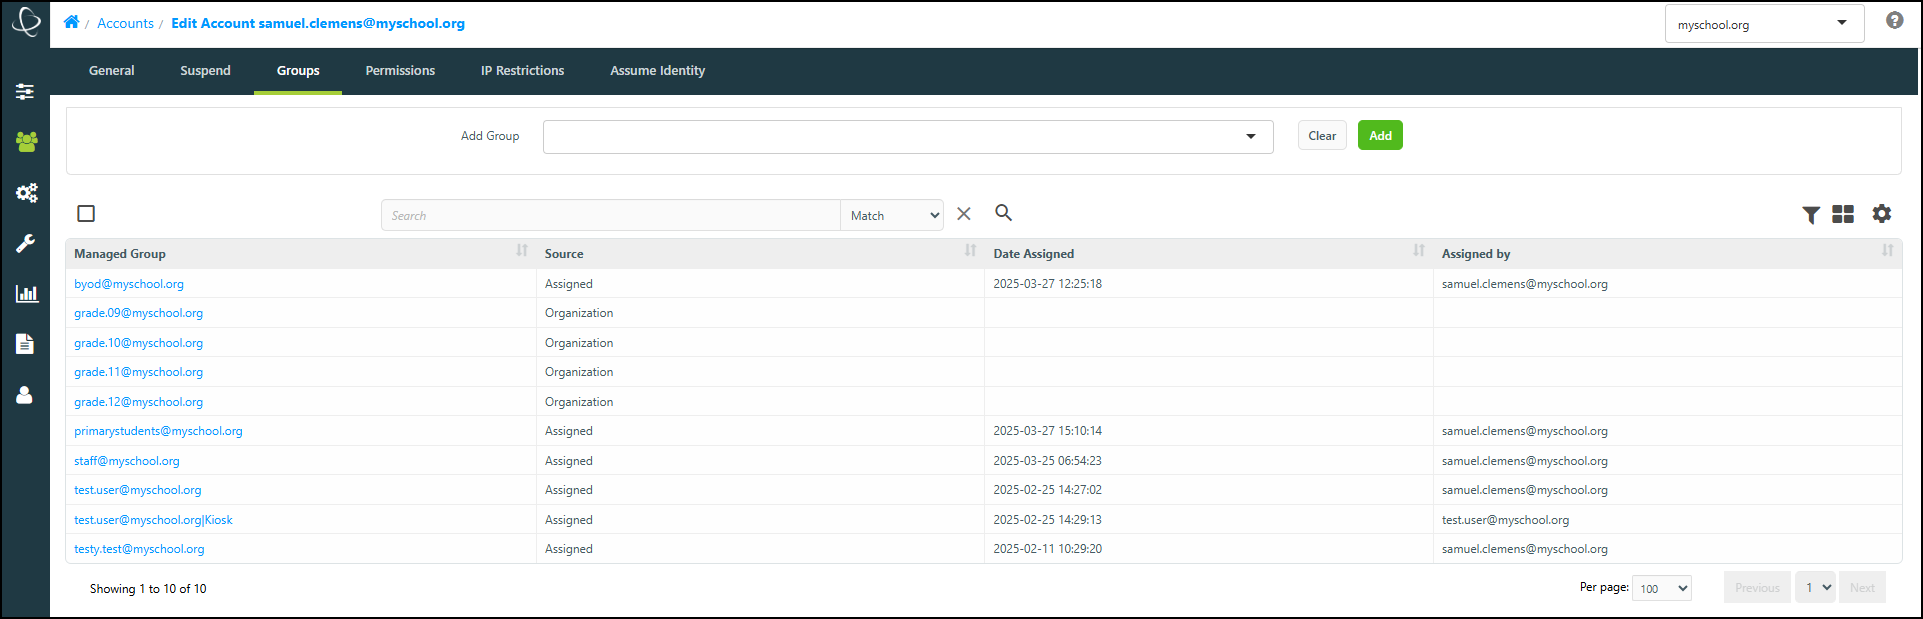
The 'Groups' tab is used to assign or remove Groups from the selected Account.
-
The Add Group field can be selected to open a dropdown menu listing any available Groups. Choose any Groups and select the Add button to assign them to this Account.
-
You can unassign Groups by selecting their table-row (or their Tile, if you are using the 'Tile' view,) and then selecting the Delete button. Please note: Doing this in the 'Edit Account' window will not delete the Groups from your WebAdmin, it will simply remove this Account's ability to access and manage them.
The Permissions Tab
Use this tab to manage the available Permissions for the selected Account.
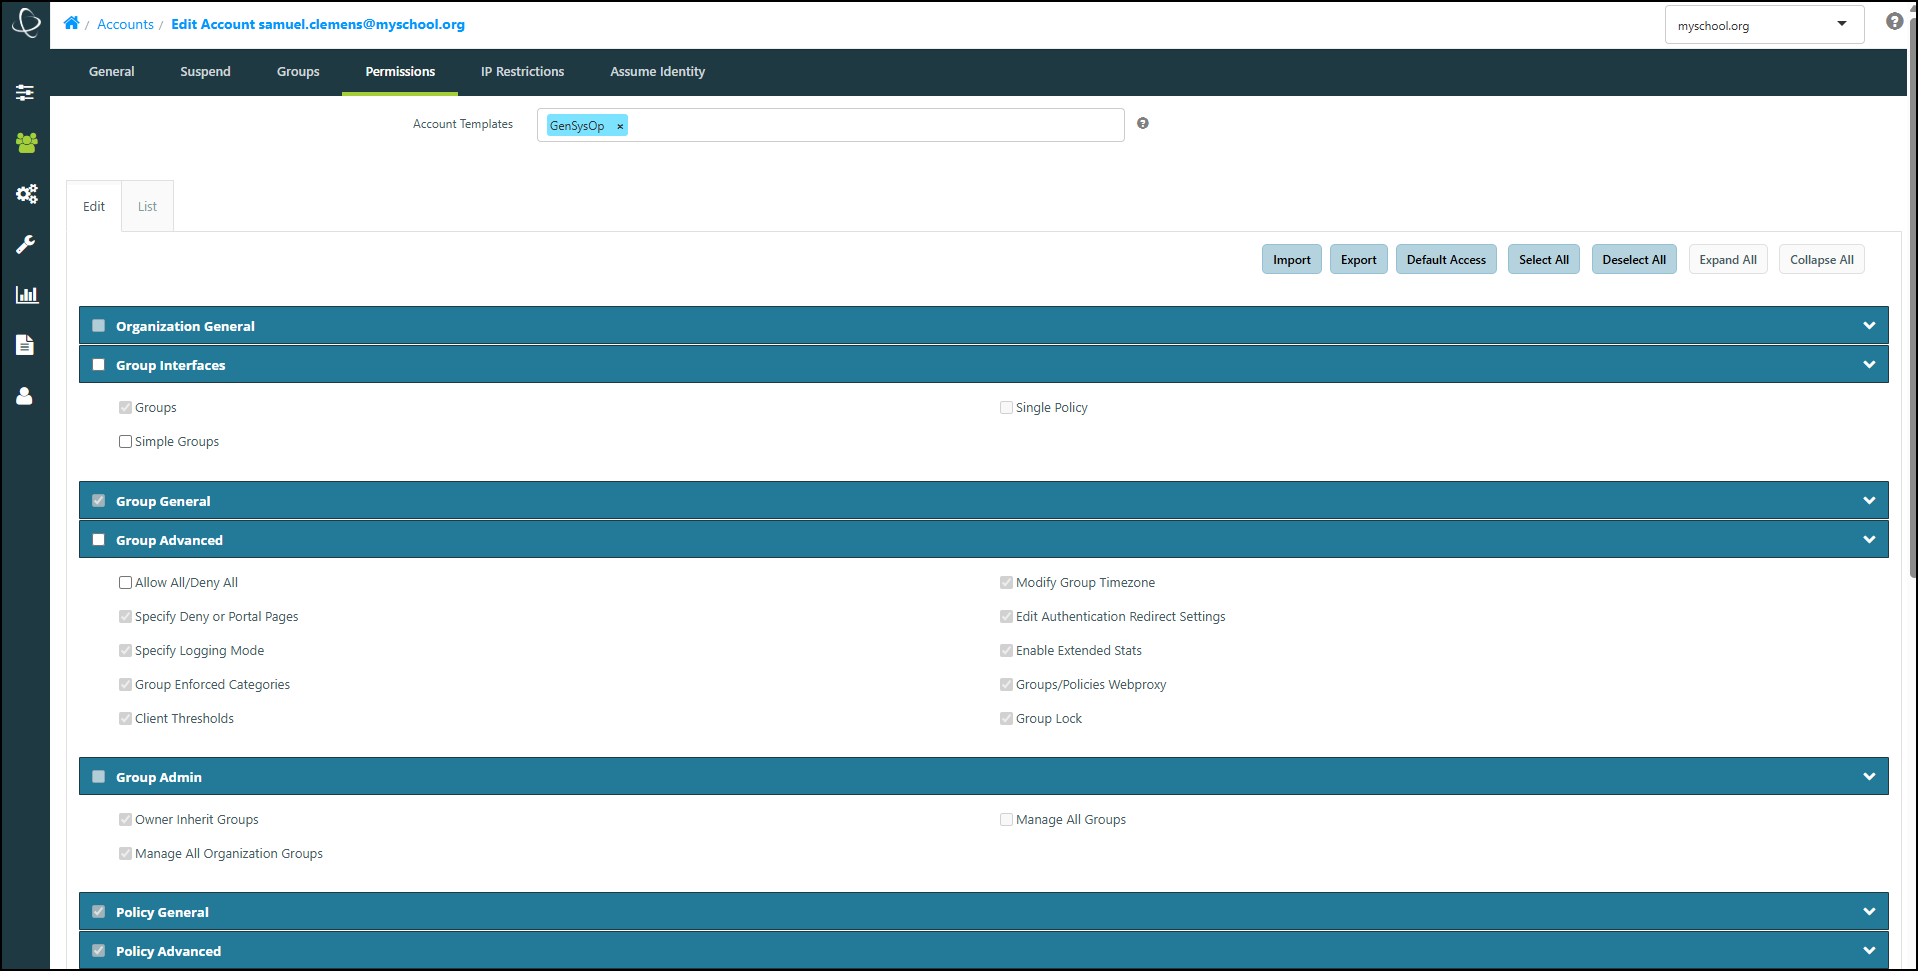
Please Note: If any Permissions are enabled or disabled by an Account Template, you will not be able to modify those for the Account.
-
For instructions regarding Account Permissions, please refer to our Setting Account Permissions documentation.
-
For information on Template-based Permissions, please refer to our Managing Account Templates document.
The IP Restrictions Tab
Admins can designate a range of IP addresses for a SysOp to manage. This prevents the SysOp from adding network- or client-based workstations outside of this range.
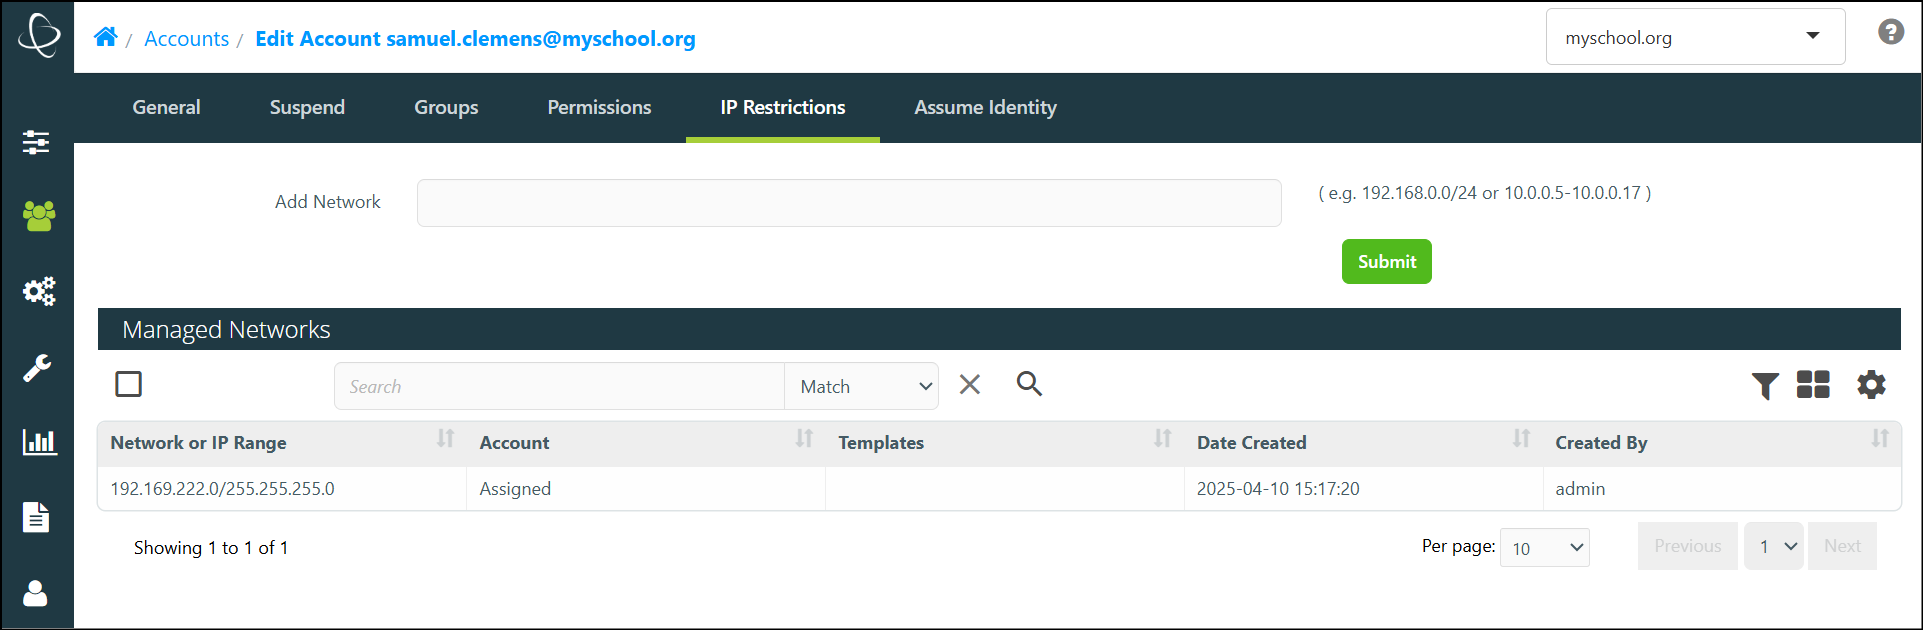
For instructions on how to add IP Restrictions, please refer to our Assigning IP Restrictions to a SysOp document.
Please Note: This tab is not available when editing an Admin Account.
The Assume Identity Tab
Selecting the 'Assume Identity' tab opens a WebAdmin session for the selected Account as if they had logged in manually. However, this session includes a special breadcrumb that allows you to return to your WebAdmin session.
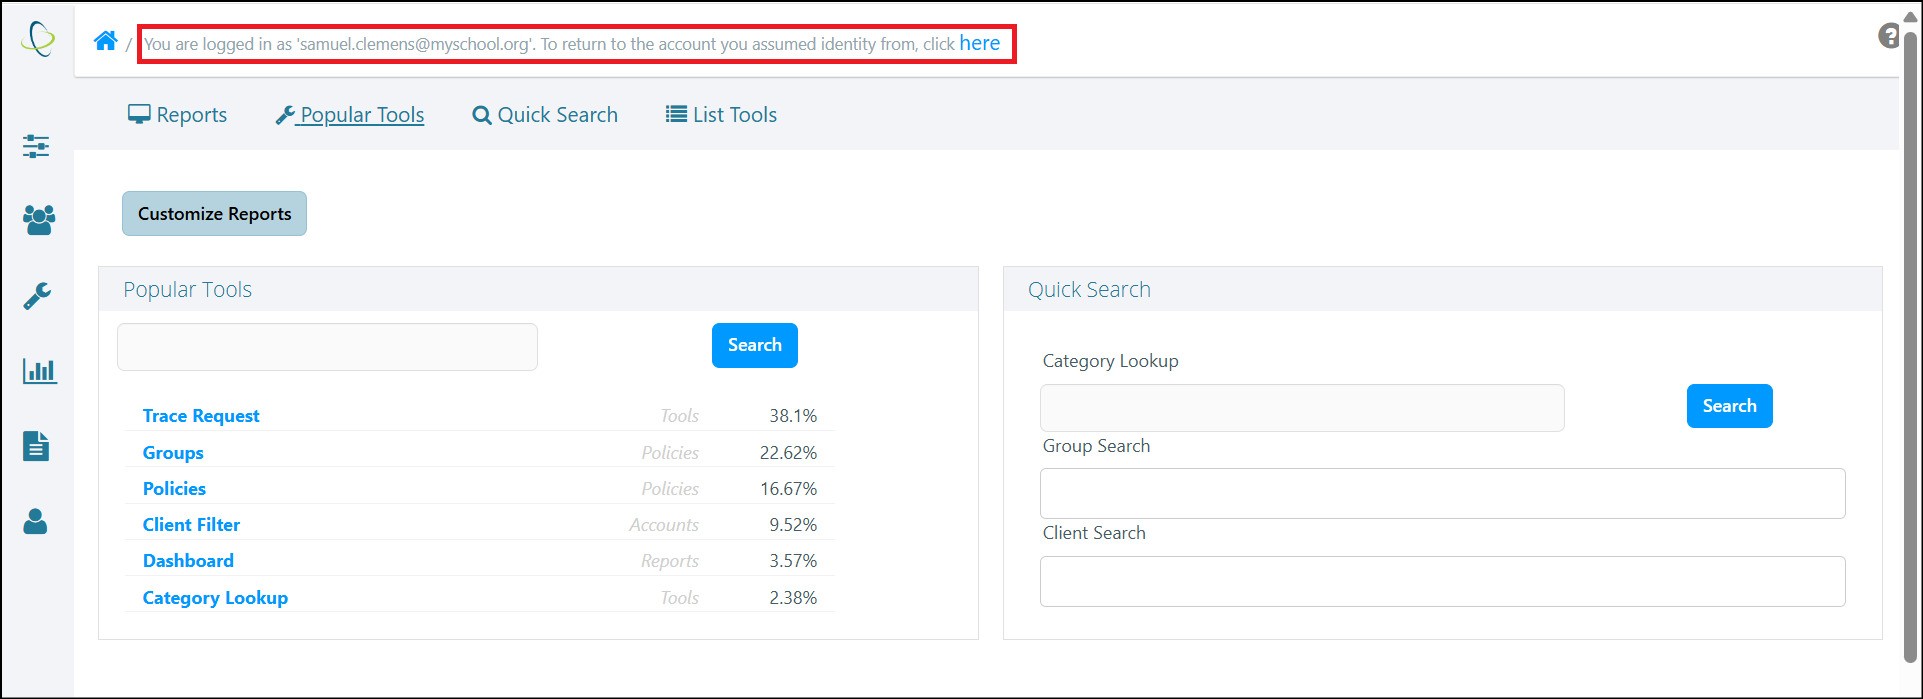
The 'Assume Identity' function allows an Account Holder assume the identity of another Account holder in order to check the WebAdmin interface and confirm that permissions and access are configured correctly.
Please Note: Accounts Require the 'Assume Identity' Permission in order to be able to use this function.