To modify Group attributes, navigate to Policies > Groups > List and choose the Group you wish to edit. The selected Group's window displays. The tabs at the top of the page let you browse and modify various functions that control the Group's behavior. Many tabs also have sub-tabs (or subsections). Each of the sections of this document its respective tab and subsections.
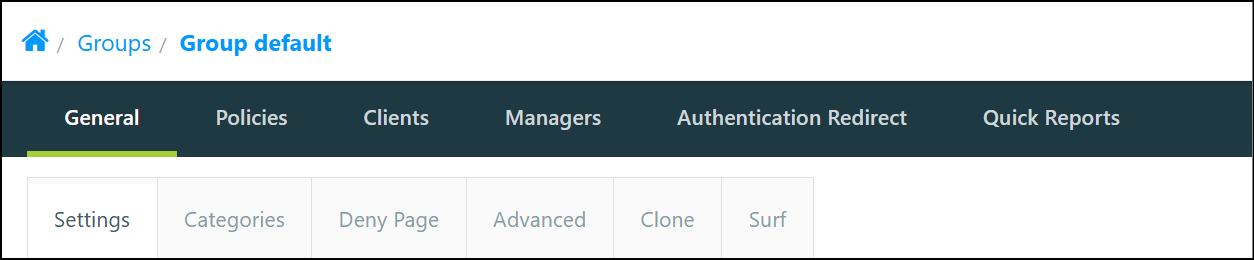
 The General Tab
Groups: General Tab
Use the 'General' tab to modify the Group name and description, create a Group Deny Page, specify logging, language, Group Timezones and enforced Categories. You can also specify the Policy Categories.
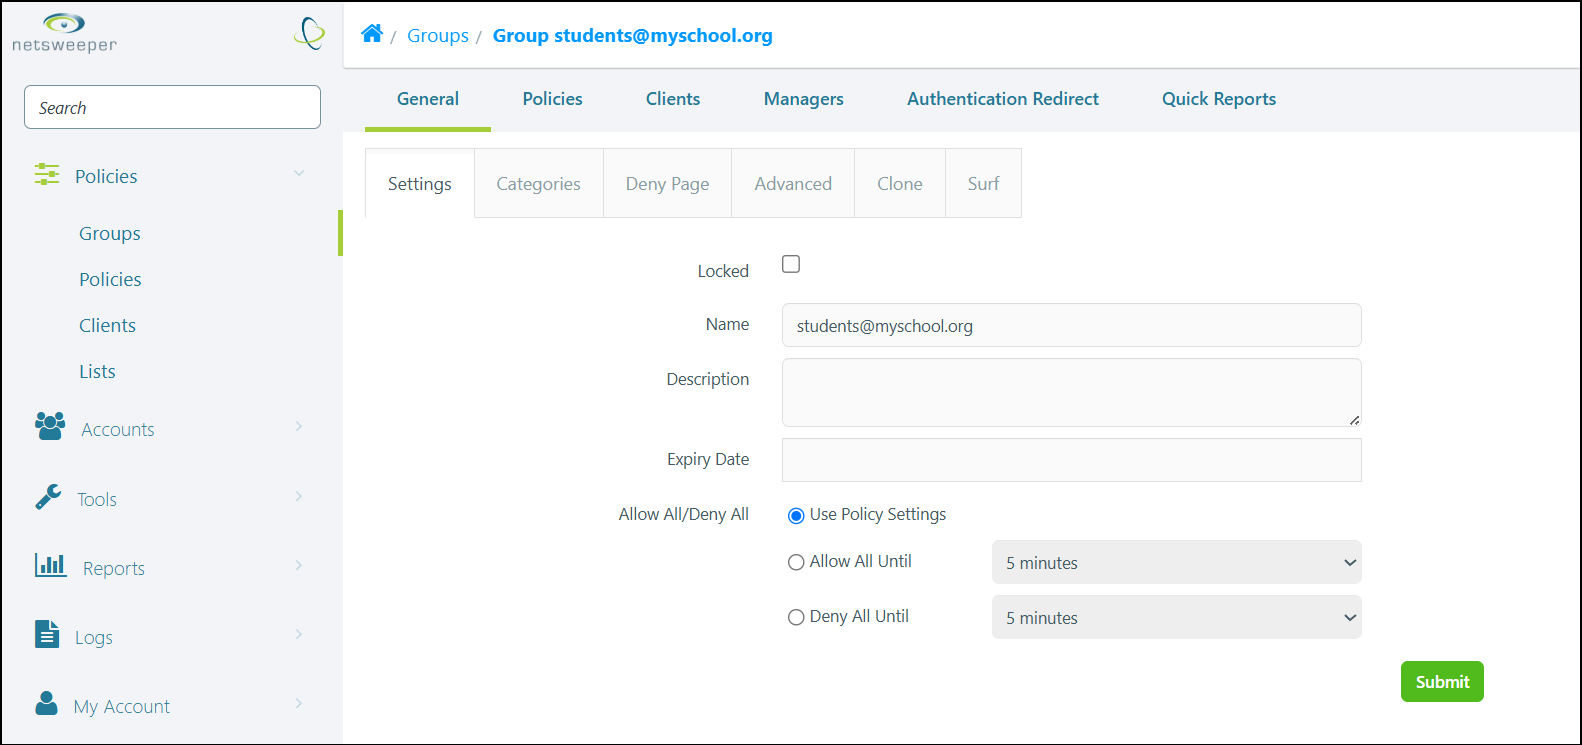
General Tab: Subsections
|
Option |
Description |
|---|---|
|
Settings |
Use this tab to modify a Group name and Description. You can also modify how you want to use the Policy Settings. You can also Lock a Group so it cannot be edited |
|
Categories |
The Categories tab allows you to select the Category Template would wish applied to the Group or choose the number of Categories assigned through the Custom Template. |
|
Deny Page
|
Use this option to create a Deny Page for this Group. See the ‘Policy Management - Custom Deny Pages’ document for more information. |
|
Advanced |
Use this tab to set Templates, Logging, Timezones, Enforced Categories, and Language. Client Thresholds can also be set if enabled. |
|
Clone |
Use this option to Clone the selected Group. You will be given the opportunity to create a new name and description for the Group. See 'Advanced Tab' settings below. |
|
Surf |
Use this option to surf the Internet using the Group’s permissions. This feature allows you to surf through websites in accordance to a chosen Group’s policy and to test filtering rules without implementing a client. The Surf Using Group button is meant for a one-off test. You cannot use it to test several URLs at once. Do not use the Back button to try another URL. |
General: Settings
General: Settings
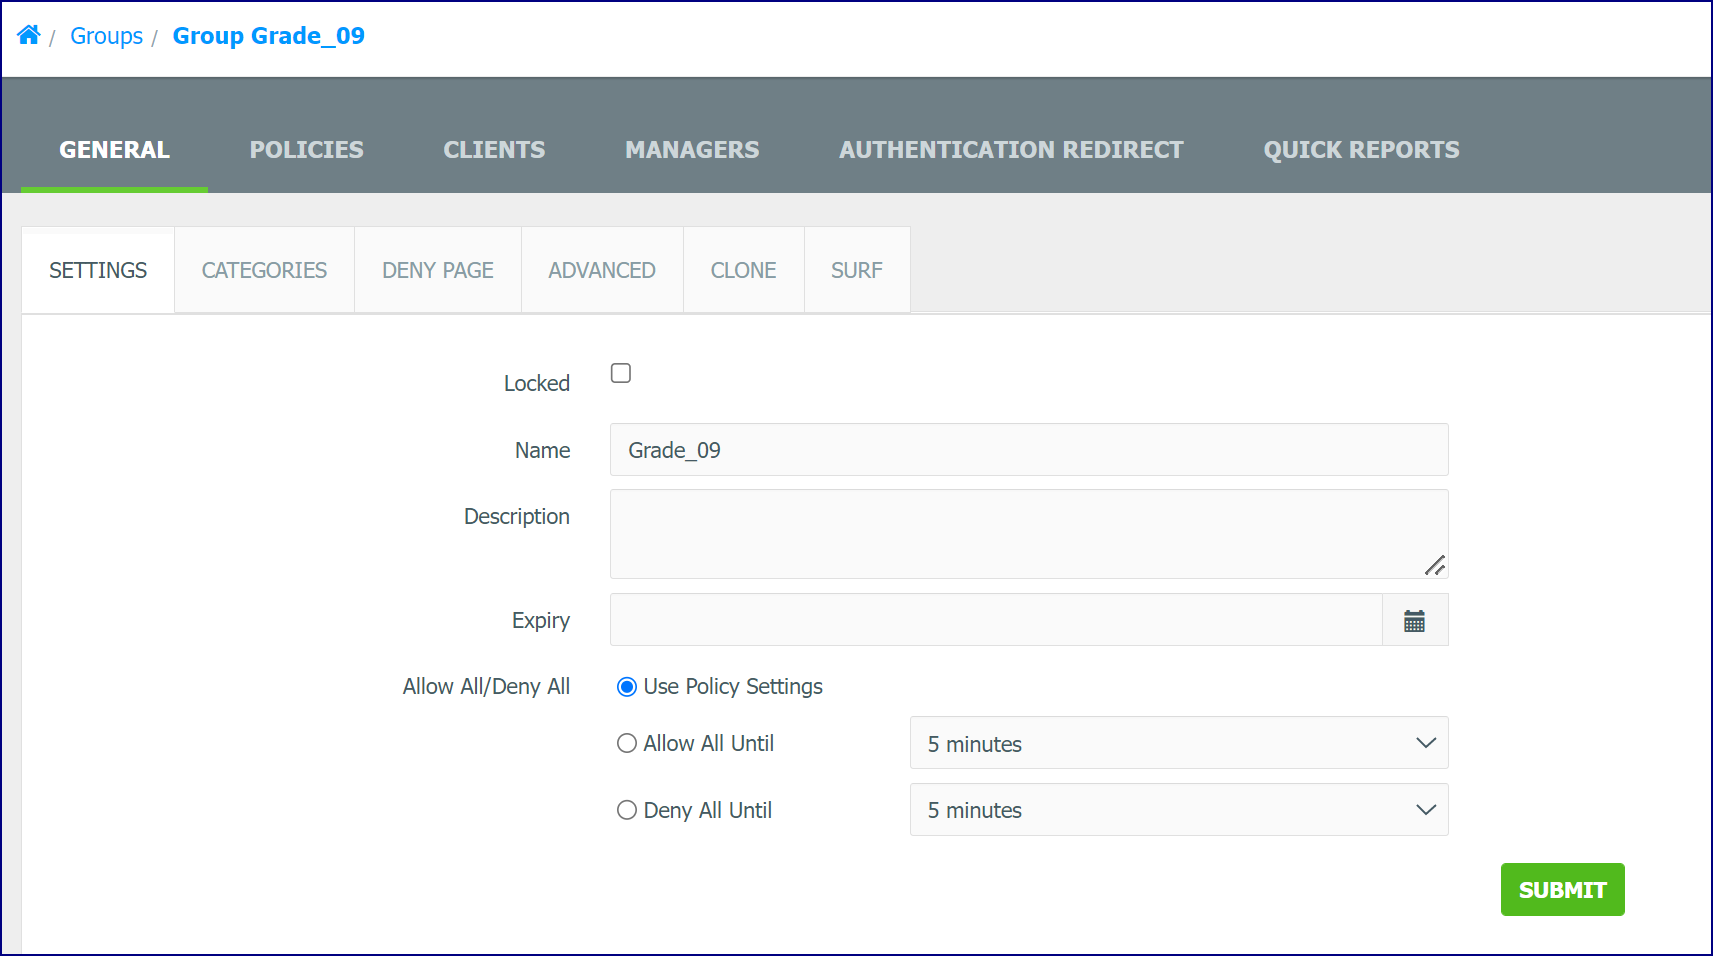
Use The 'General: Settings' subsection to modify a Group name and Description. You can modify how you want to use the Policy Settings and Lock the Group from editing. You can also set an Expiry Date for the Group.
Allow All/Deny All
The Allow All/Deny All option lets you pause filtering or deny all URLs for a Group. By default, 'Use Policy Settings' is selected, (which means to filter as configured).. Select either 'Allow All Until' or 'Deny All Until' and set a time limit to utilize this feature.
General: Categories
General: Categories
The General: Categories subsection is used to view and manage the Group's Category Template.
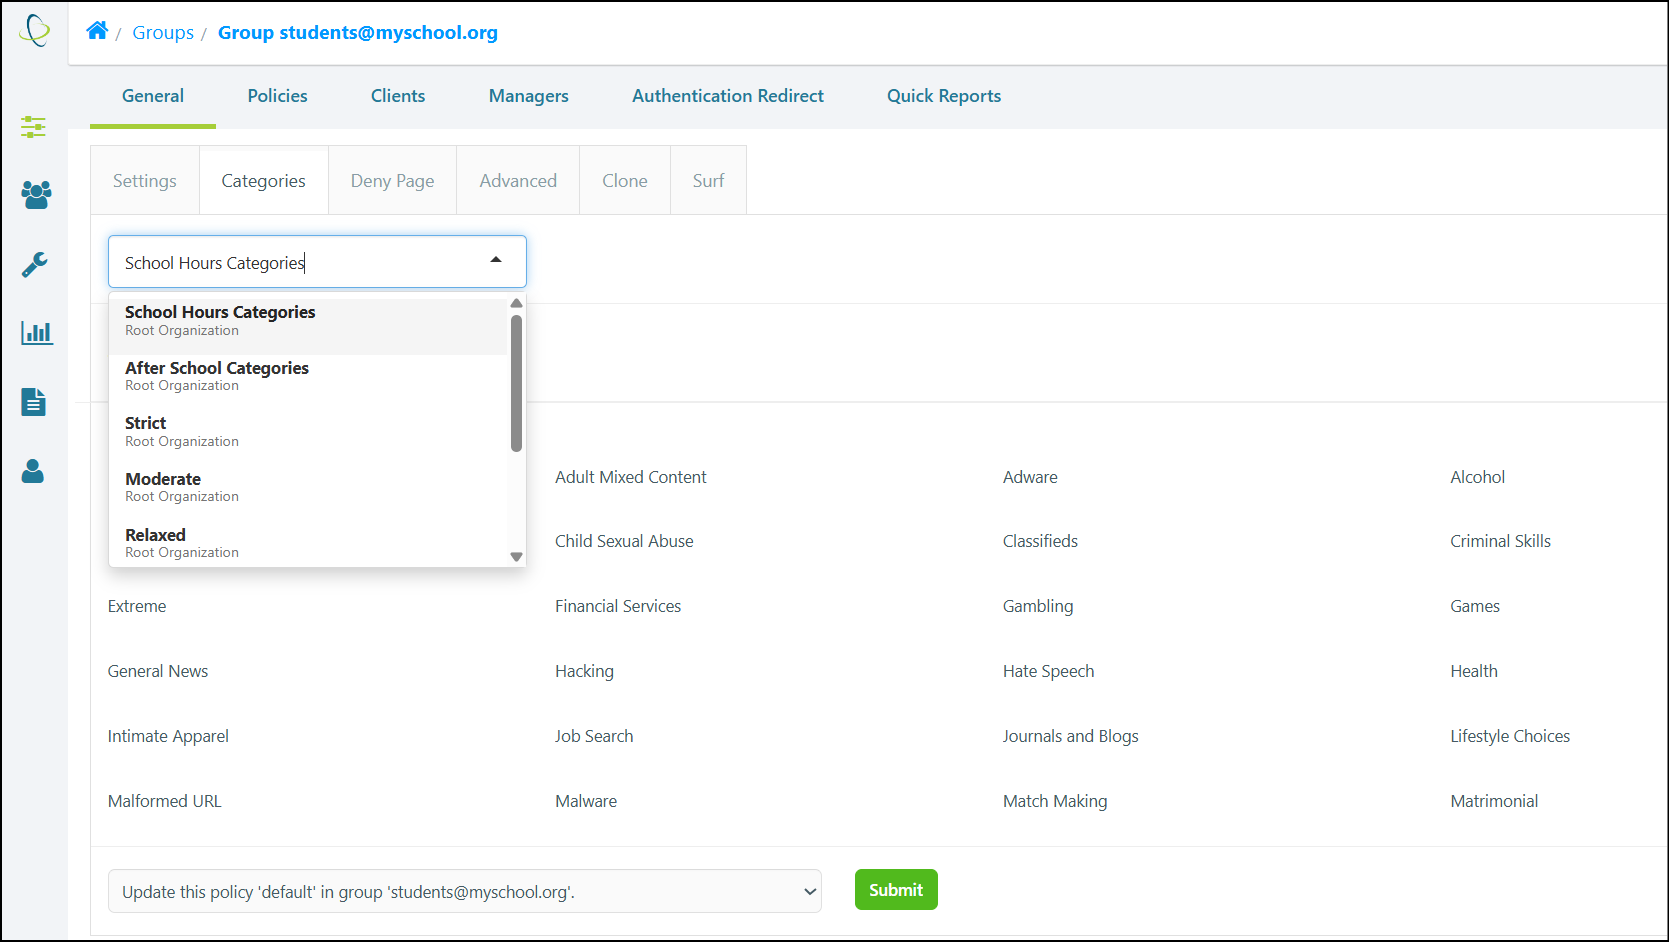
You can also make a custom selection of Categories by using the Custom Template.
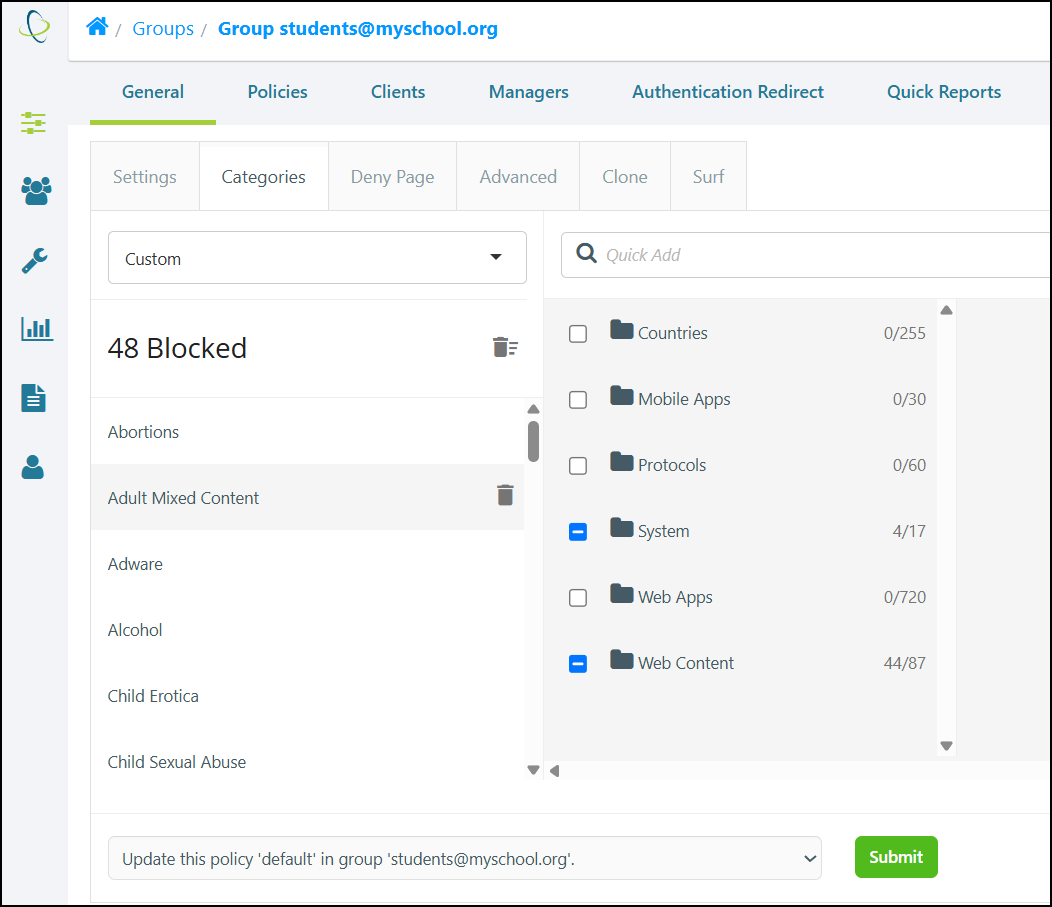
For an overview of Category Templates, please refer to our Category Templates documentation.
General: Deny Page
General: Deny Page
You can use this subsection to create and manage a custom Deny Page for a Group. By default, the Group will use a Global Deny Page unless otherwise configured.
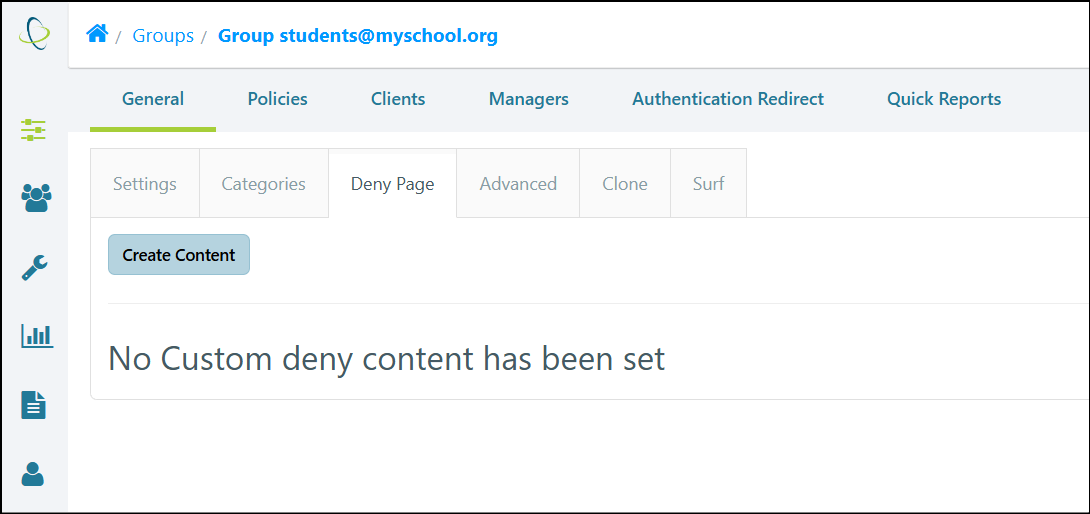
-
Please refer to our Creating a Group Deny Page documentation for detailed, step-by-step instructions on this topic.
-
For an overview of Netsweeper Deny Pages and our Deny Page Editor tool, please refer to our Deny Page Overview document.
General: Advanced
General: Advanced
This subsection lets you specify if the Group is to be used as a Template, as well as to customize several advanced settings for the Group, such as Logging, Timezone, and Language settings.
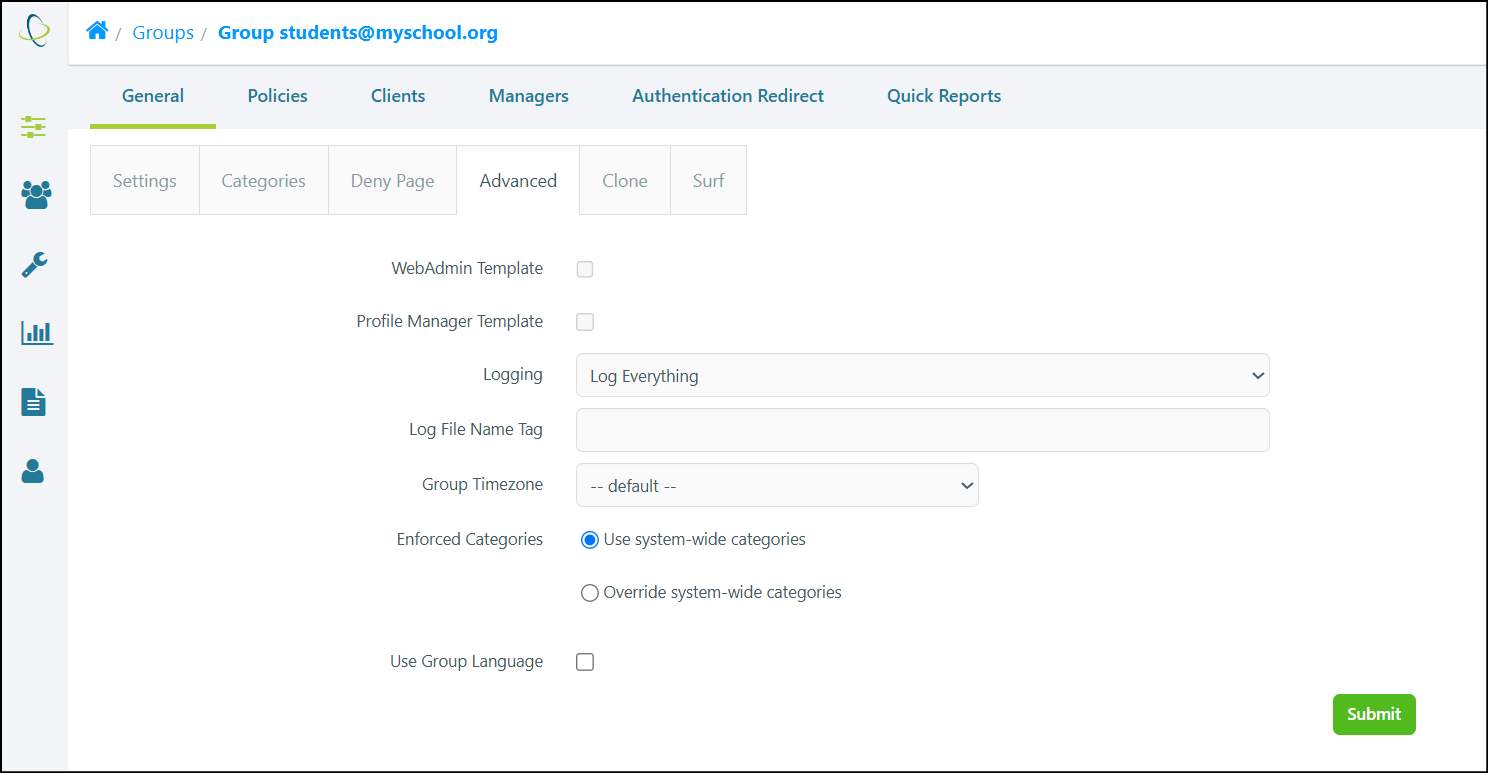
Advanced Settings
|
Option |
Description |
|---|---|
|
WebAdmin Template |
If this box is checked, the selected Group can be designated as a WebAdmin Template. Please see the Group Advanced Template Tab |
|
Profile Manager Template |
This option enables the selected template as a Profile Manager Template. |
|
Client Threshold Limiting |
This option enables 'Client Threshold Limiting' for the Group. This is not displayed by default. See 'Configuration – Client Abuse Thresholds' for more information. |
|
Logging |
Use this option to select the Logging level for this Group. There are four options available:
|
|
Log File Name Tag
|
Use this option to write logs for Groups into the same file. This tag is used with the lm5_group_multiwriter and lm5_tag_multiwriter options used in logging. In the Reporter, reports can be generated for Groups set up with this option. |
|
Group Timezone |
Use this option to change the Timezone for the Group. The Group specific Timezone affects Group Policy Events for a Group. It can be useful if some Groups reside in a timezone that doesn’t match the Policy Server timezone and the Group has multiple Policies that should be switched independent of the time of the day or day of the week. See the 'Policy Management - Timezones' documentation for more information. |
|
Enforced Categories |
You can have 'Enforced Categories' on a per Group basis. The Categories will be merged with Account enforced Categories but override System-wide enforced Categories. Enforced Categories can also be set in the WebAdmin Template. For more information on Enforced Categories, please see Policy Management - Categories. |
|
Use Group Language
|
Use this option to select the language. By default, English and French are displayed as choices once ‘Use Group Languages’ is checked. For other languages to display, go to Administration > WebAdmin Settings and scroll to ‘General Settings’. You can select more languages in the ‘Enables Languages’ field. |
|
List Tools |
The Group must have a Policy with at least one Local List for this option to display. See ‘Group List Tools’ below. |
Use Group Language
The Use Group Language option allows you to specify a language for Deny Pages for the Group.. If set, it will take precedence over the Global Language but not over the Policy Deny Page Language. If there is no Group or Policy Deny Page Language set, it will use the Global Language.
Selecting this option will cause a languages dropdown menu to appear.
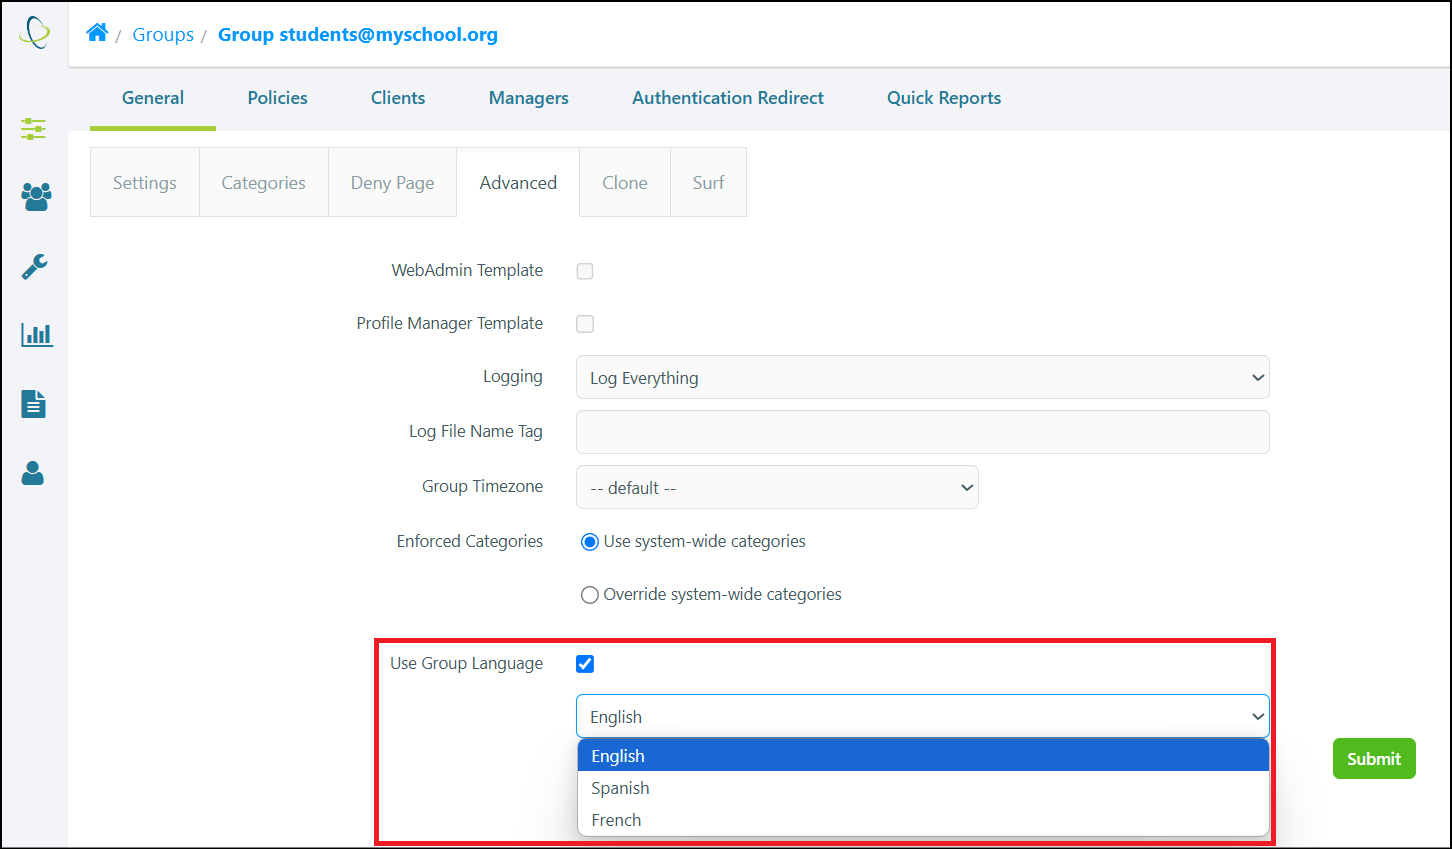
Please note: The available languages are determined by global WebAdmin Settings. Admin Accounts with sufficient permissions can manage the available languages by navigating to Administration > WebAdmin Settings > General Settings.
List Tools
Use this option to add a List Entry directly to the Group's Policy Local List. The available Actions for the List Entry are limited to Allow / Deny.
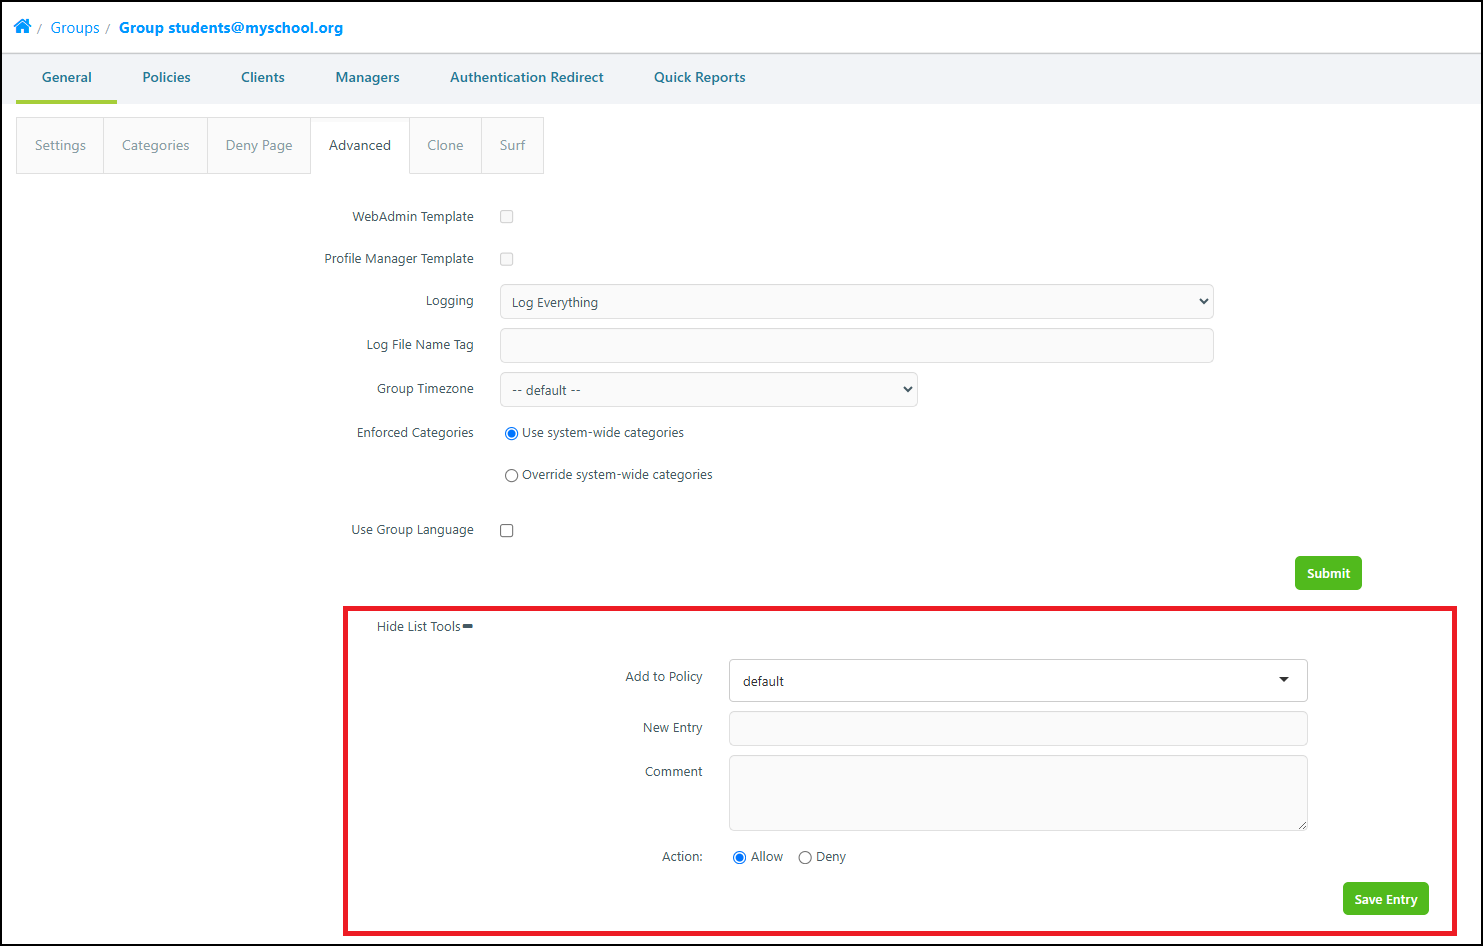
Please note: The Group must have a Policy with a created Local List in order for this option to display in the Advanced subsection..
-
For information on Local Lists, please refer to our Local Lists documentation.
-
For an overview on Netsweeper Lists and List Entries, please refer to our Lists Overview documentation.
General: Clone
General: Clone
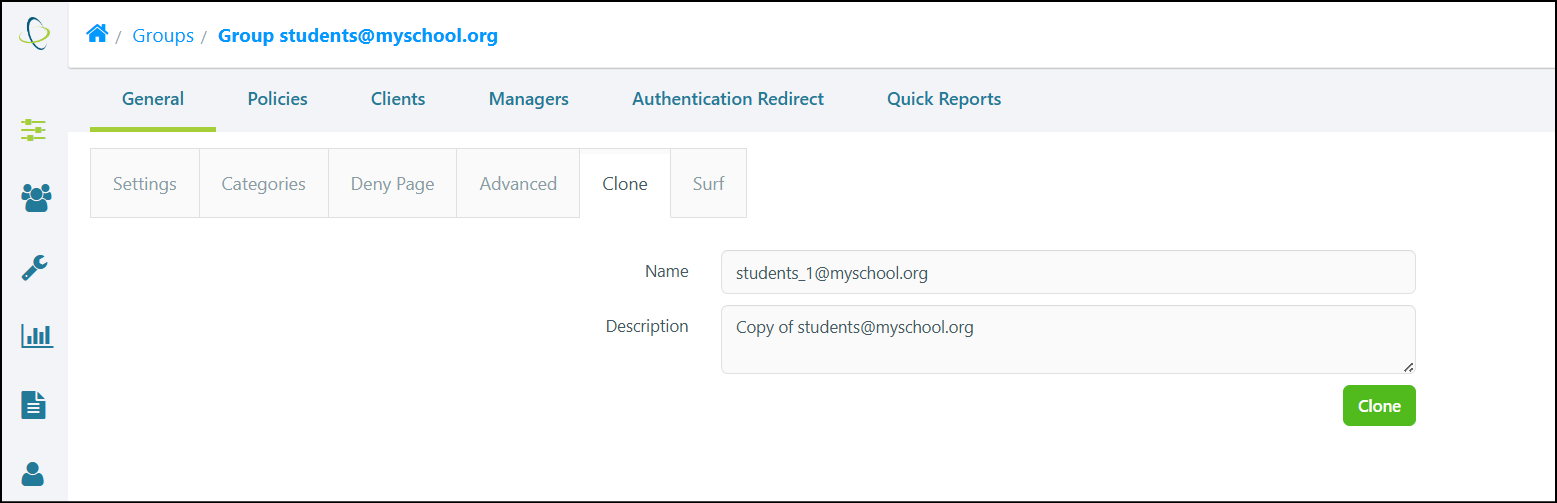
Use this subsection to Clone the selected Group. This allows you to quickly create new Groups based on the configuration of an existing Group.
The available fields are Name and Description.
Policies Tab
Groups: Policies Tab
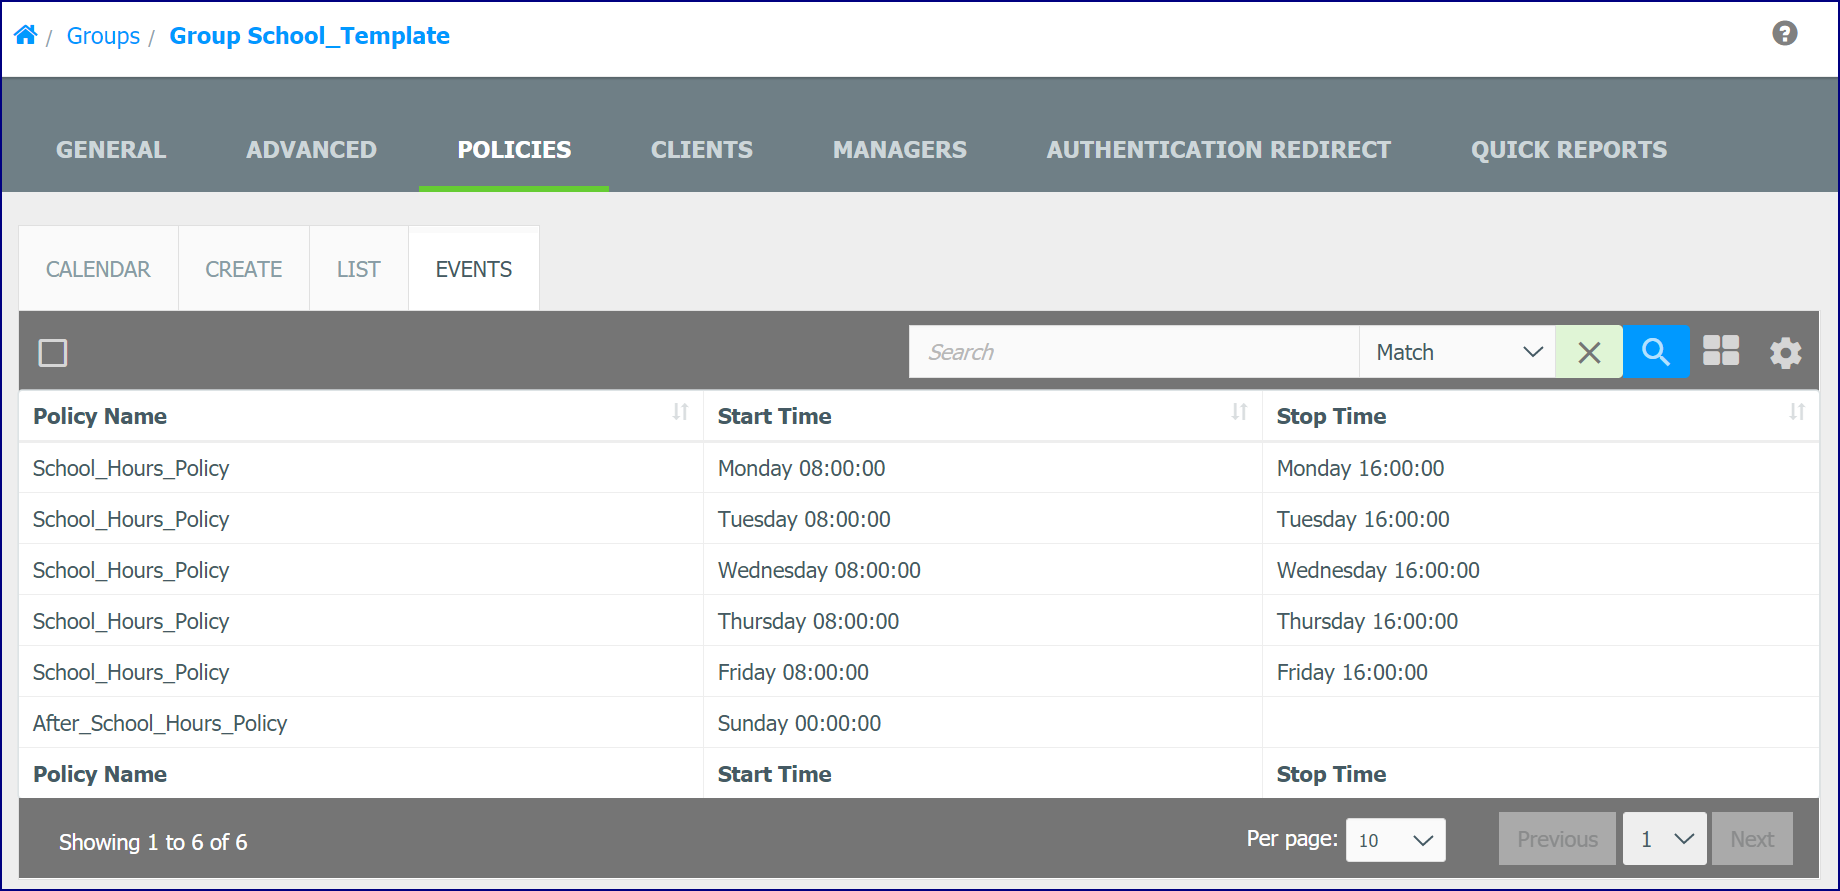
Use the Groups 'Policies' tab to add and manage Policies and Policy Events, (time durations that determine when a Policy is applied).
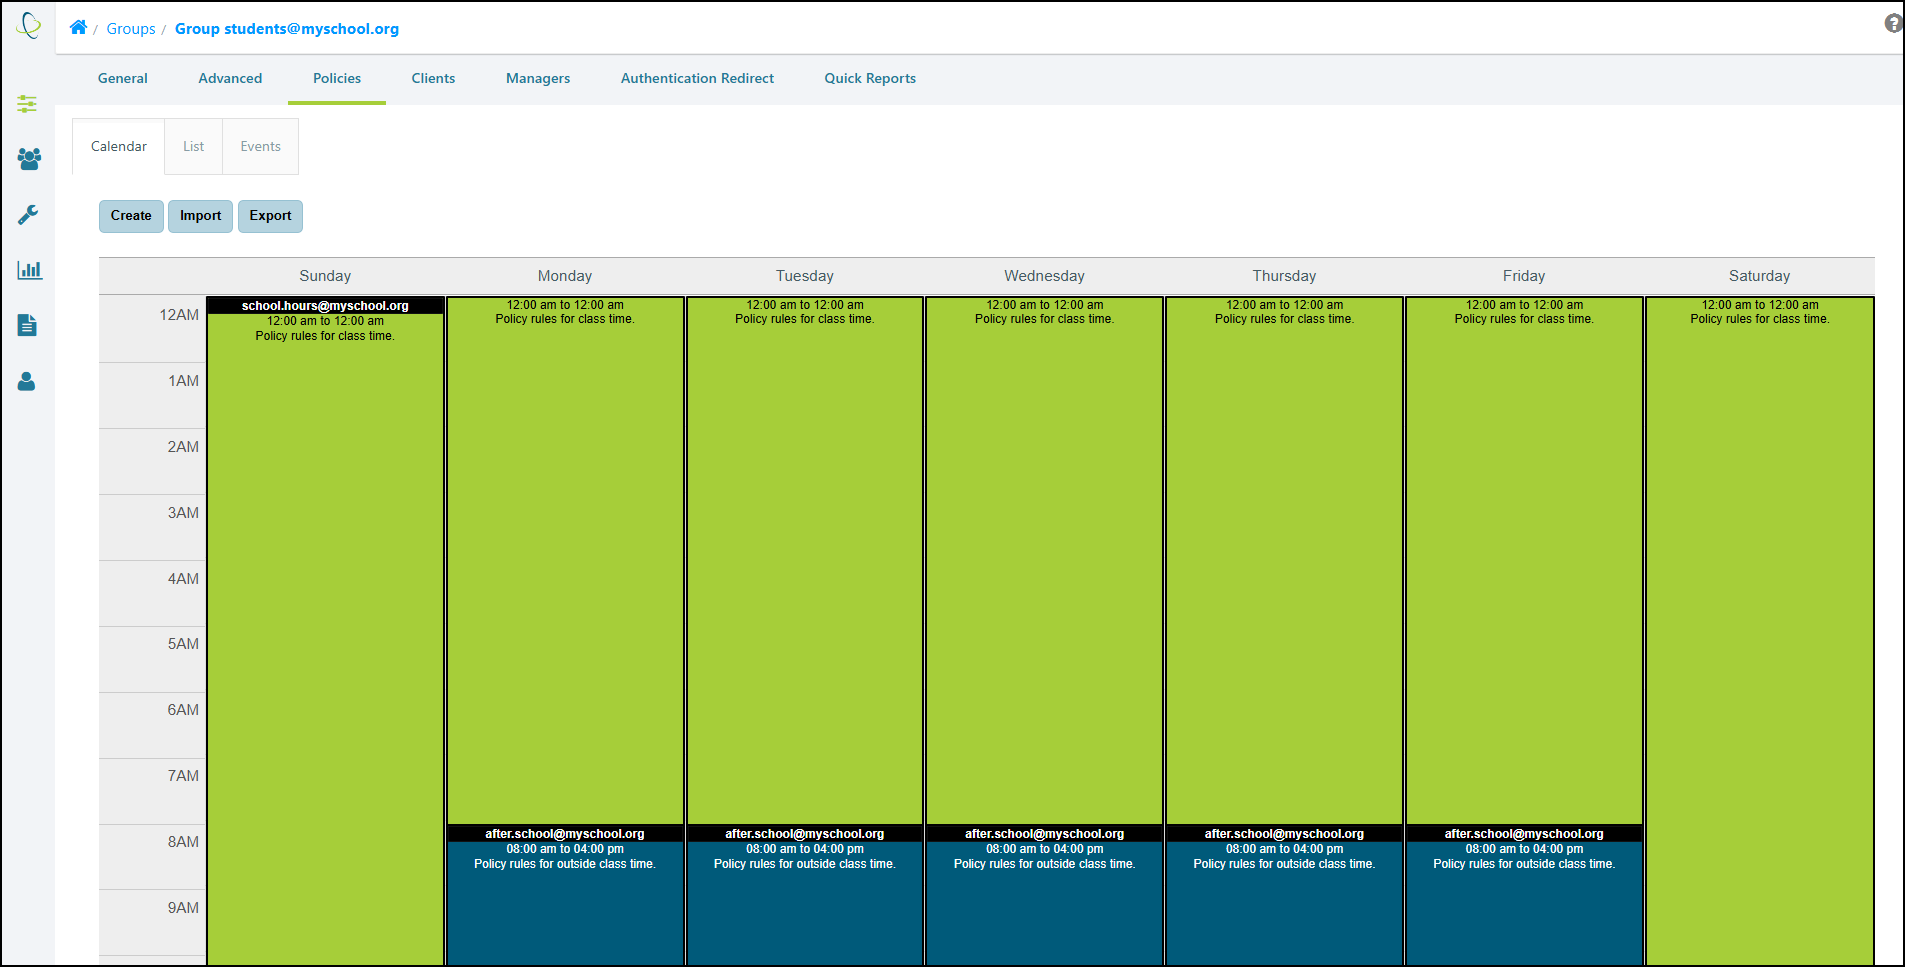
The Policies tab consists of three subsections, Calendar, List, and Events.
Policies: Calendar
The Calendar subsection provides a visual display of the Policy Events applied to the Group. From this tab, you can add, modify, or delete Policy Events directly on the Policy Calendar page. You can create new Policies ‘on the fly’ while adding or editing Policy Events. The duration of a Policy Event can be multiple days, or have ‘No End Time’. Multiple Policy Events can be created with the same duration starting on different days. You can also create your own color scheme for reviewing Policy Events on the Policy Calendar.
-
Please refer to our Policy Events Overview documentation for more information on Policy Events and the Calendar.
-
For step-by-step instructions on how to create Policy Events, please see our Creating Policy Events document.
Policies: List
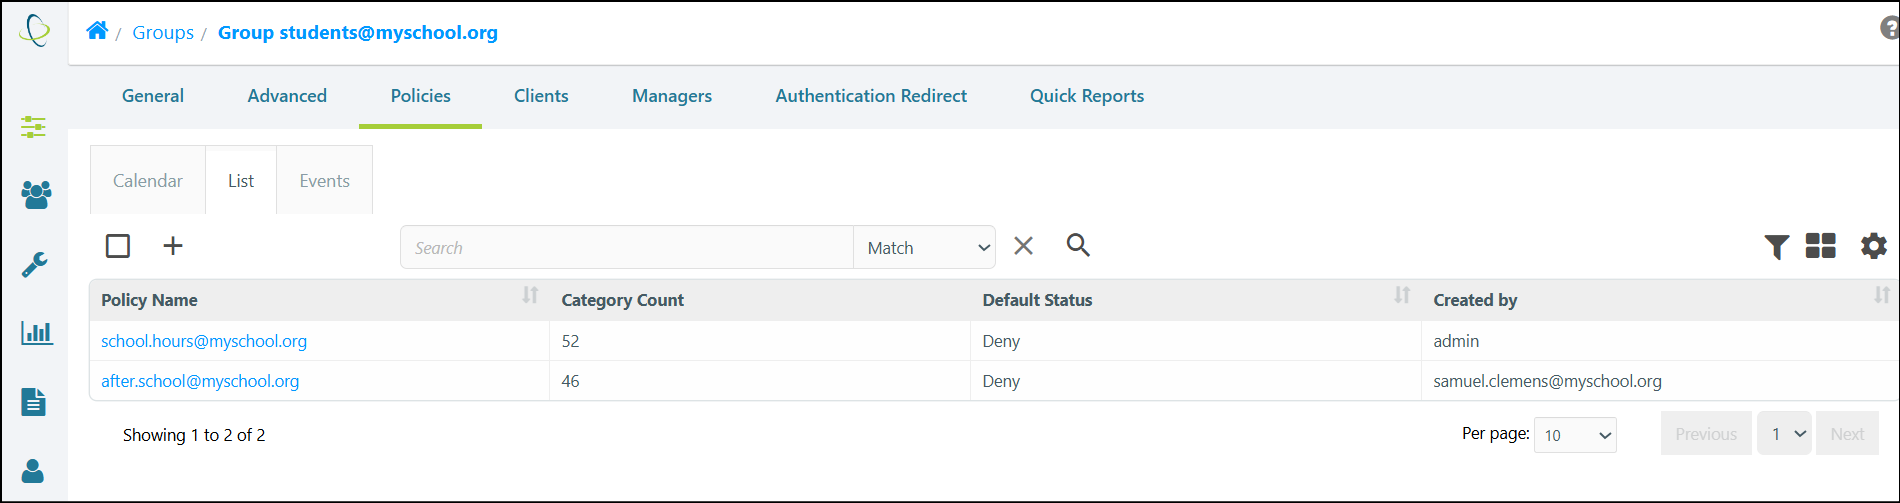
The List subsection allows you to view and manage the Group's Policies, as well as create new Policies for the Group.
Policies: Events
The Events subsection displays the Group’s Policy Events and their Start and Stop Time information in a table (or tile) view.
Clients Tab
Groups: Clients Tab
Use the 'Clients' tab to add and manage Clients for the selected Group. A Client is a computer user, workstation, or subnet of workstations, as defined by Client Type settings, (Client name, password, workstation address, or network subnet).
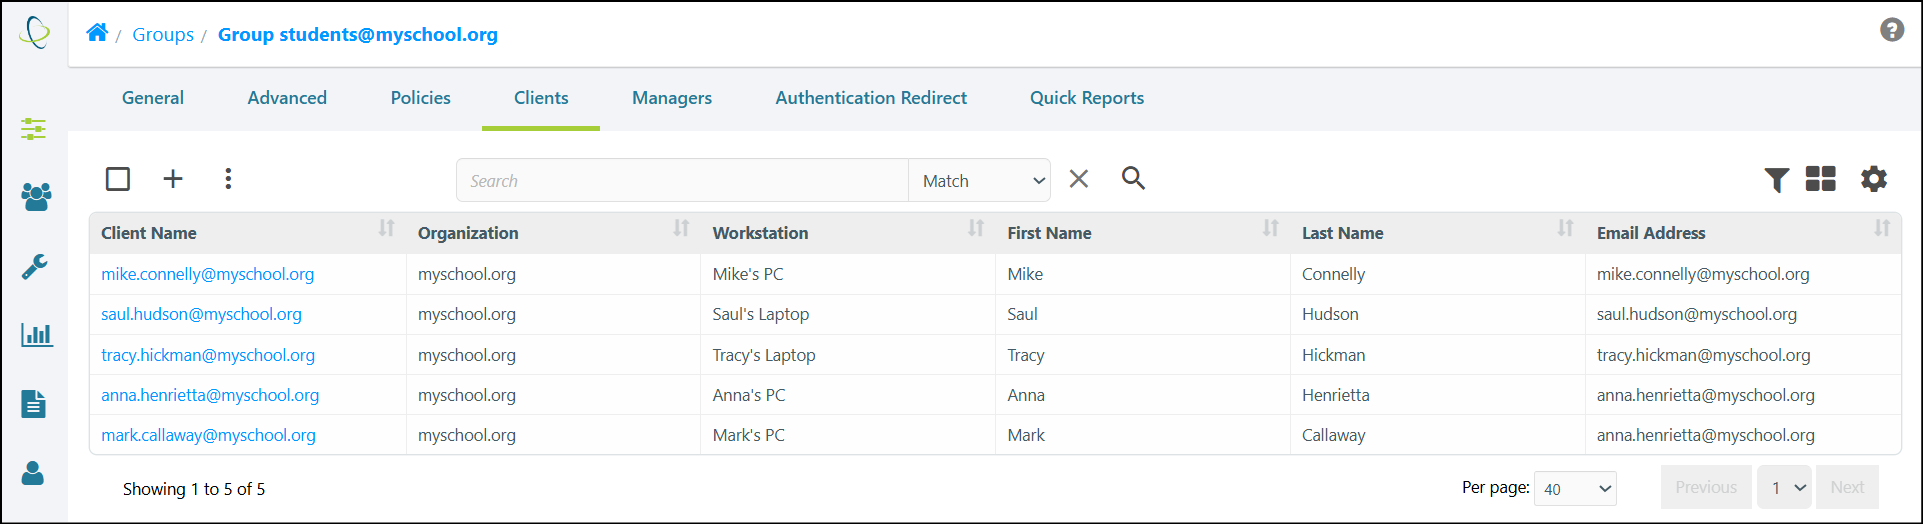
The 'Create' (+) icon allows you to manually add a new Client.
You can also create a Group from a selected Client by hovering over the Actions icon and selecting Create Group From Client.
For more information on this feature, please refer to our Create a Group from a Client documentation.
Client Categories
If the Enable Client Categories option has been applied in Administration > WebAdmin Settings > Group Client Settings, the Group's 'Clients' tab displays the number of Categories selected for any Client that has their own Categories or Category Template applied.
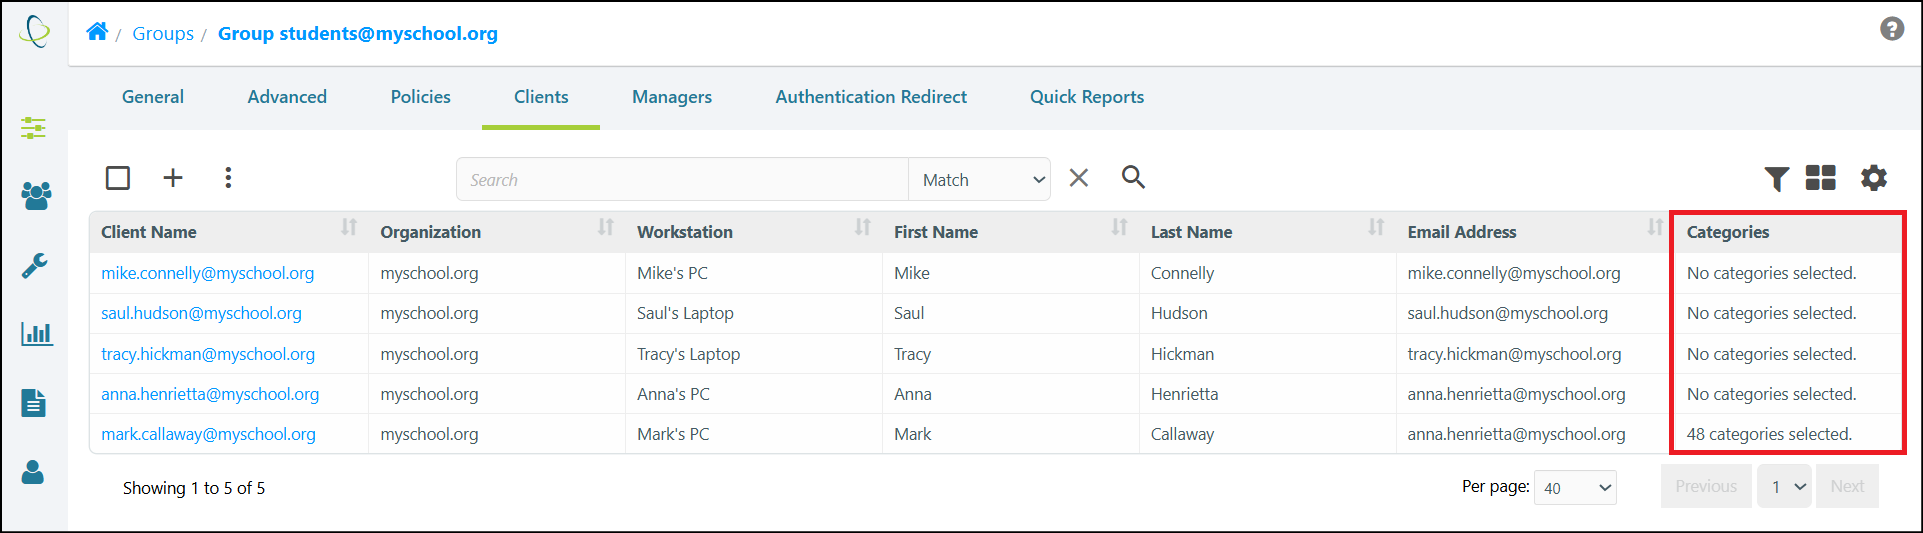
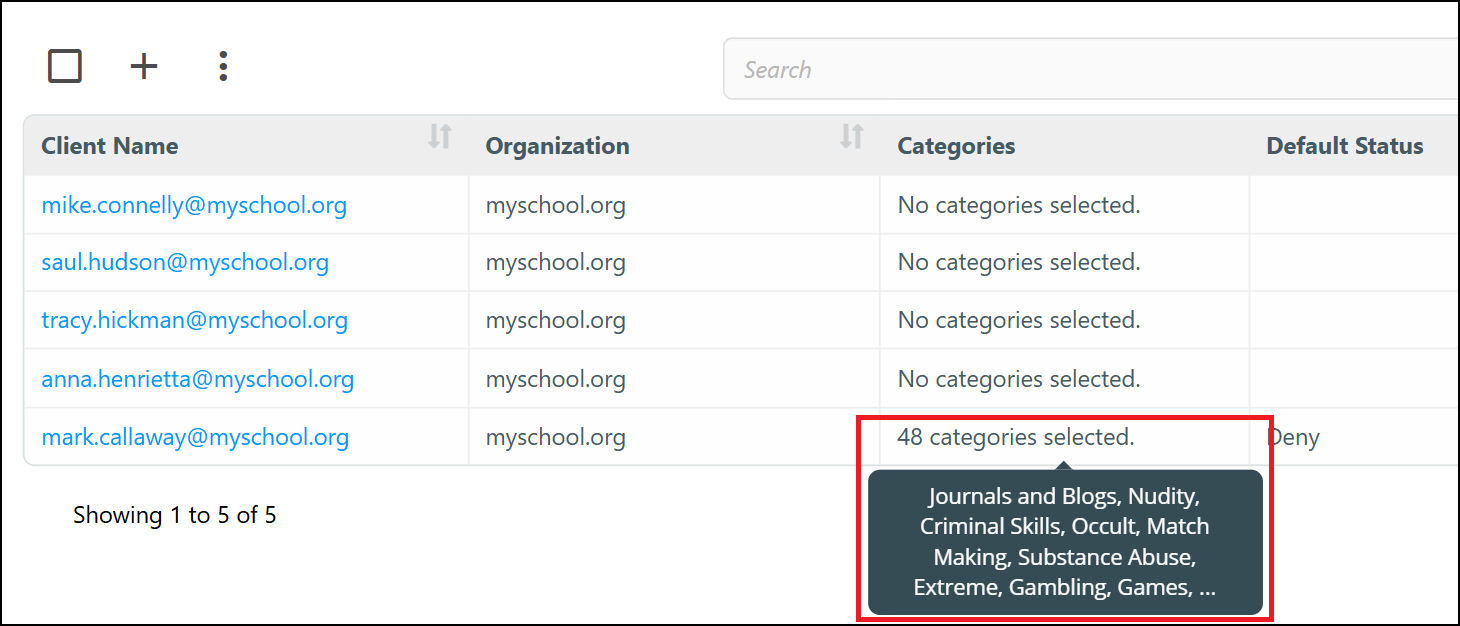
Hovering over the message displays a tool-tip with a list of assigned Categories. If the list is too long, the tool-tip will be truncated.
A full list of assigned Categories can be viewed by selecting the Client in the Client Name column.
See also:
Managers Tab
Groups: Managers Tab
Use the 'Managers' tab to assign an Account to manage the selected Group.
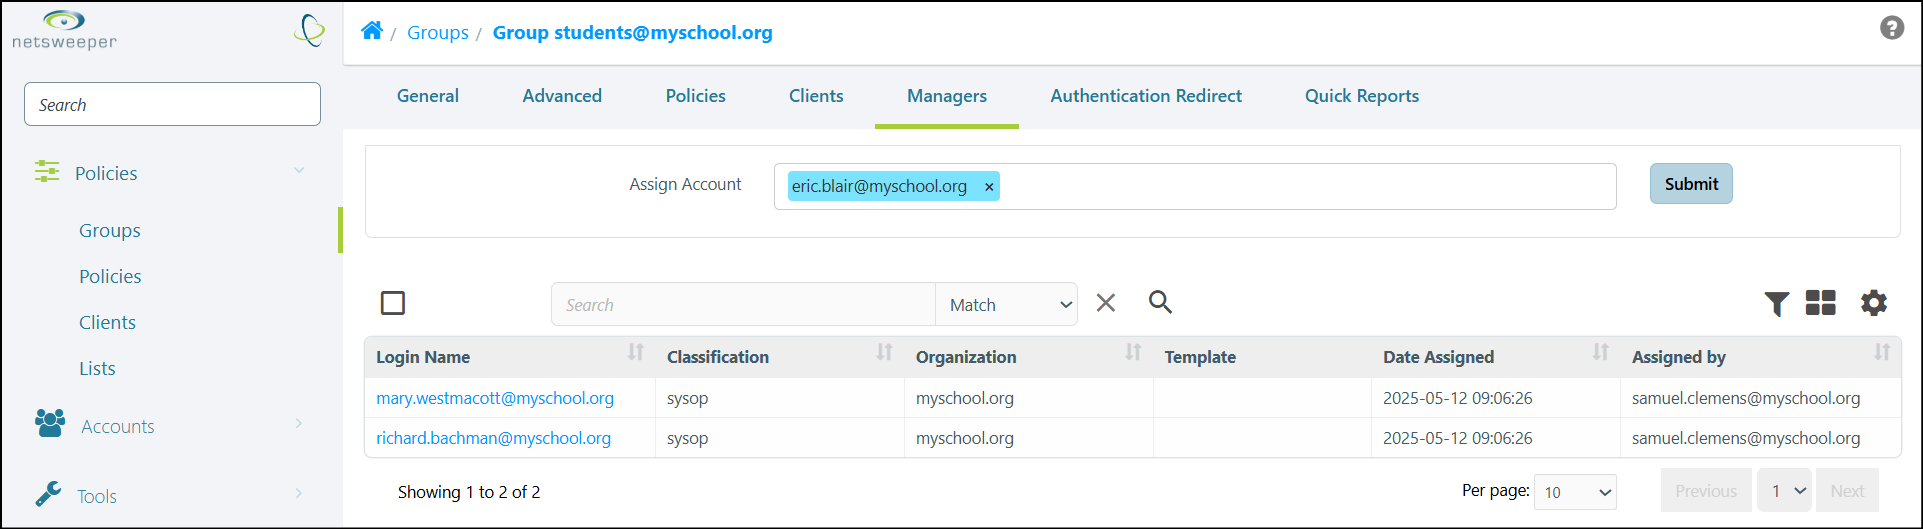
Account Overview
An Account is a user with limited privileges that manages filtered Clients in their Group. Usually this person has some authority over the other users such as a teacher over a class of students, a manager over a Group of workers, or a parent over a family. There are a variety of accounts available for delegating filtering administration.
Adding a SysOp Account to a Group
- Navigate to Policies > Groups > List, choose the desired Group and select their Managers tab.
- Select the Assign Account field to display a dropdown list of Account names.
-
Choose one or more Account names and then select the Submit button.
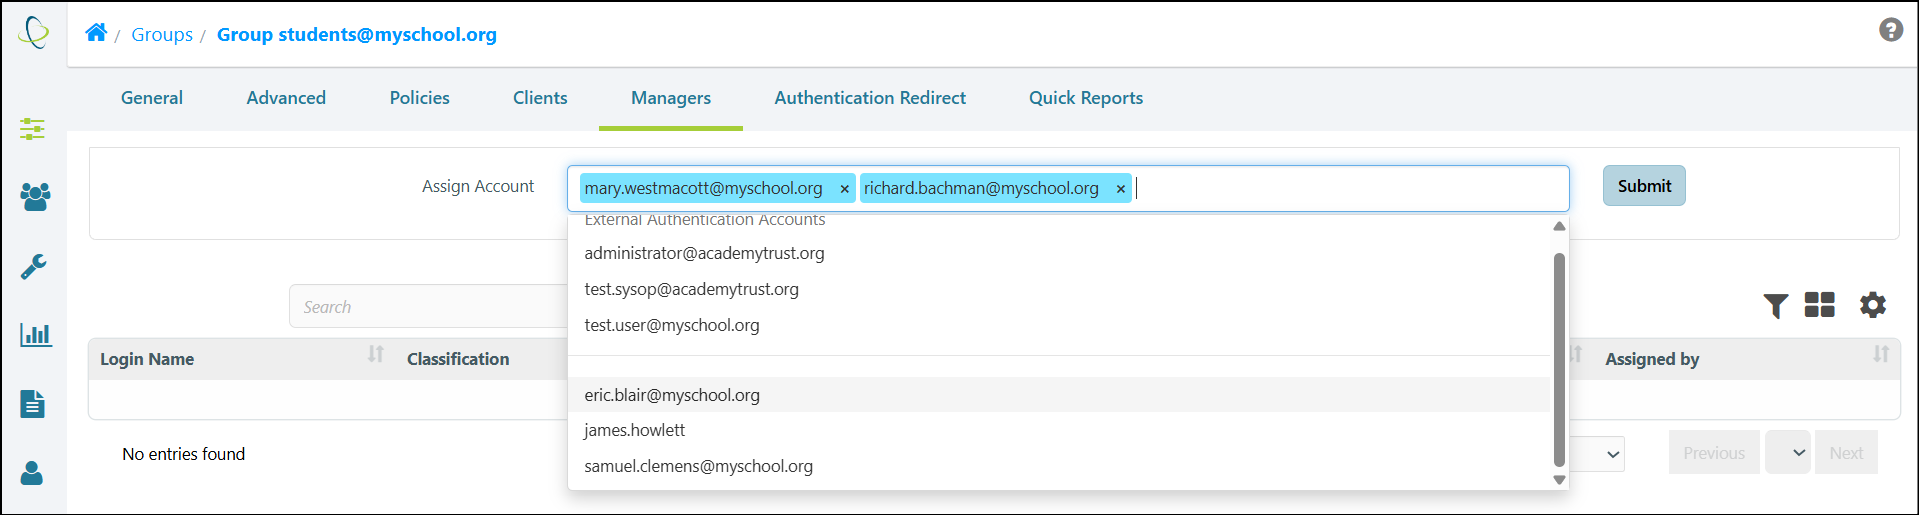
- The selected Accounts are added and can now access and manage this Group.
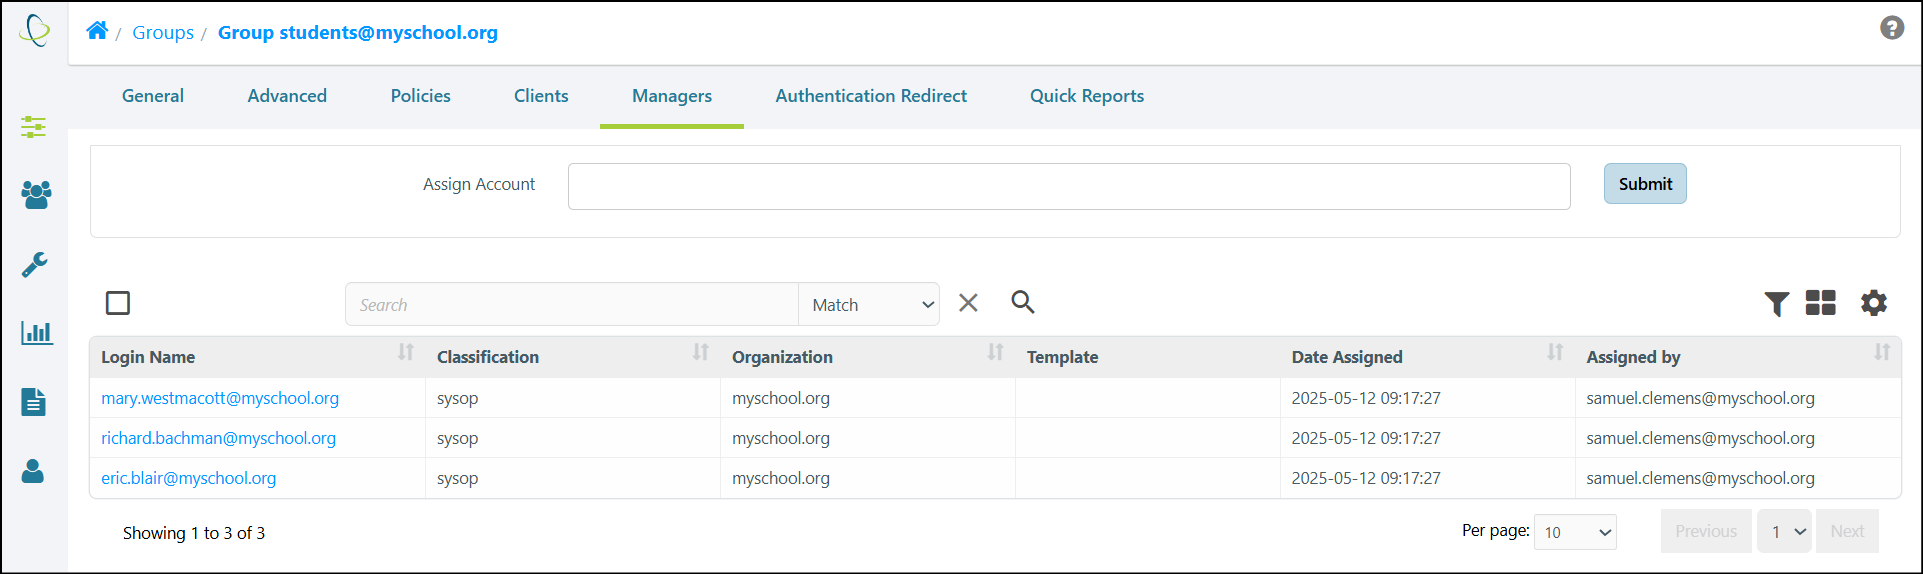
For more information on Accounts, please refer to our Accounts documentation.
Authentication Redirect Tab
Groups: Authentication Redirect Tab
The Authentication Redirect tab enables users to authenticate in order to be placed into a different filtering Group.
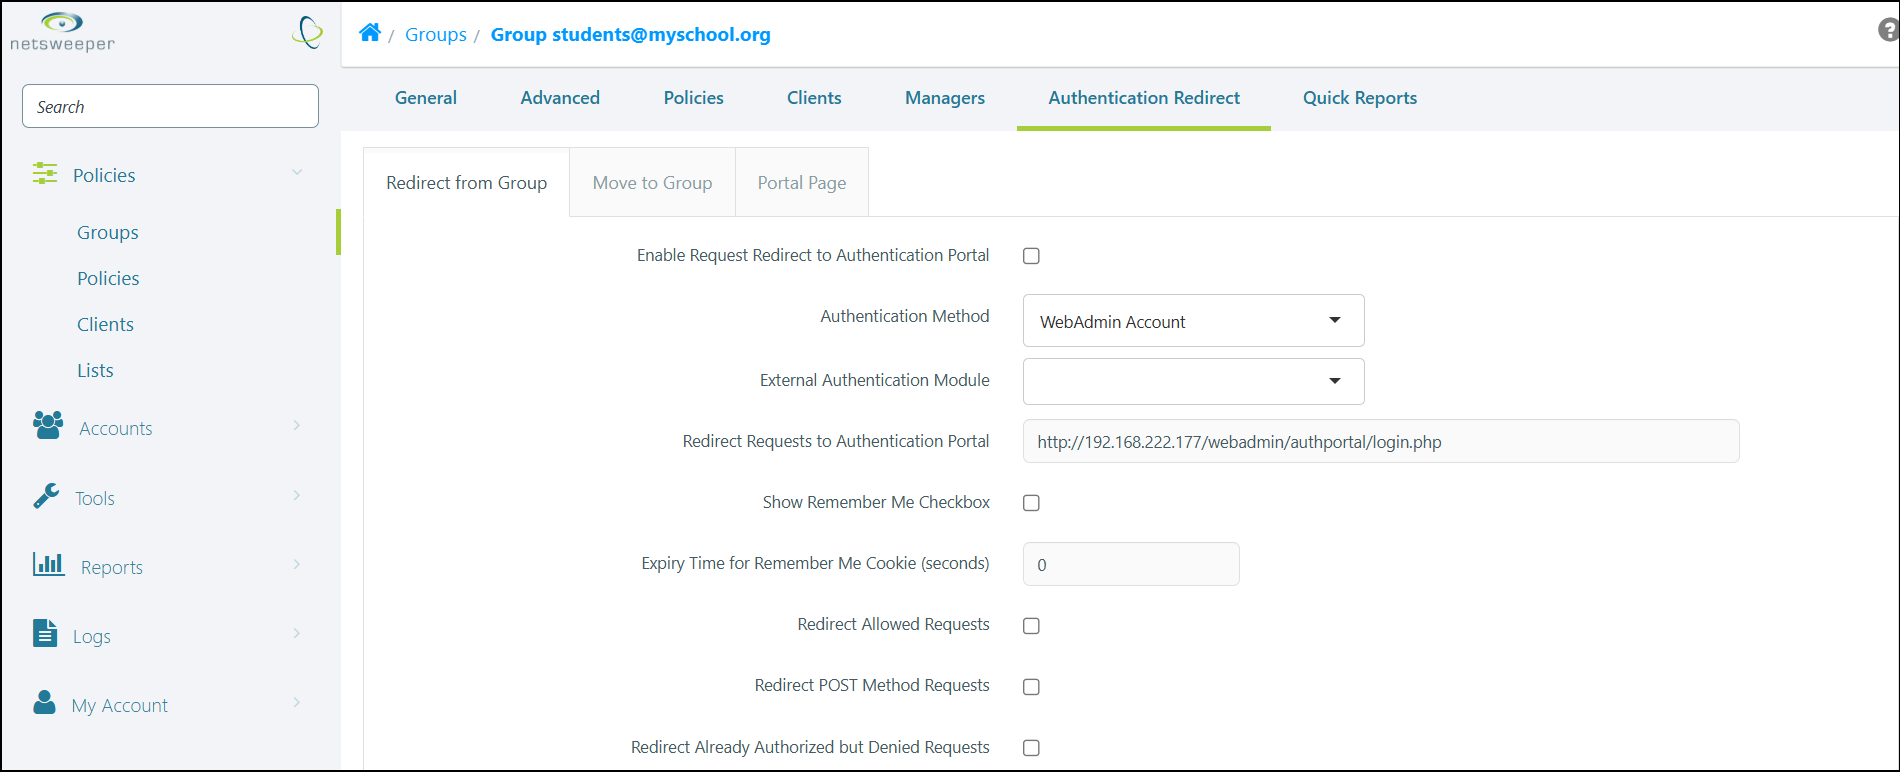
The page contains three subsections: Redirect from Group, Move to Group, and Portal Page.
-
Use the Redirect from Group tab to configure if and how Clients are forced to authenticate and be moved from this Group into another filtering Group. These are referred to as 'Outbound Settings'.
-
The Move to Group tab contains settings that determine how Clients that have been authenticated are handled when they are moved into this Group. These are referred to as 'Inbound Settings'.
-
The Portal Page tab allows you to create a Portal Deny Page. Click the Create Content (if available) and create the content for the Portal Deny Page.
Please refer to our Authentication Redirect configuration documentation for more information on this feature.
Quick Reports Tab
Groups: Quick Reports Tab
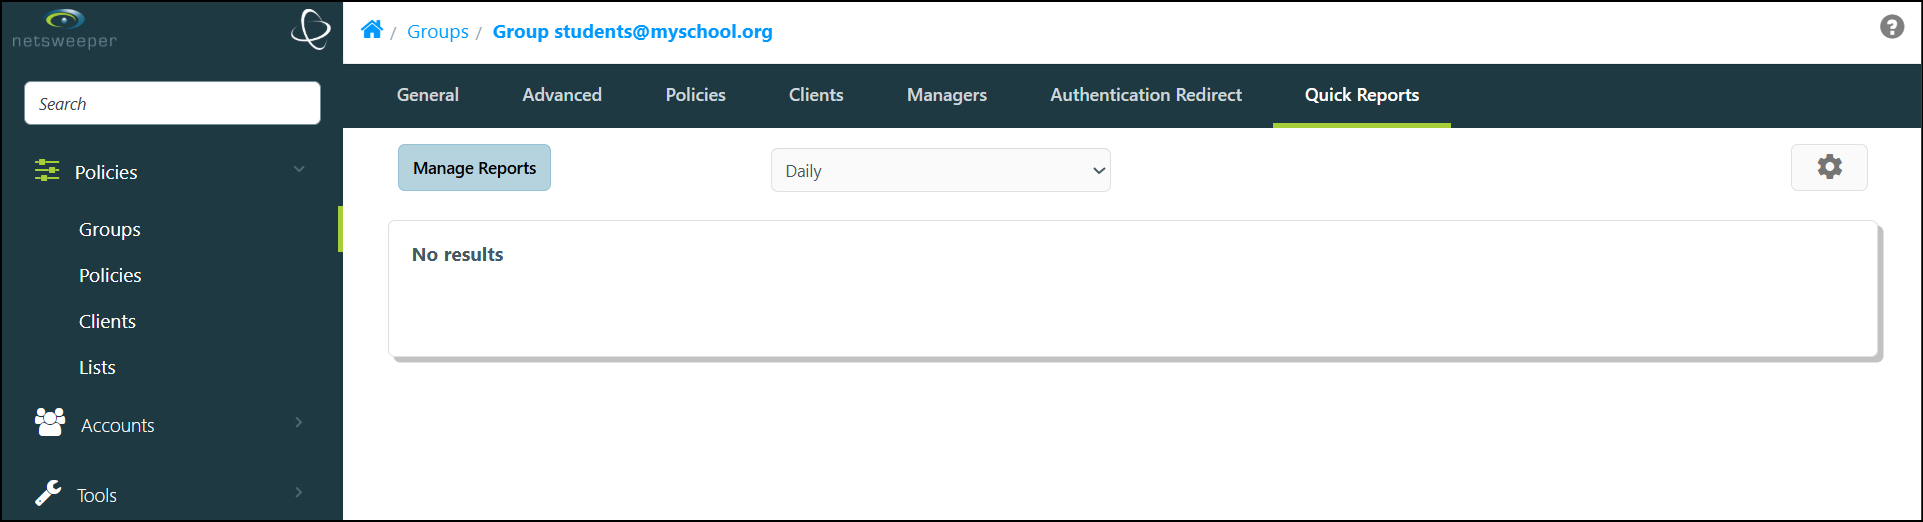
Use the 'Quick Reports' tab to view and manage Quick Reports for the selected Group.
About Quick Reports
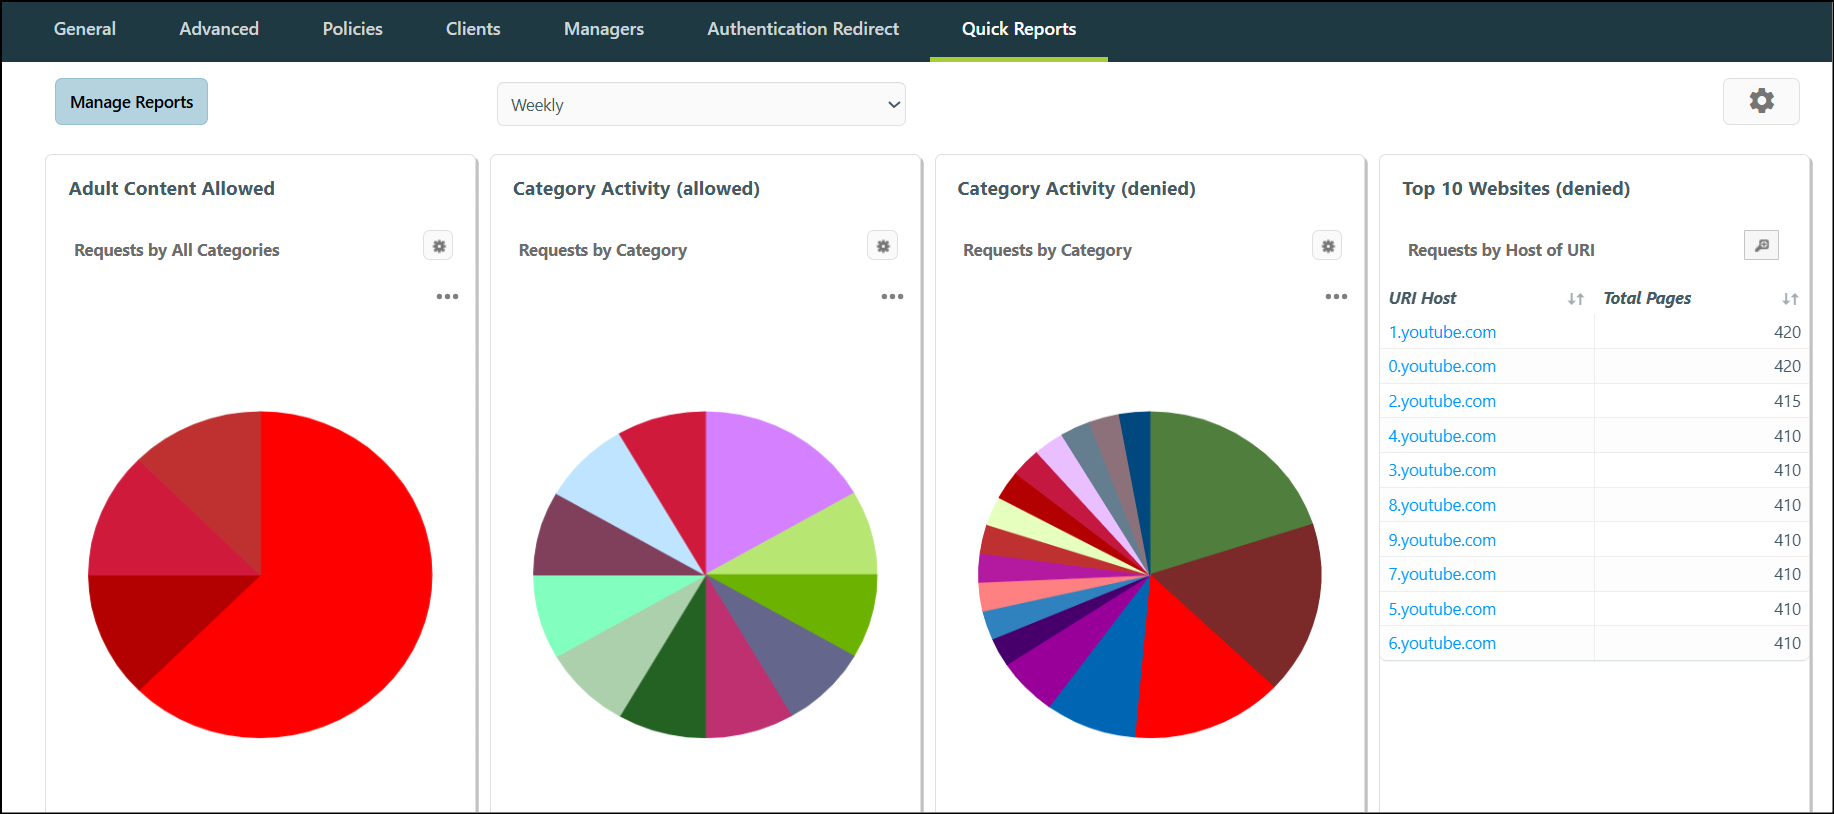
Quick Reports are a set of Reports that have been designed to provide high-level information at a glance. These Reports can easily be enabled for any Group that you have permission to manage. Each Quick Report comes in three instances; Daily, Weekly, and Monthly.
Enabling Quick Reports for a Group
-
Navigate to Policies > Groups > List, choose the desired Group, and select the Group's Quick Reports tab.
-
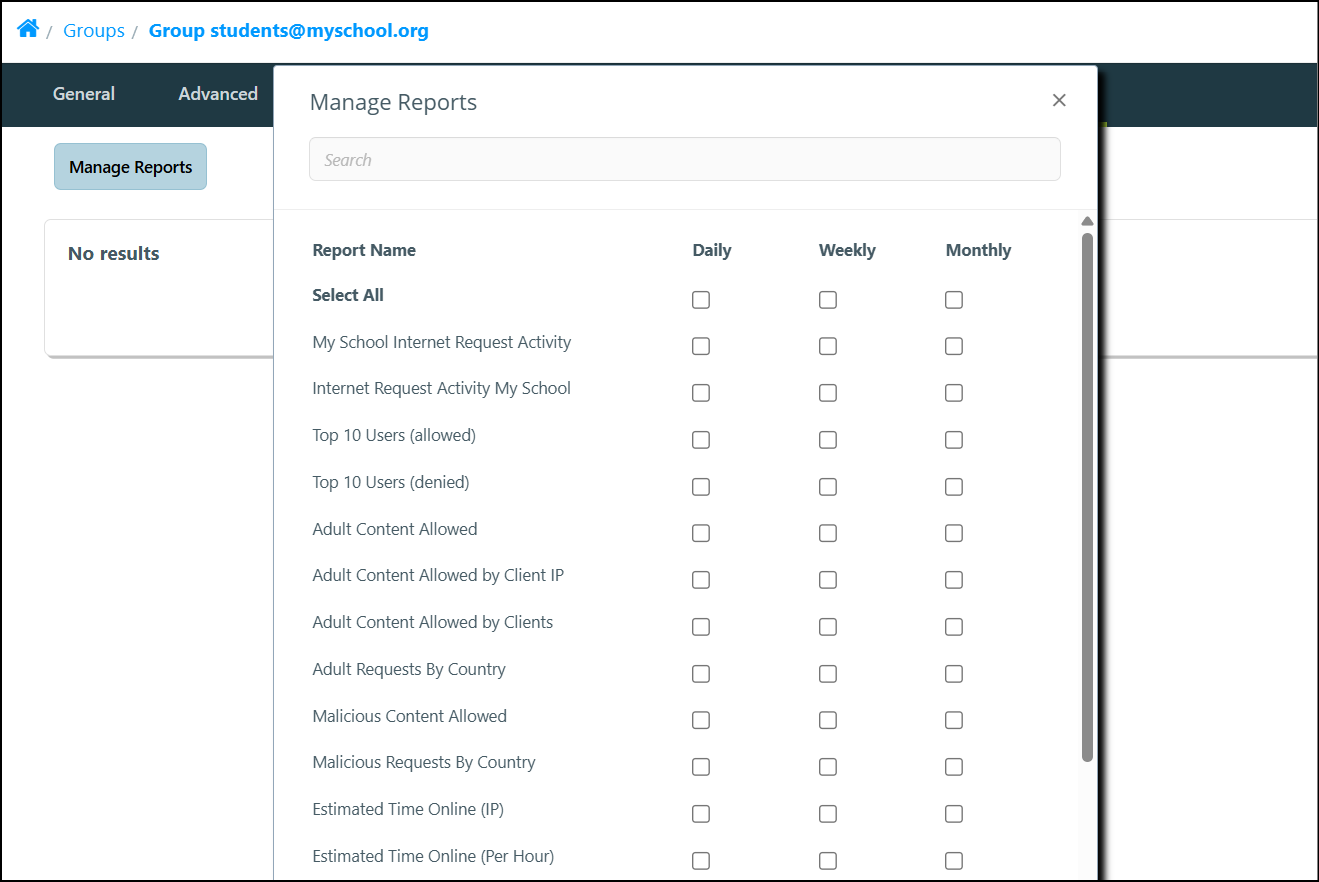
Select the Manage Reports button to display the 'Manage Reports' popup window.
-
Choose any of the available Quick Reports and instances as desired and select the Submit button.
-
Enabled Quick Reports will process and load right away.
Deleting a Group with Quick Reports
If you delete a Group with Quick Reports assigned, a popup displays that asks if you want to delete the associated Reports.
Additional Information
For more information about Quick Reports, please refer to our Quick Reports documentation.
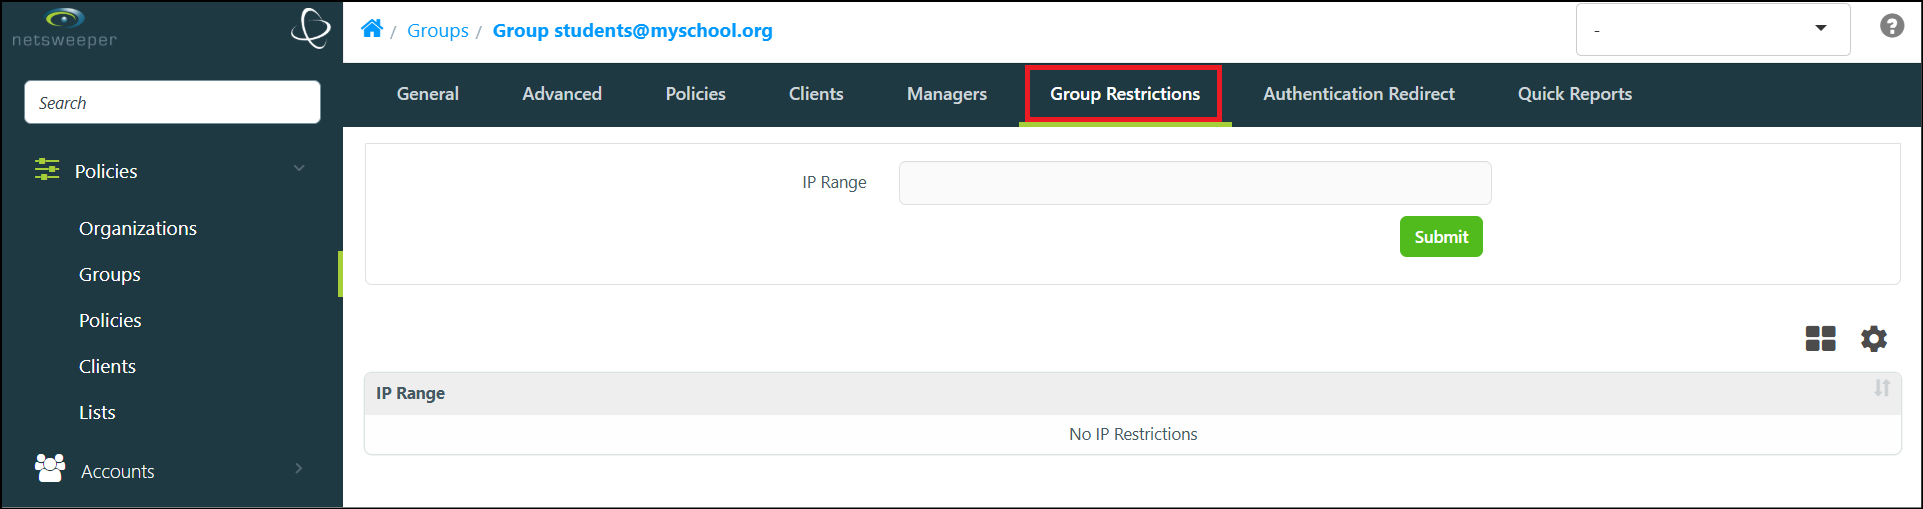
Restrictions Tab
Groups: Restrictions Tab
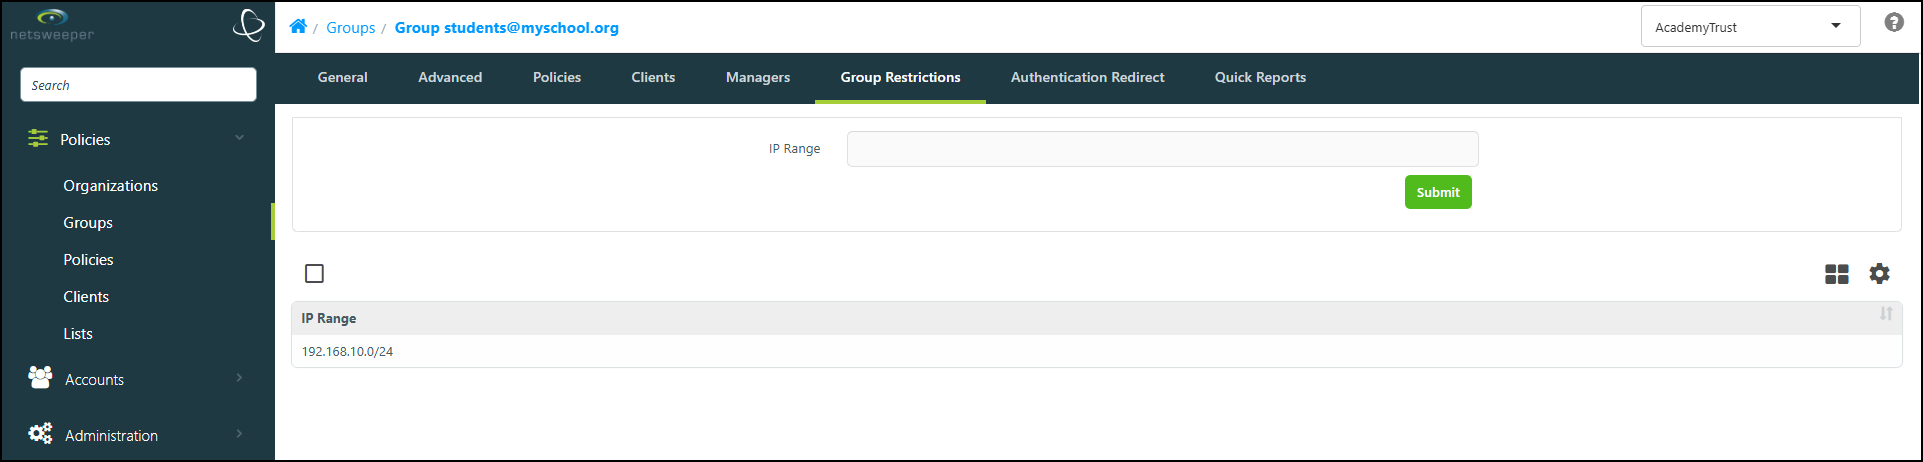
Use this option to input an IP range for the Group. This can be entered as a range (e.g. 192.168.4.1-192.168.4.24) or as a CIDR notation (192.168.4.0/24). Group Restrictions can also be set in WebAdmin Templates.
Please Note: An Admin-level Account with the appropriate Permissions is required to perform the steps in this document.
Adding the Group Restrictions Tab
To enable the Group Restrictions tab.
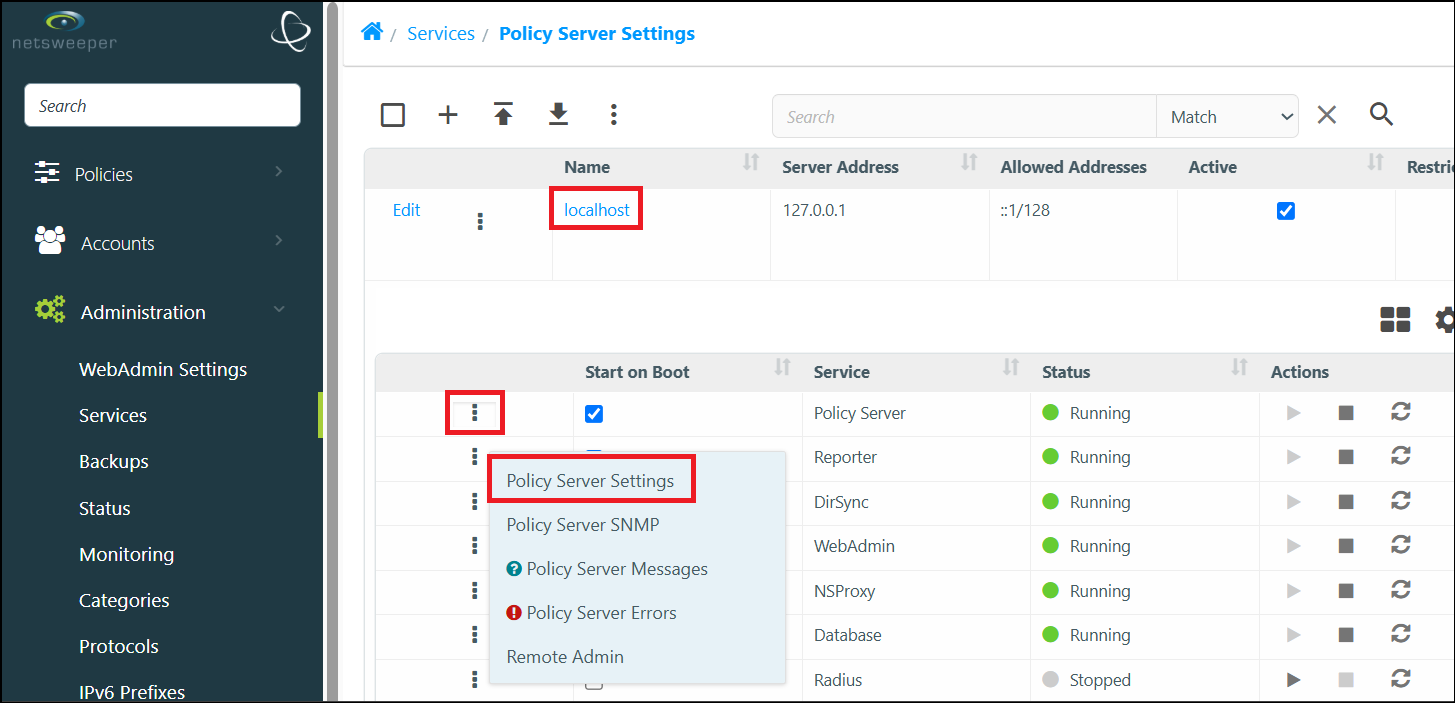
- Navigate to Administration > Services and expand the Policy Server Host, select the Actions button and choose the Policy Server Settings selection.
- In the Policy Server Settings window, add dbclientnamegrouprestrict to the groupclient_lookup_order at the beginning of the list.
i.e. groupclient_lookup_order dbclientnamegrouprestrict dbclientname dbip dbsubnet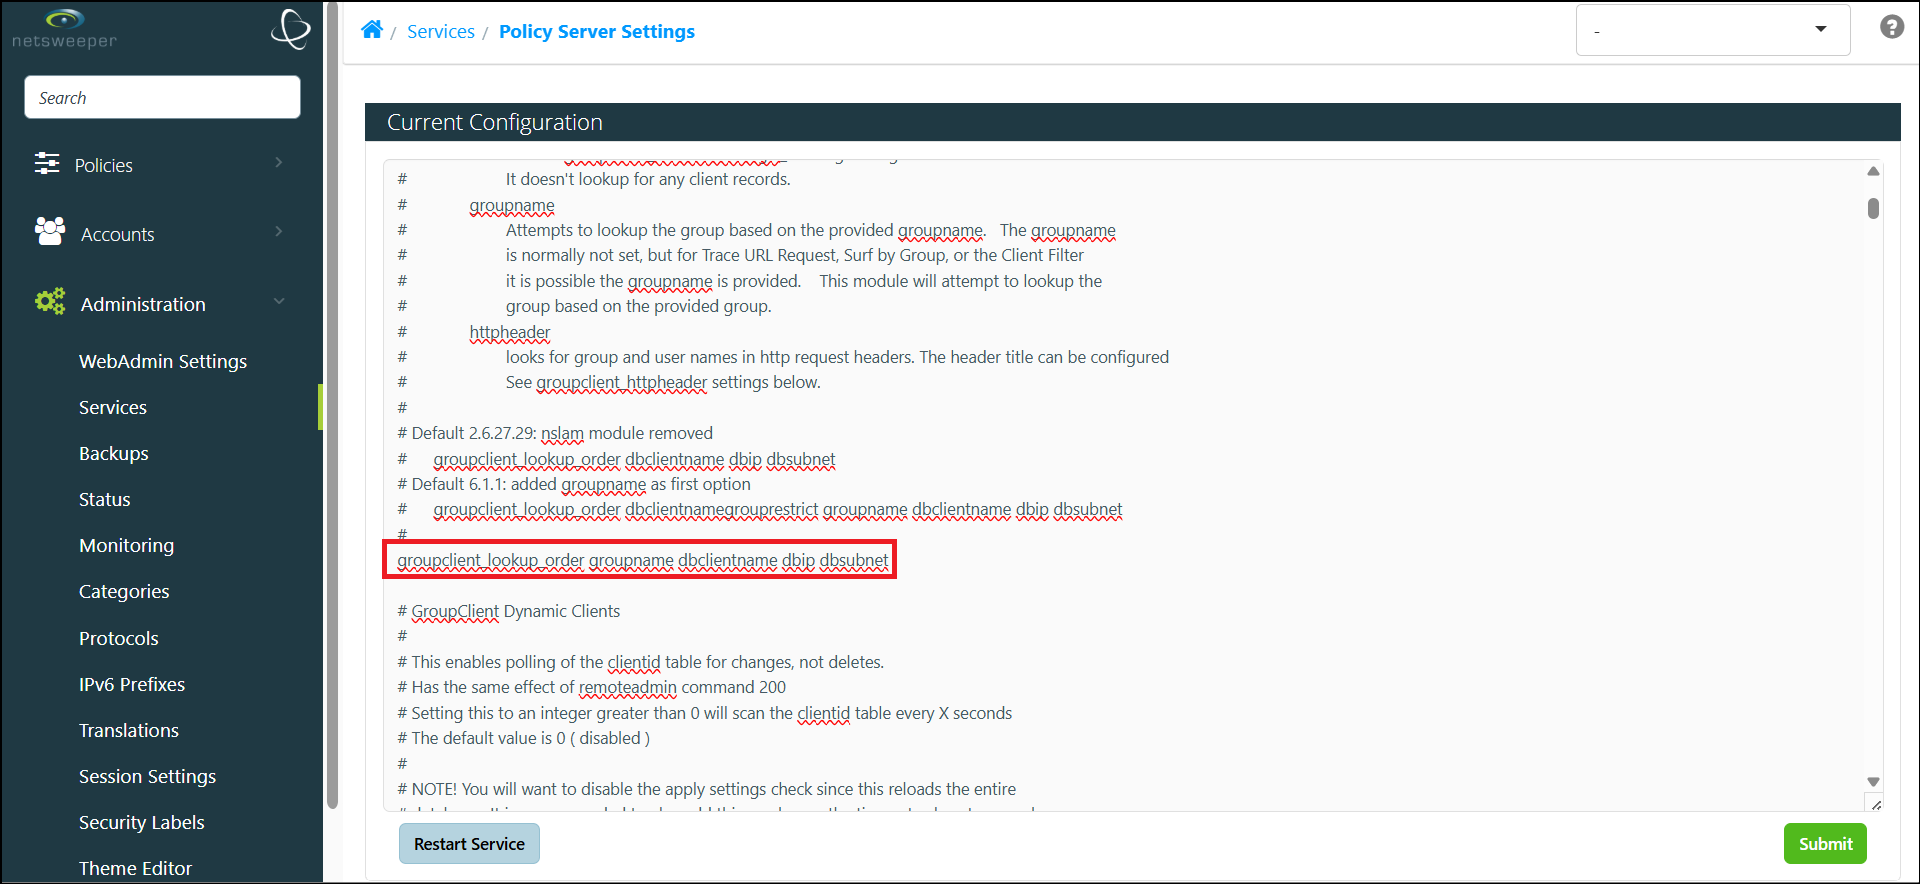
- Select the Submit button to apply the configuration changes and the Restart Service button to restart the Policy Server.
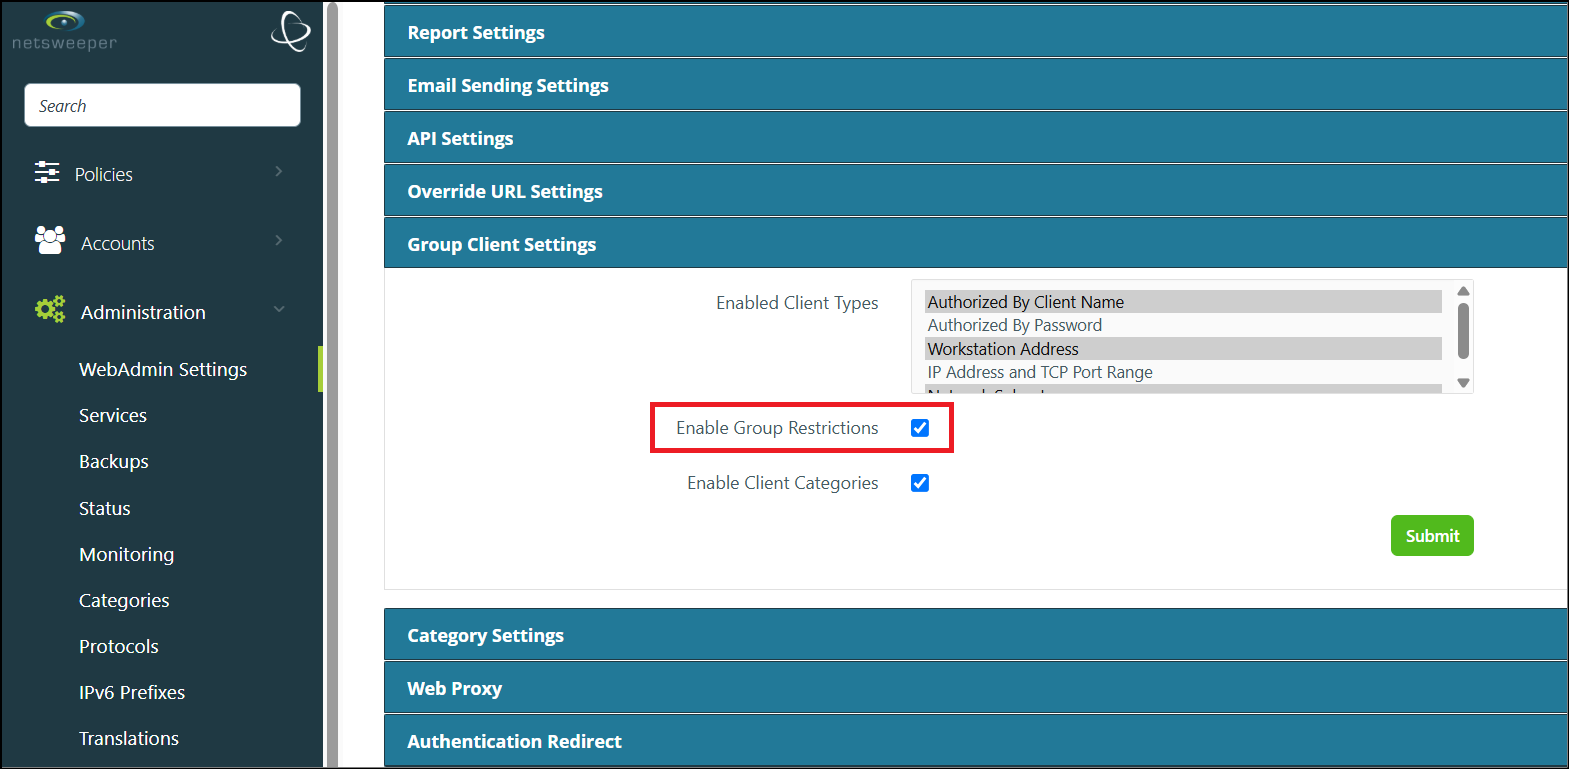
- Next, navigate to Administration > WebAdmin Settings, find the 'Group Client Settings' section and select the Enable Group Restrictions option.
- You will receive a warning about needed to enable the 'dbclientnamegrouprestrict' option in Policy Server Settings, (as per the previous step).
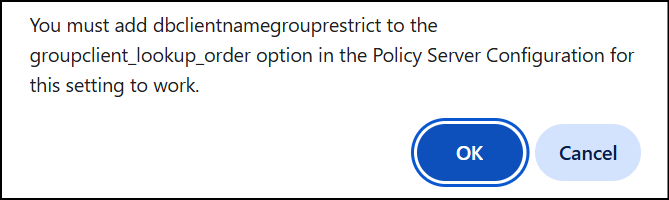
- Select OK and then select the Submit button to apply your changes. You will receive a 'WebAdmin Settings Saved Successfully!' notification.
- Navigate to Policies > Groups > List and choose a Group to confirm the Group Restrictions tab has been added.
Setting up Group Client Restrictions for External Authentication
This example will restrict the Clients to the defined IP range. The dbclientnamegrouprestrict module we will use in Policy Server Settings will look up a user's Group based on the username and make sure the user is in a range that is set for a Group. This can be used in deployments where the username is known such as with the Workstation Agent the or Client Filter.
The IP range Restriction feature can be used when deployments are shared between schools. It can keep students from sharing passwords to get less restrictive filtering Policies.
-
Navigate to Policies > Groups > List and choose the Group you wish to edit.
-
Select the Group Restrictions tab. (If you cannot see this tab, see the 'Adding the Group Restrictions Tab' section above).
-
In the IP Range field add the IP address or IP range that would apply to the Group.
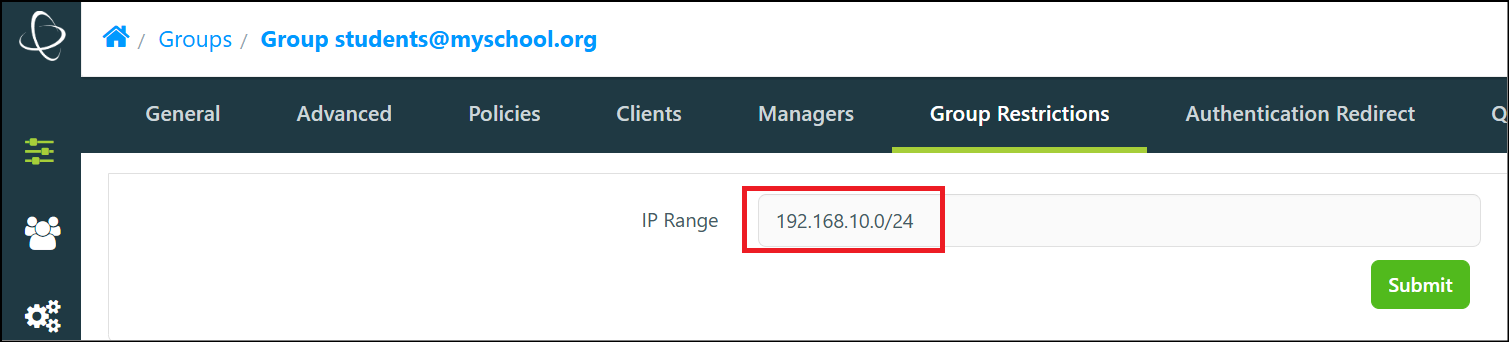
-
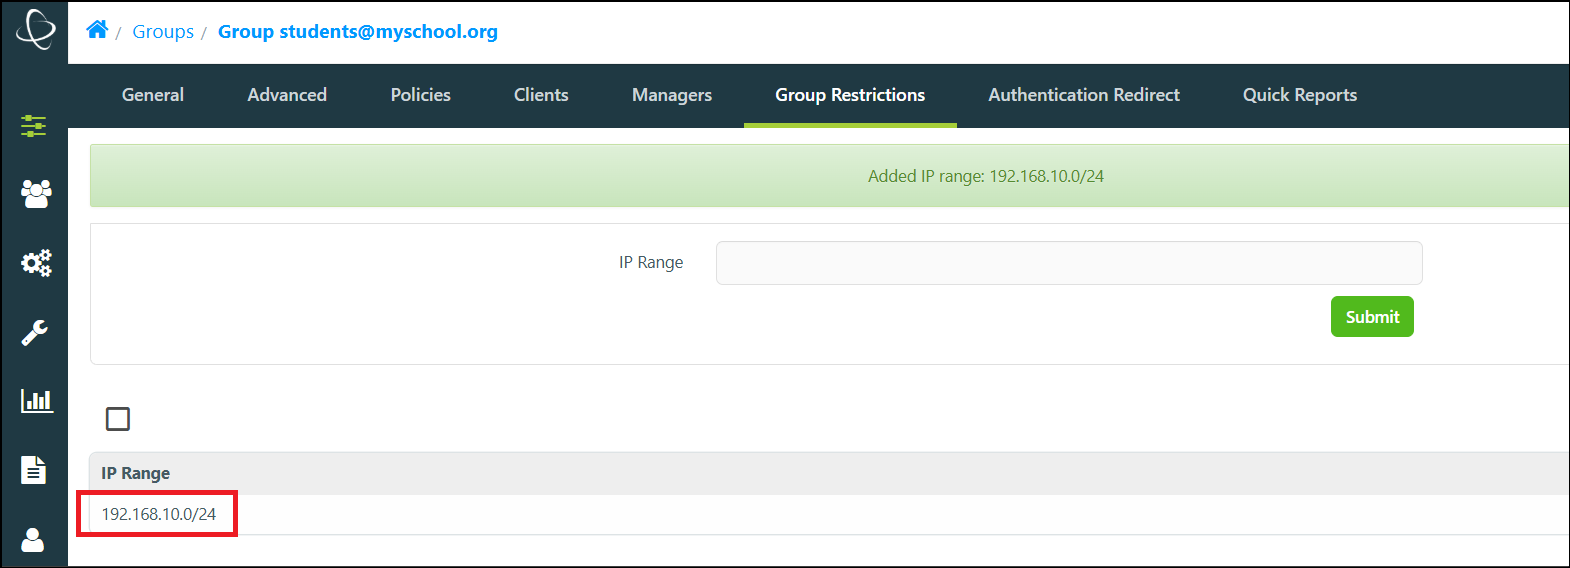
Select the Submit button to apply the Restriction.
-
The IP range is added and appears in the window. You will also received a 'Added IP range: 192.168.10.0/24' notification.
Advanced Tab
Groups: Advanced Tab
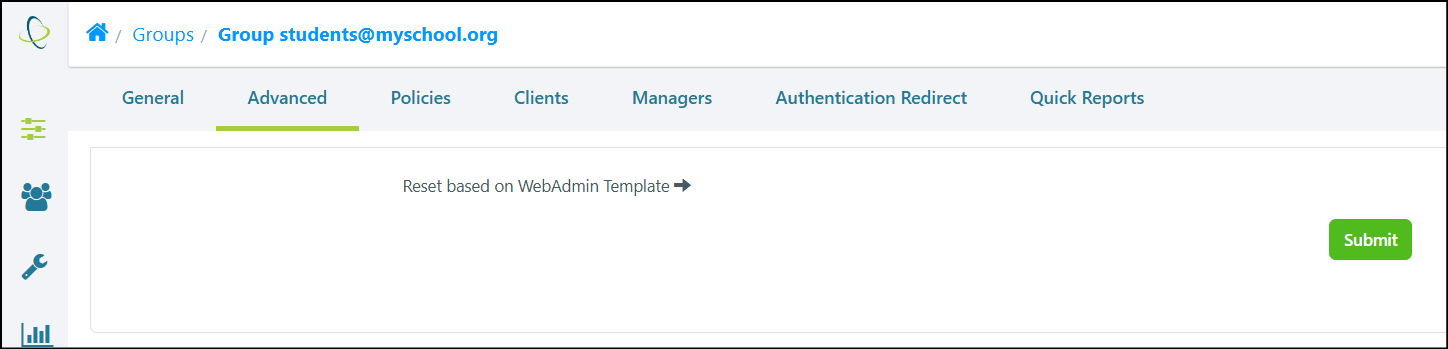
The 'Advanced' tab allows Groups to be 'reset' based on existing Group Templates.
Please note: The Advanced tab only displays if Templates are enabled and available.
Reset Based on WebAdmin Template
-
Navigate to Policies > Groups > List and choose the desired Group.
-
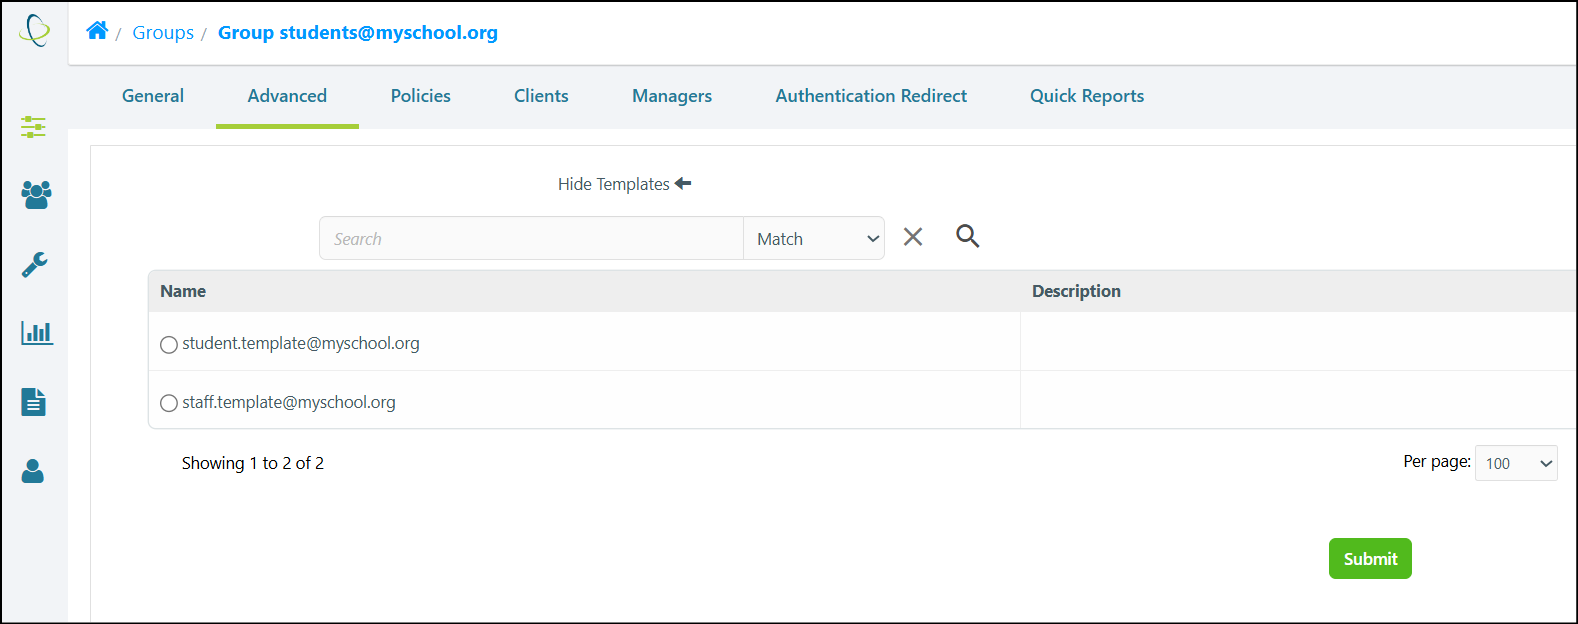
In the Group's 'Advanced' tab, select the Reset Based on WebAdmin Template button. Available Templates display.
-
Choose the desired Template and select the Submit button. The Group is reset based on the Template you have applied to it.
Copy Settings From Group
Additionally, if the 'Copy Group from Existing Group' option has been enabled in WebAdmin Settings > General Settings and at least one Group Template is available, the Copy Settings from Group option will be available in the 'Advanced' tab.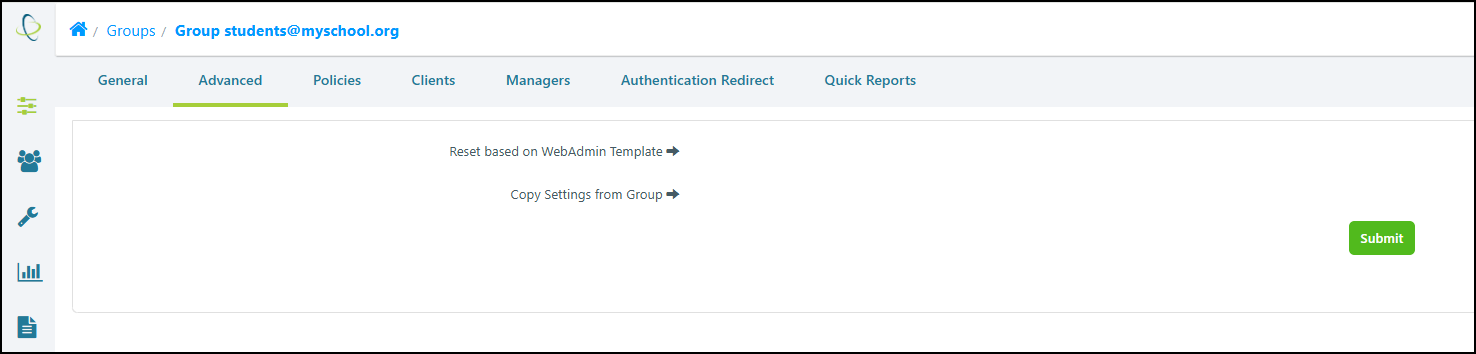
Copy Settings From Group
-
Navigate to Policies > Groups > List and choose the desired Group.
-
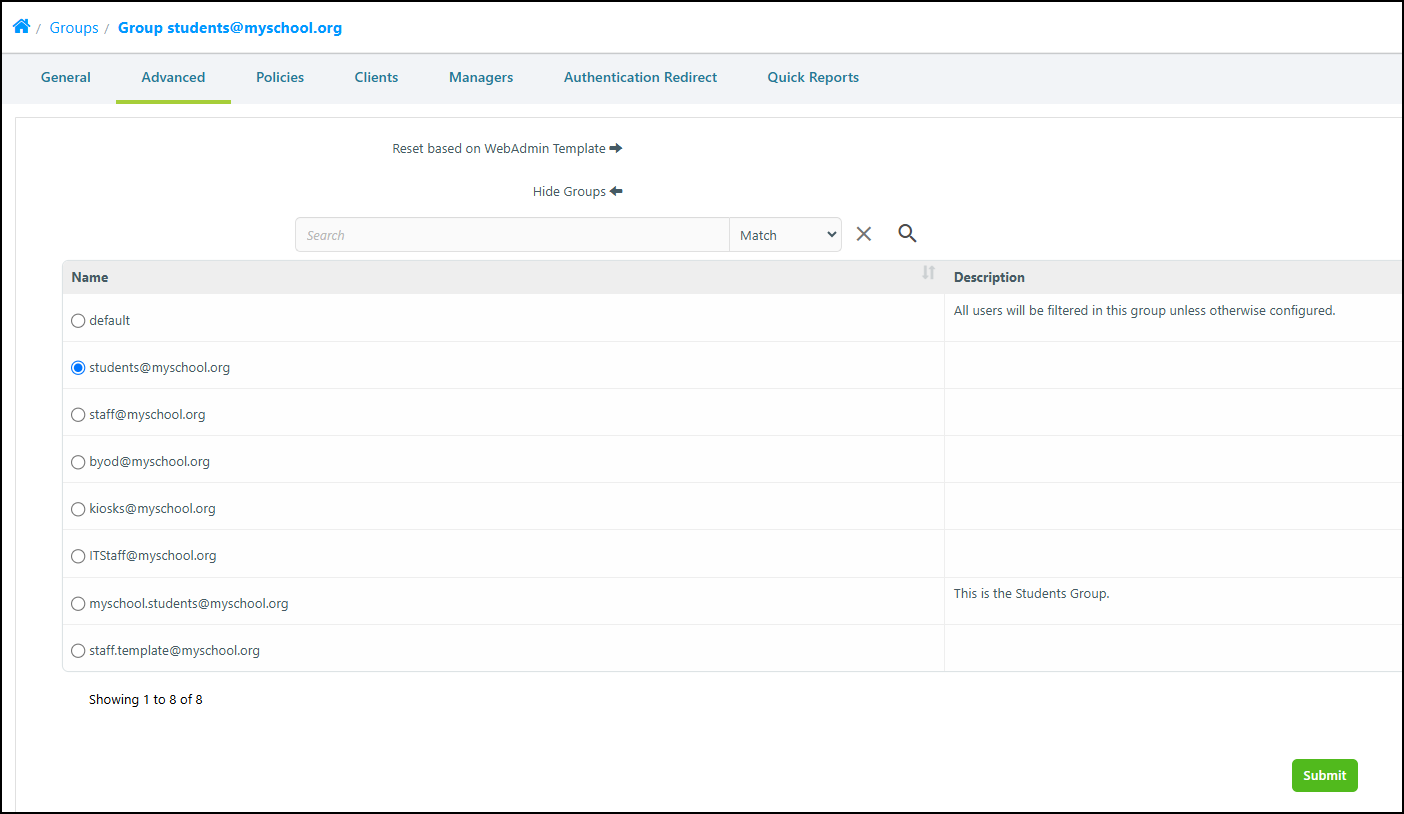
In the Group's 'Advanced' tab, select the Copy Settings from Group button. Available Groups display.
-
Choose the desired Group and select the Submit button. The Group's settings are copied over.
Additional Information
Please refer to our Group Templates documentation for more information on creating and managing Group Templates.